Test cases: Order with address mapping
A big part of the integration is the correct mapping of the address data from Abacus to Shopware. To test this thoroughly, different processes must be taken into account, and the handling in Abacus must be correct too.
- 1.1 Order as new shopware customer
- 1.2 Order as existing customer with an address change
- 1.3 Order as existing customer with same billing and shipping address
- 1.4 Order as existing customer with a different billing and shipping address
- 1.5 Order as existing customer with different contact persons
- 1.6 Order as existing customer with different addresses and different contact
- 1.7 Order as existing customer with different addresses and types (private/business))
The following test cases are described from a user view in Shoppware, in all cases you can also first create the shopper in Abacus and then do the test case.
See here how
1.1 Order as new shopware customer
In Shopware:
- Create a new customer account on the storefront
- Log in to the newly created customer account
- Place a new order
In Abacus:
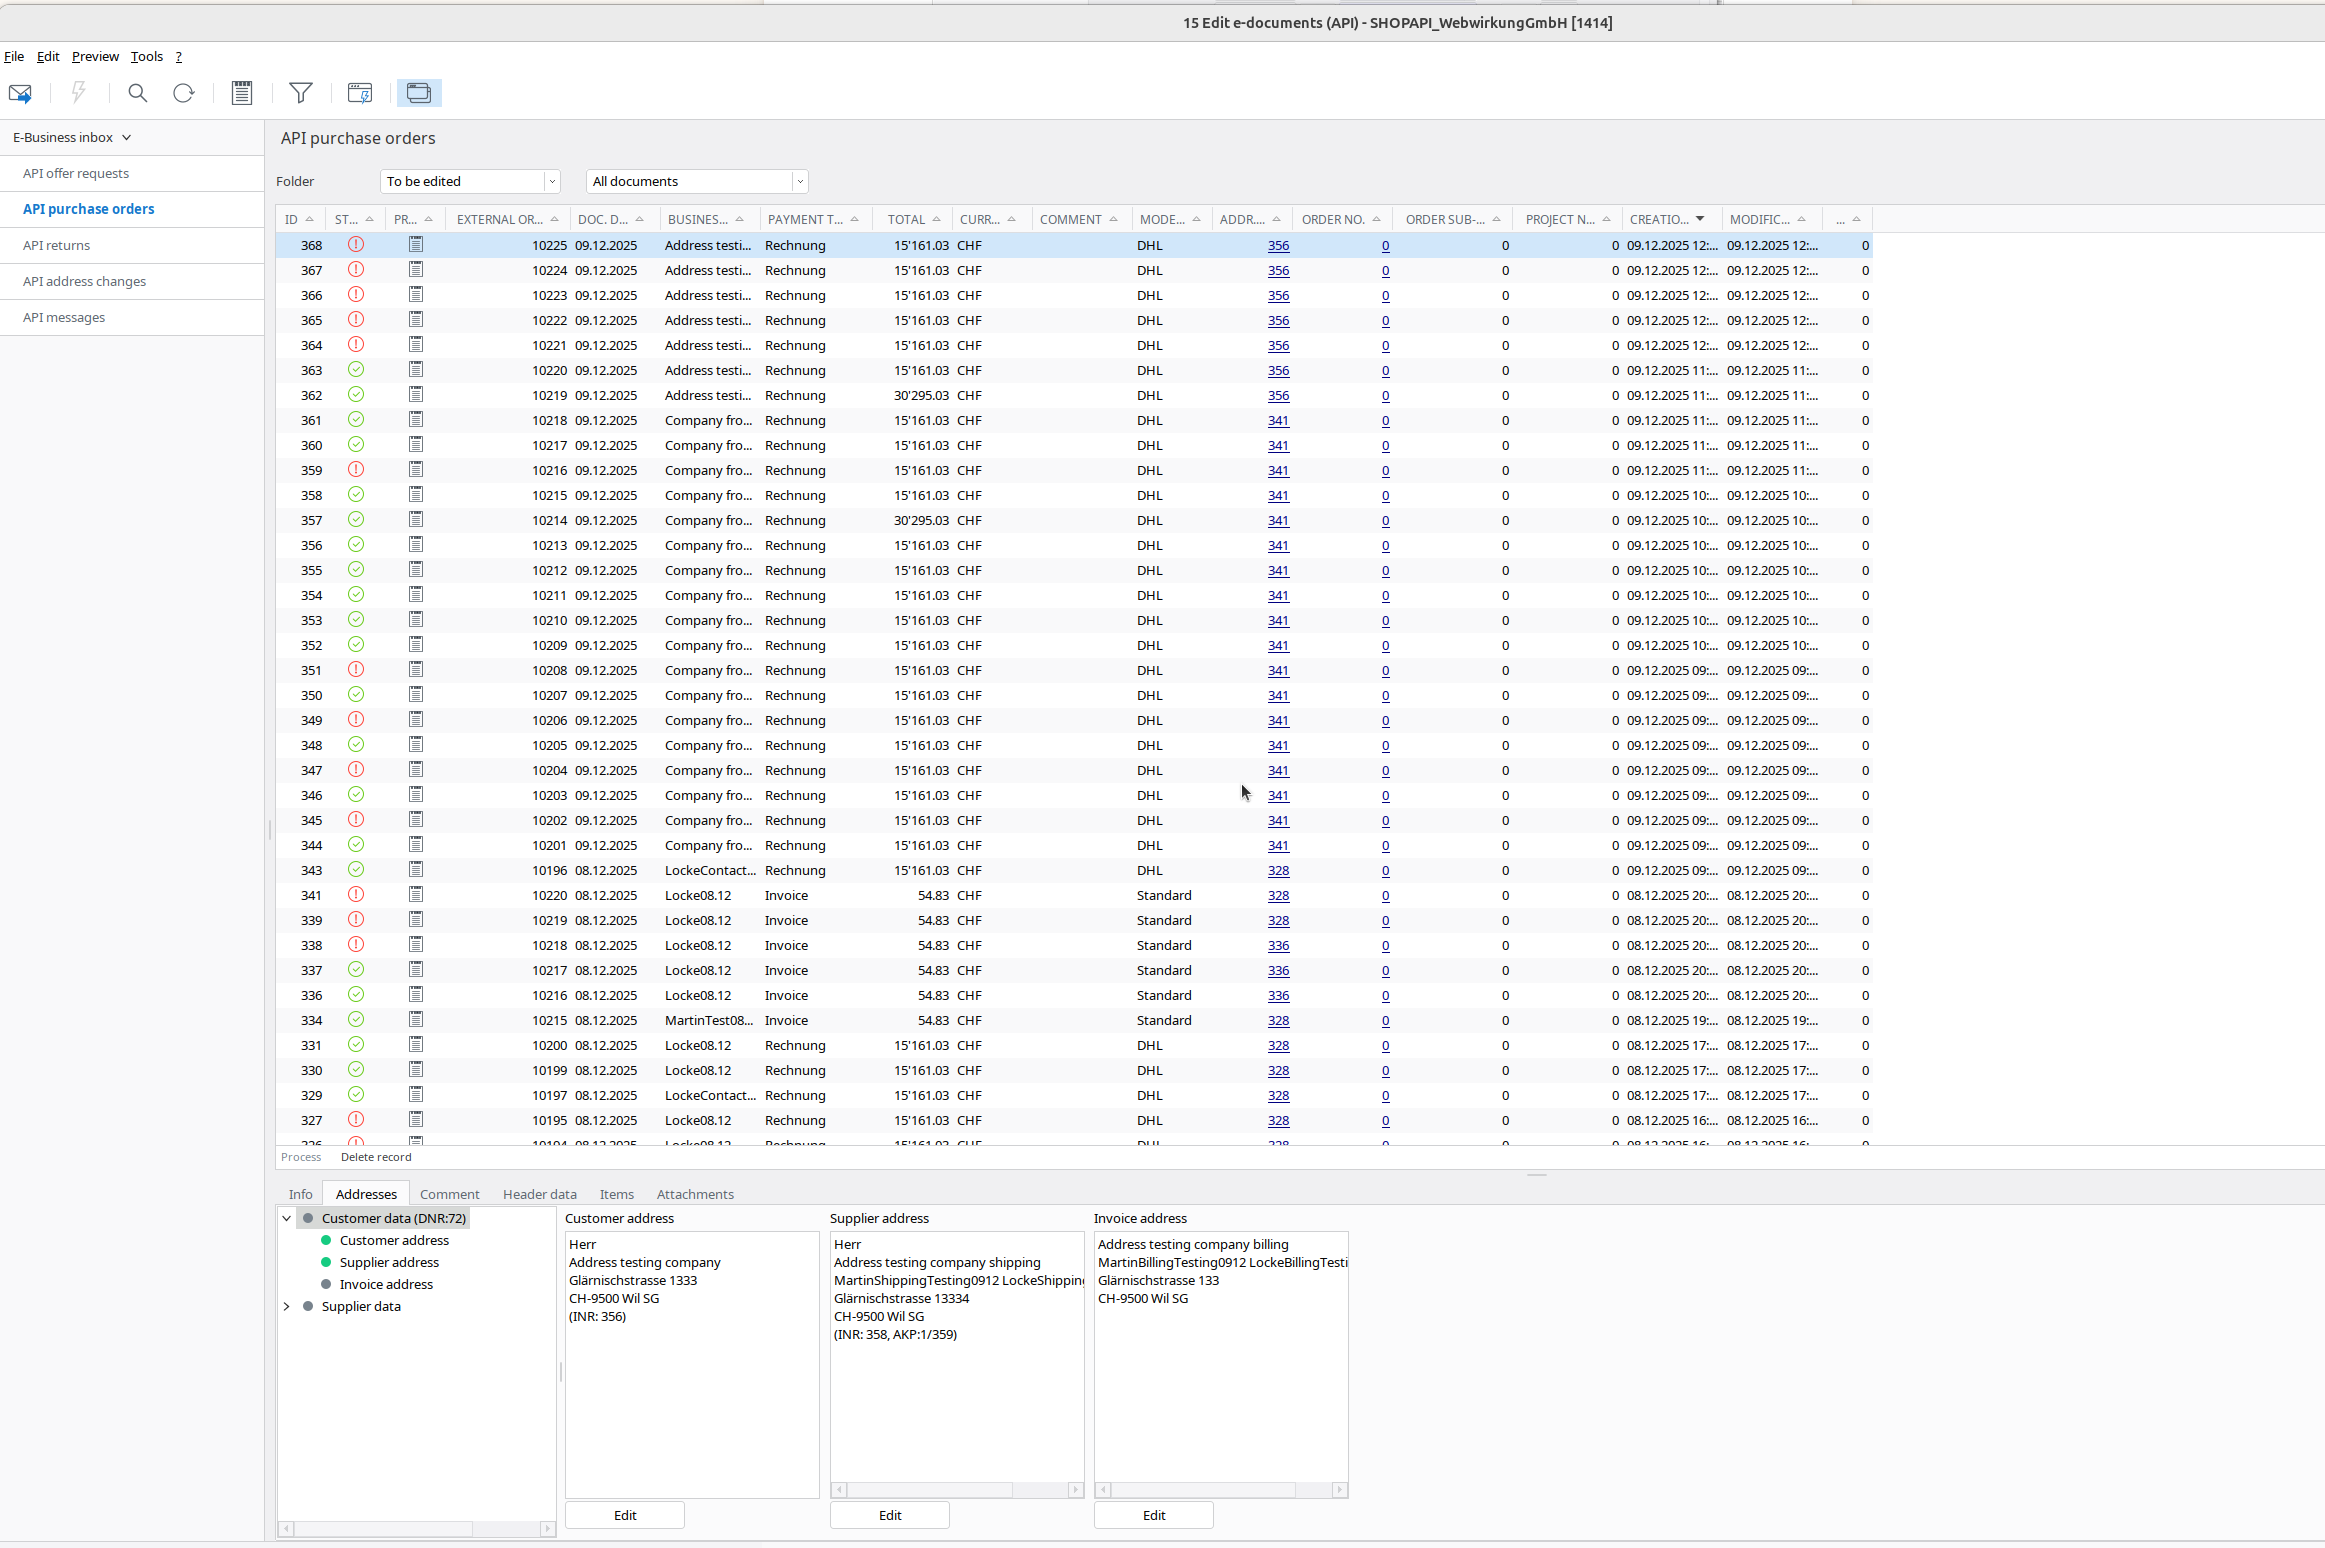
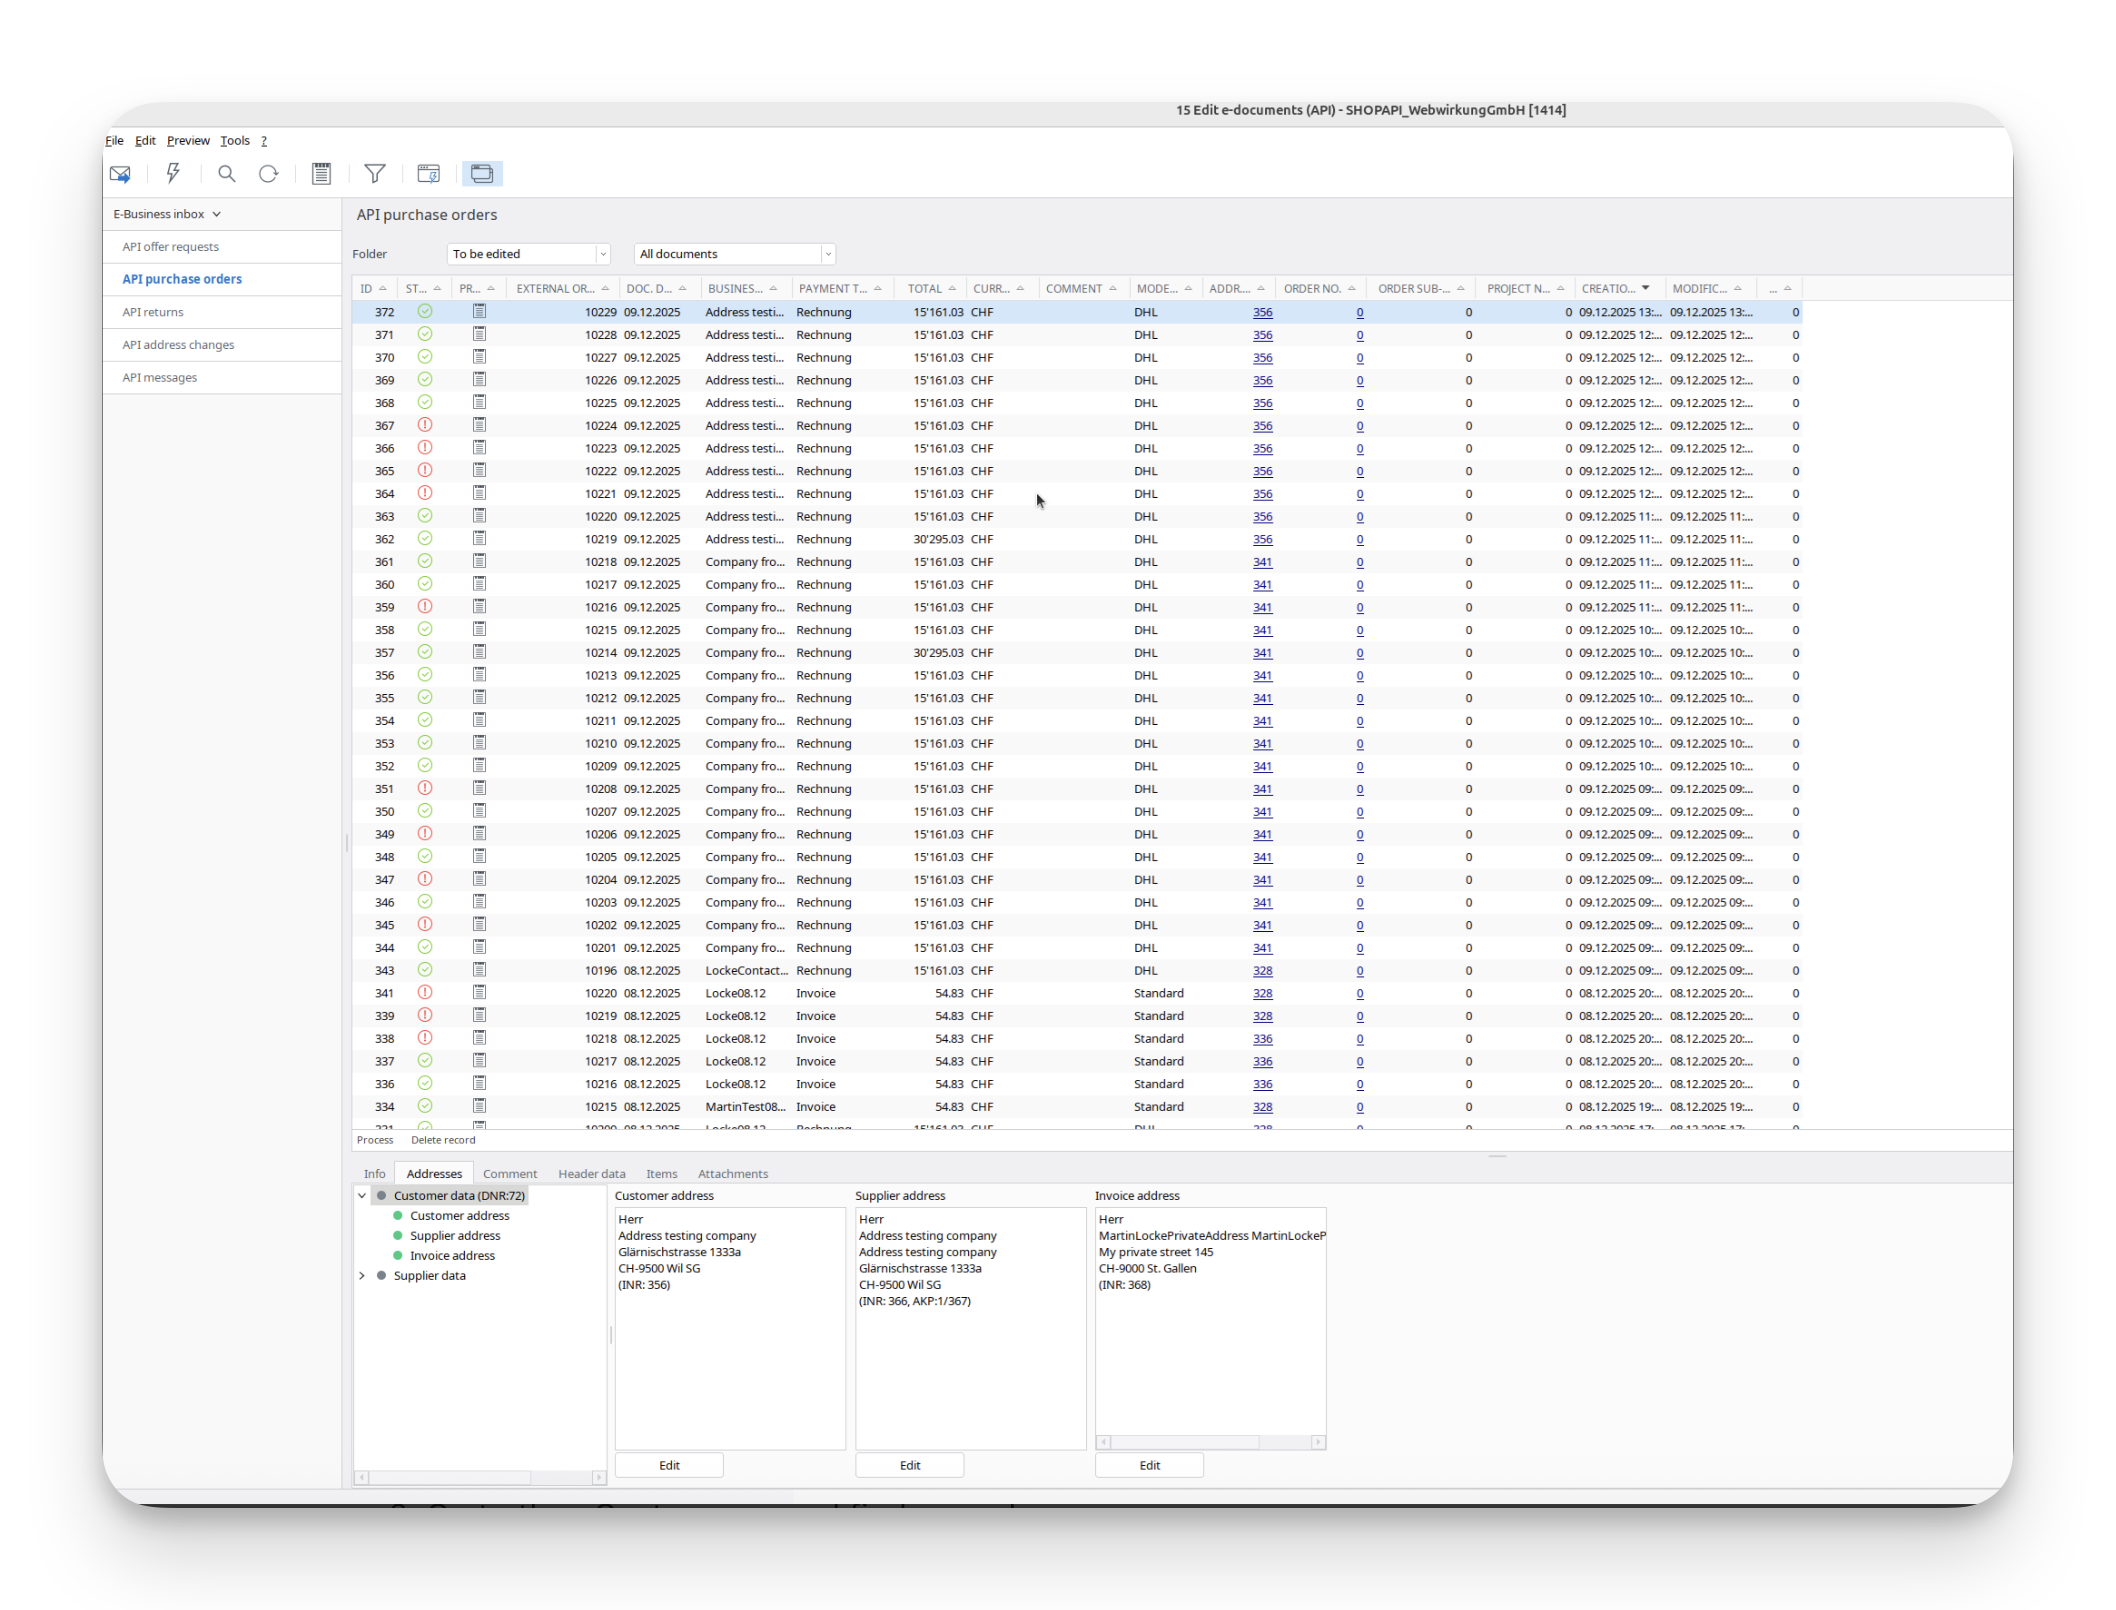
- Go back to Abacus -> E-business -> Edit e-documents(API)(J15)
- Find your order
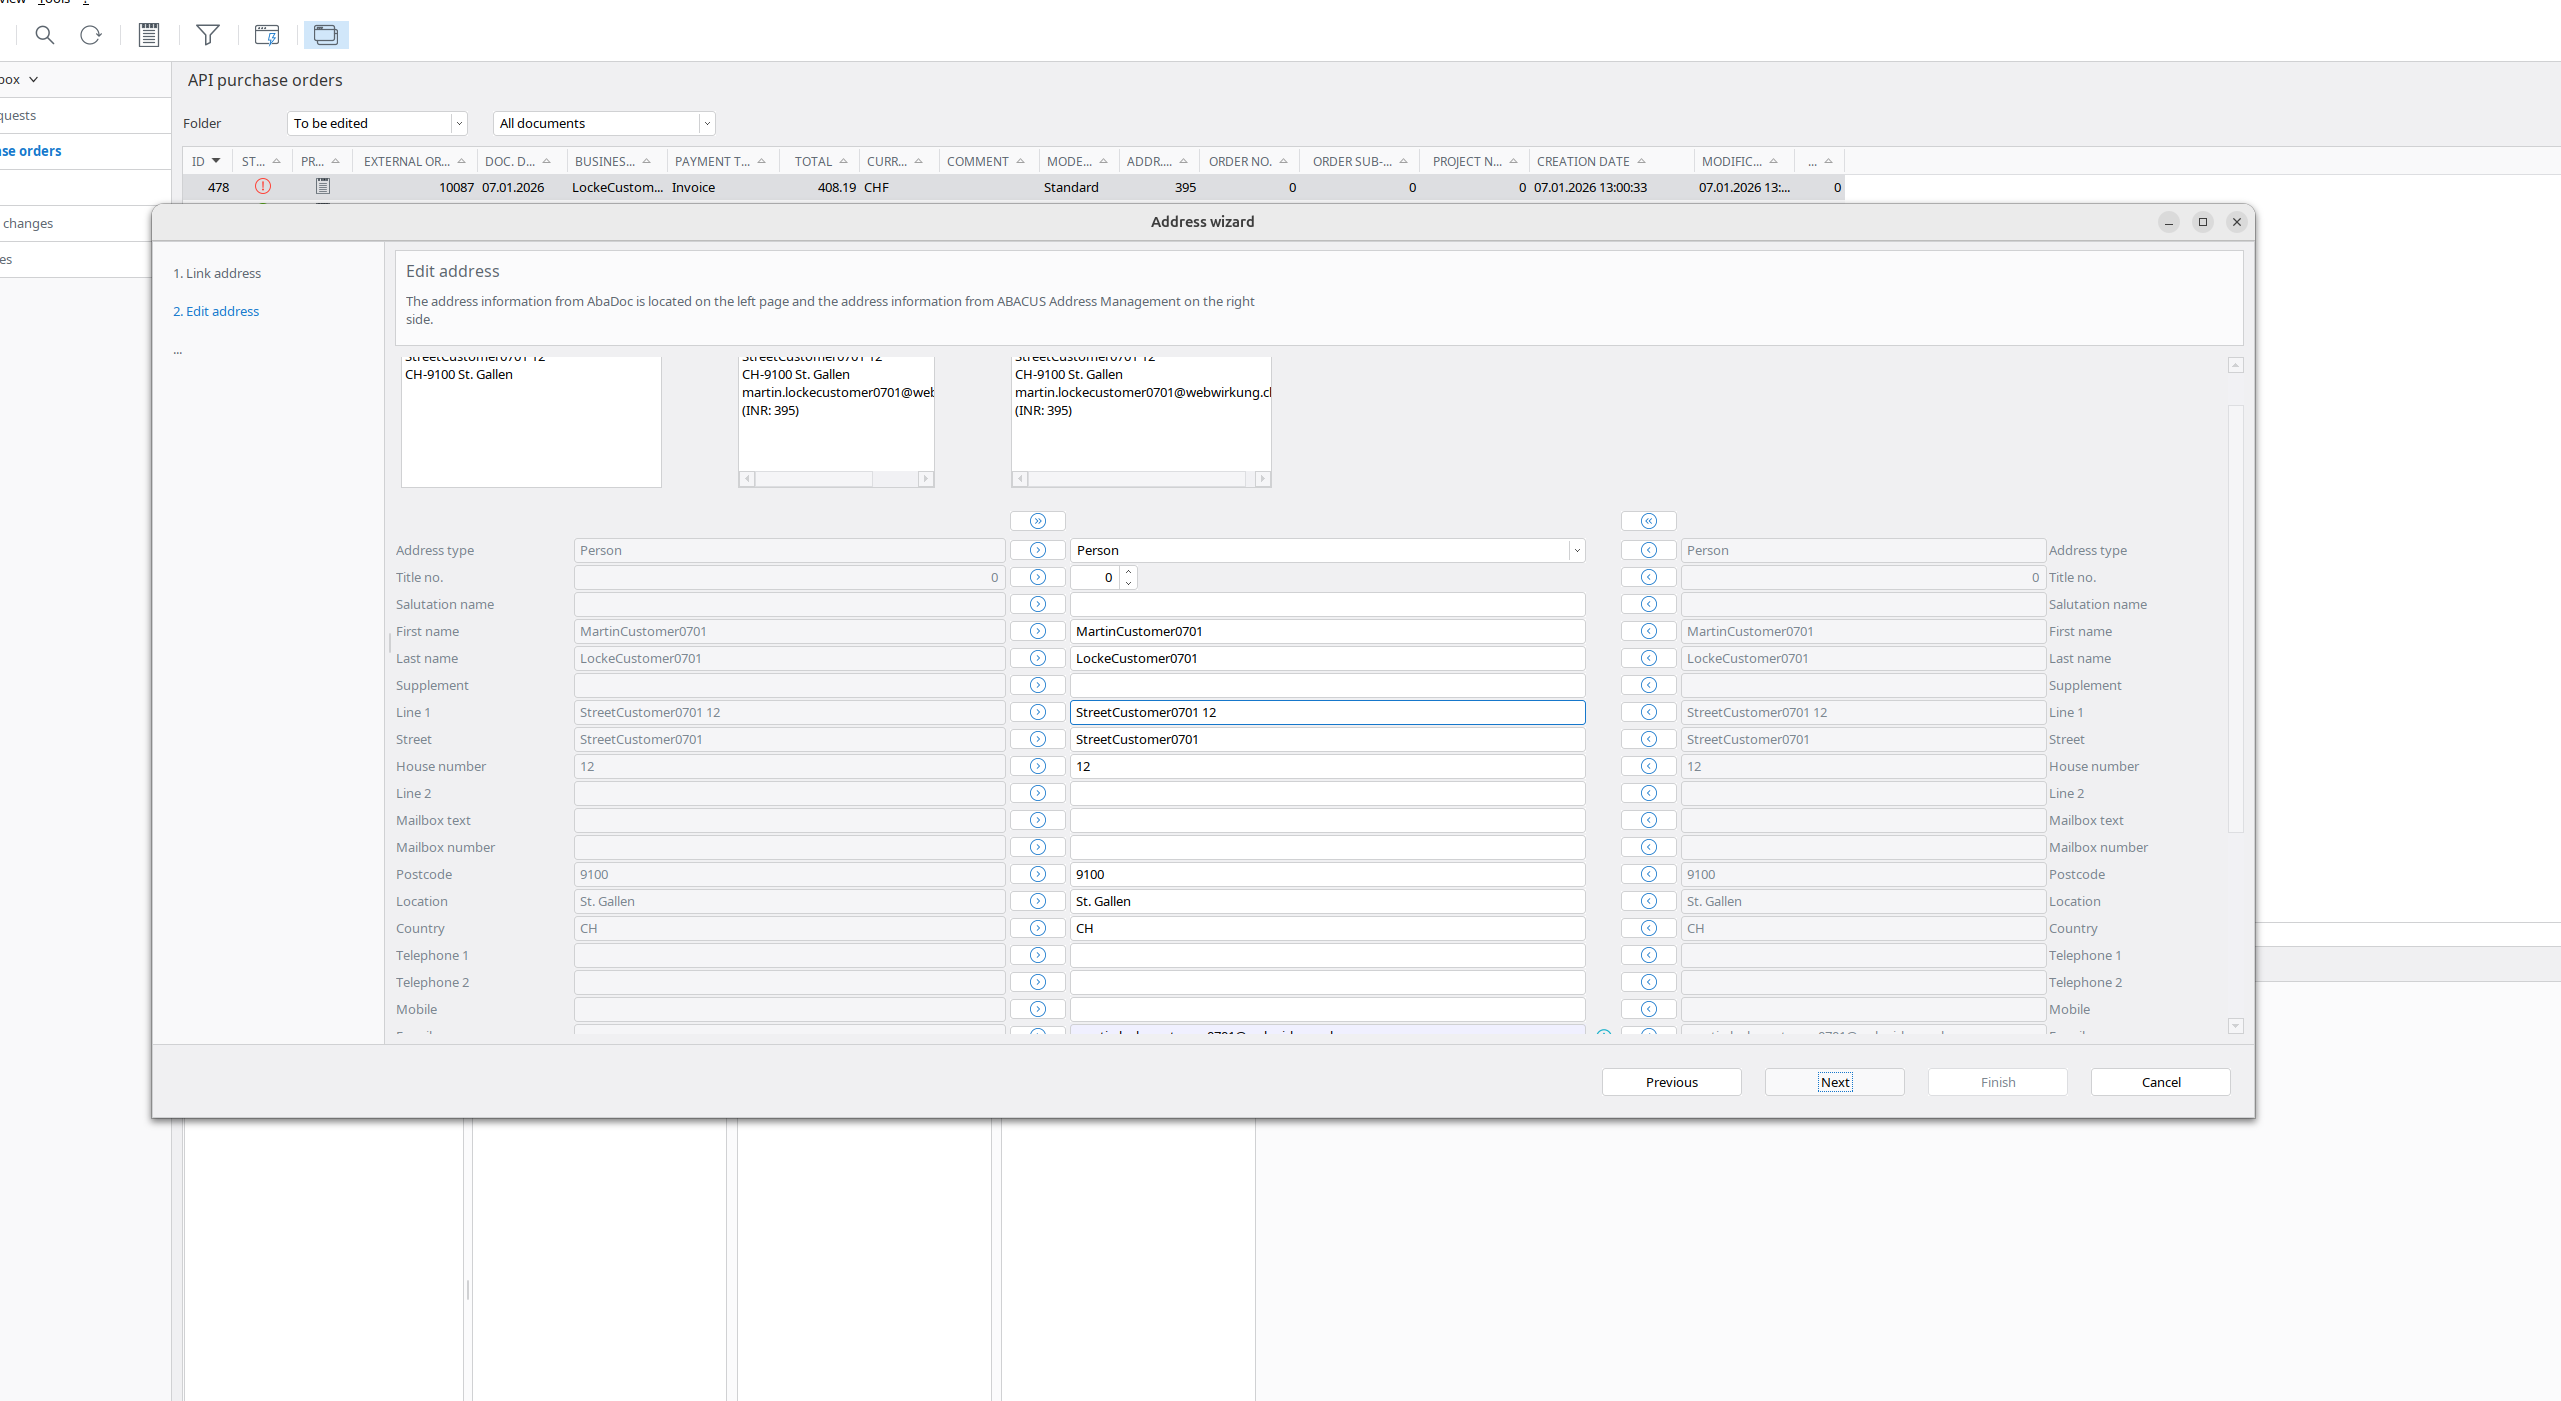
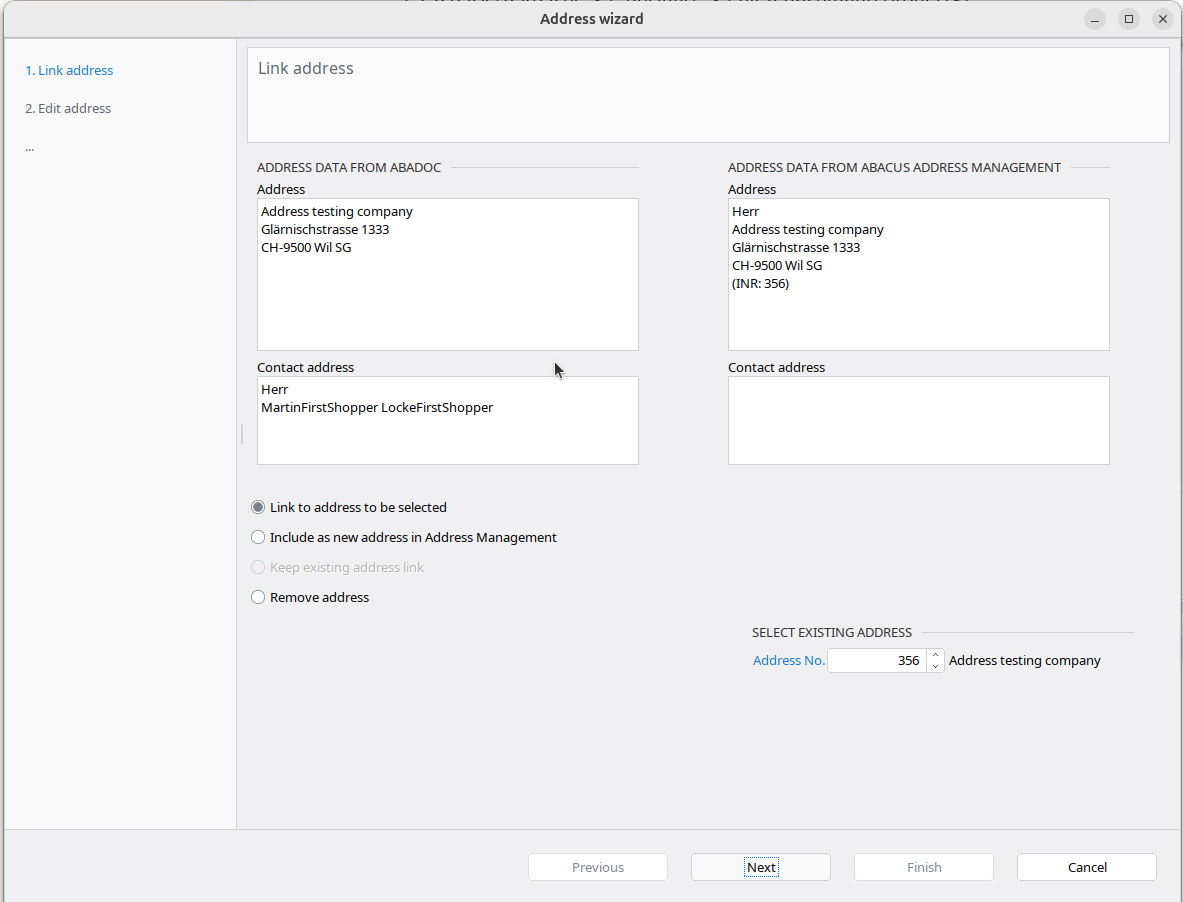
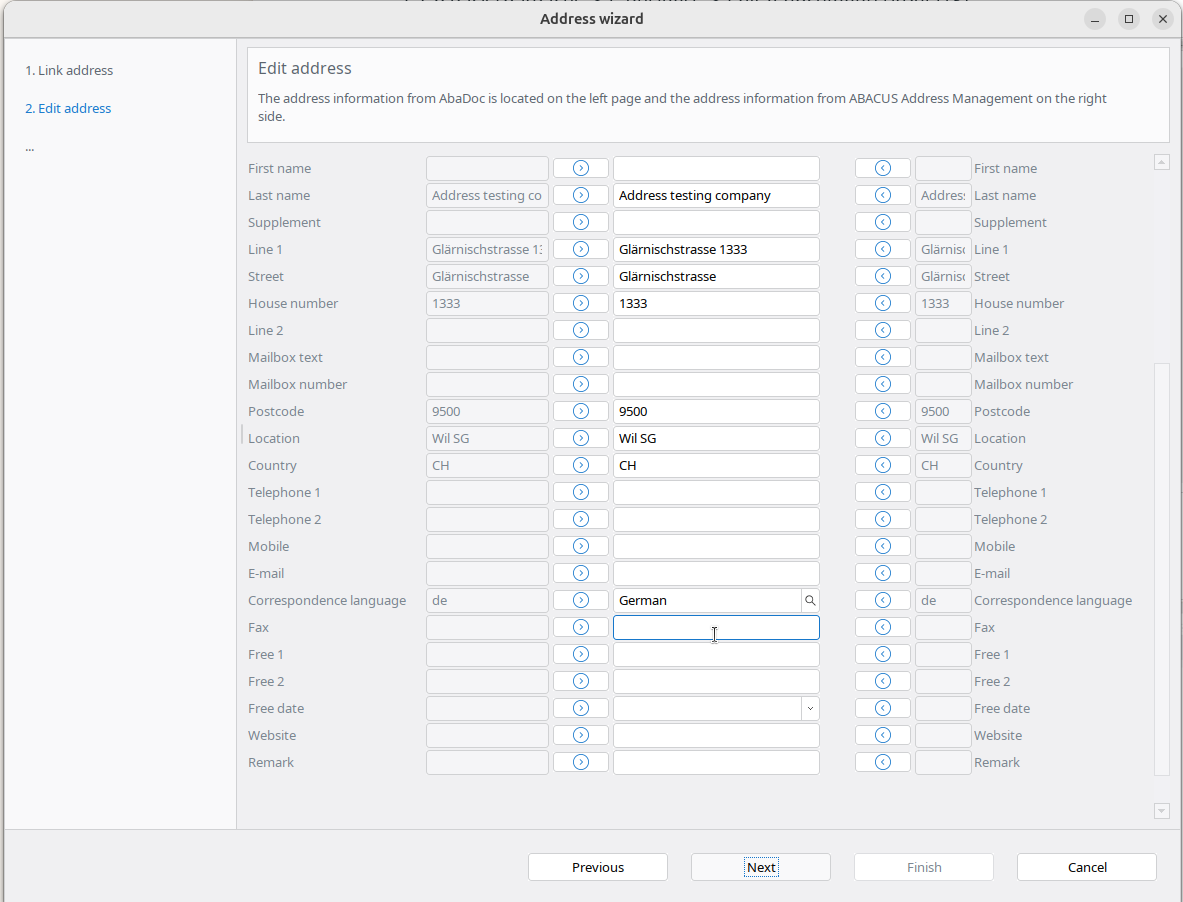
- Map all addresses(Customer address, Supplier address, Invoice address)
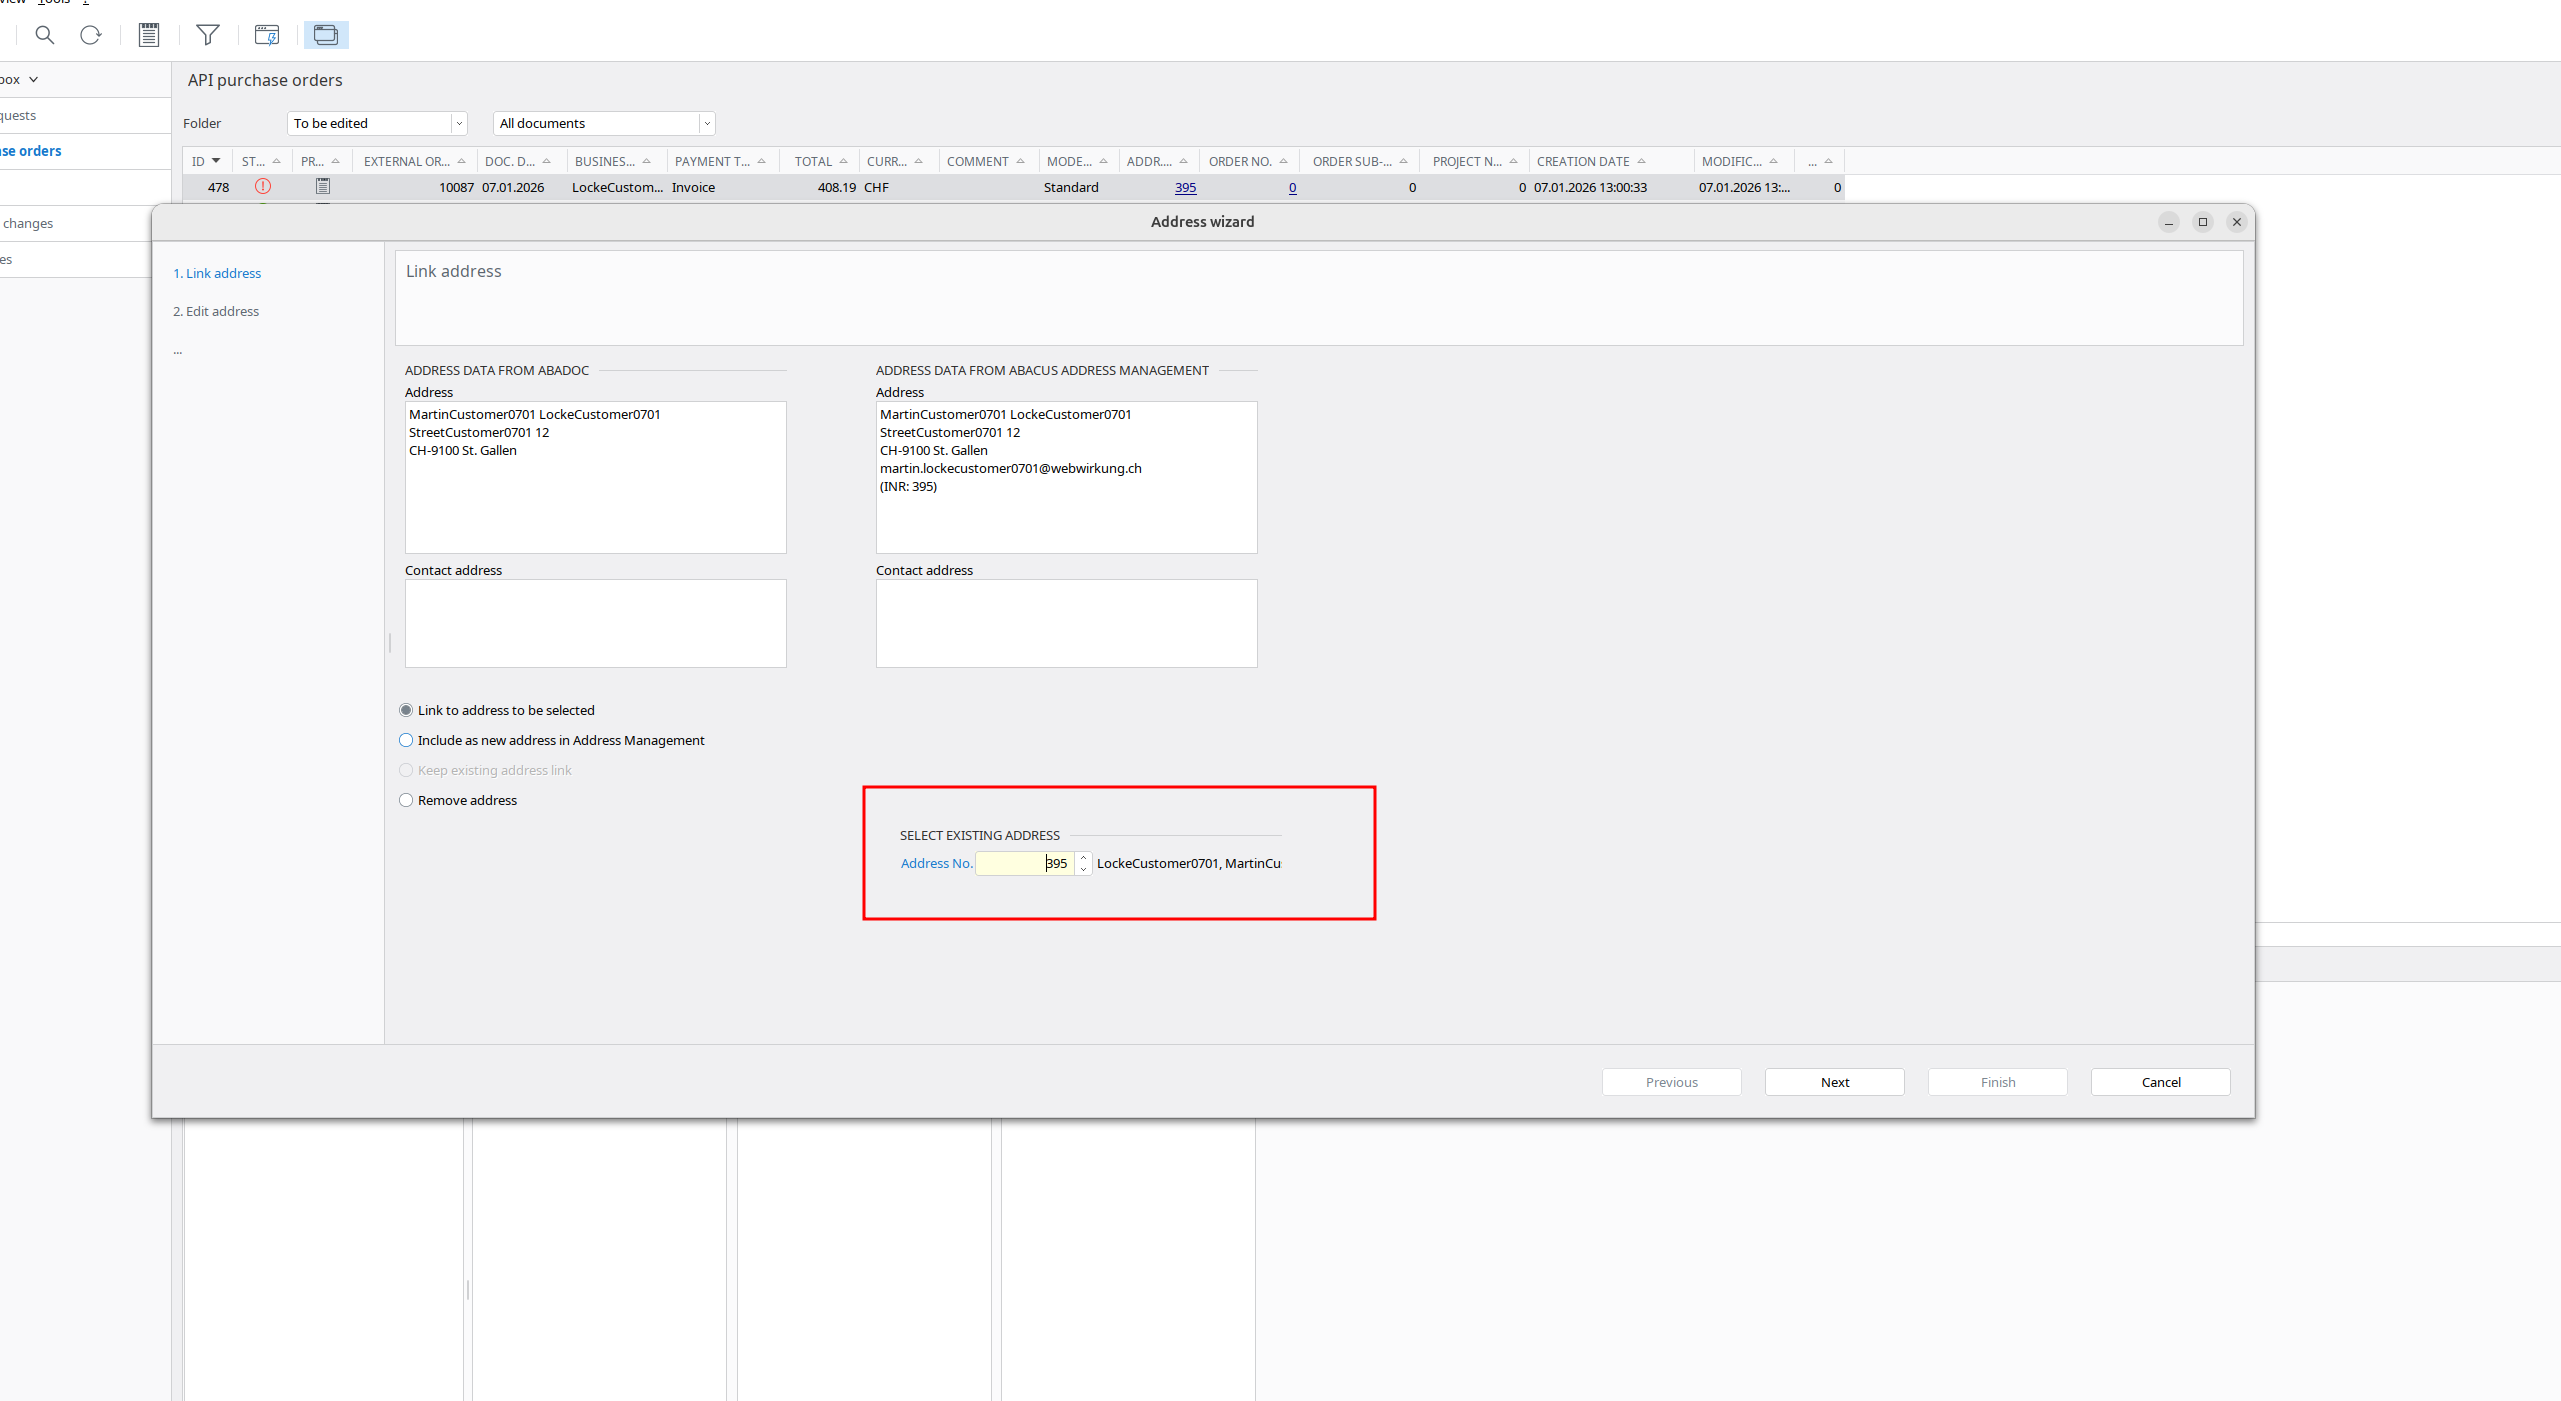
| Link customer address | Edit customer address |
|---|---|
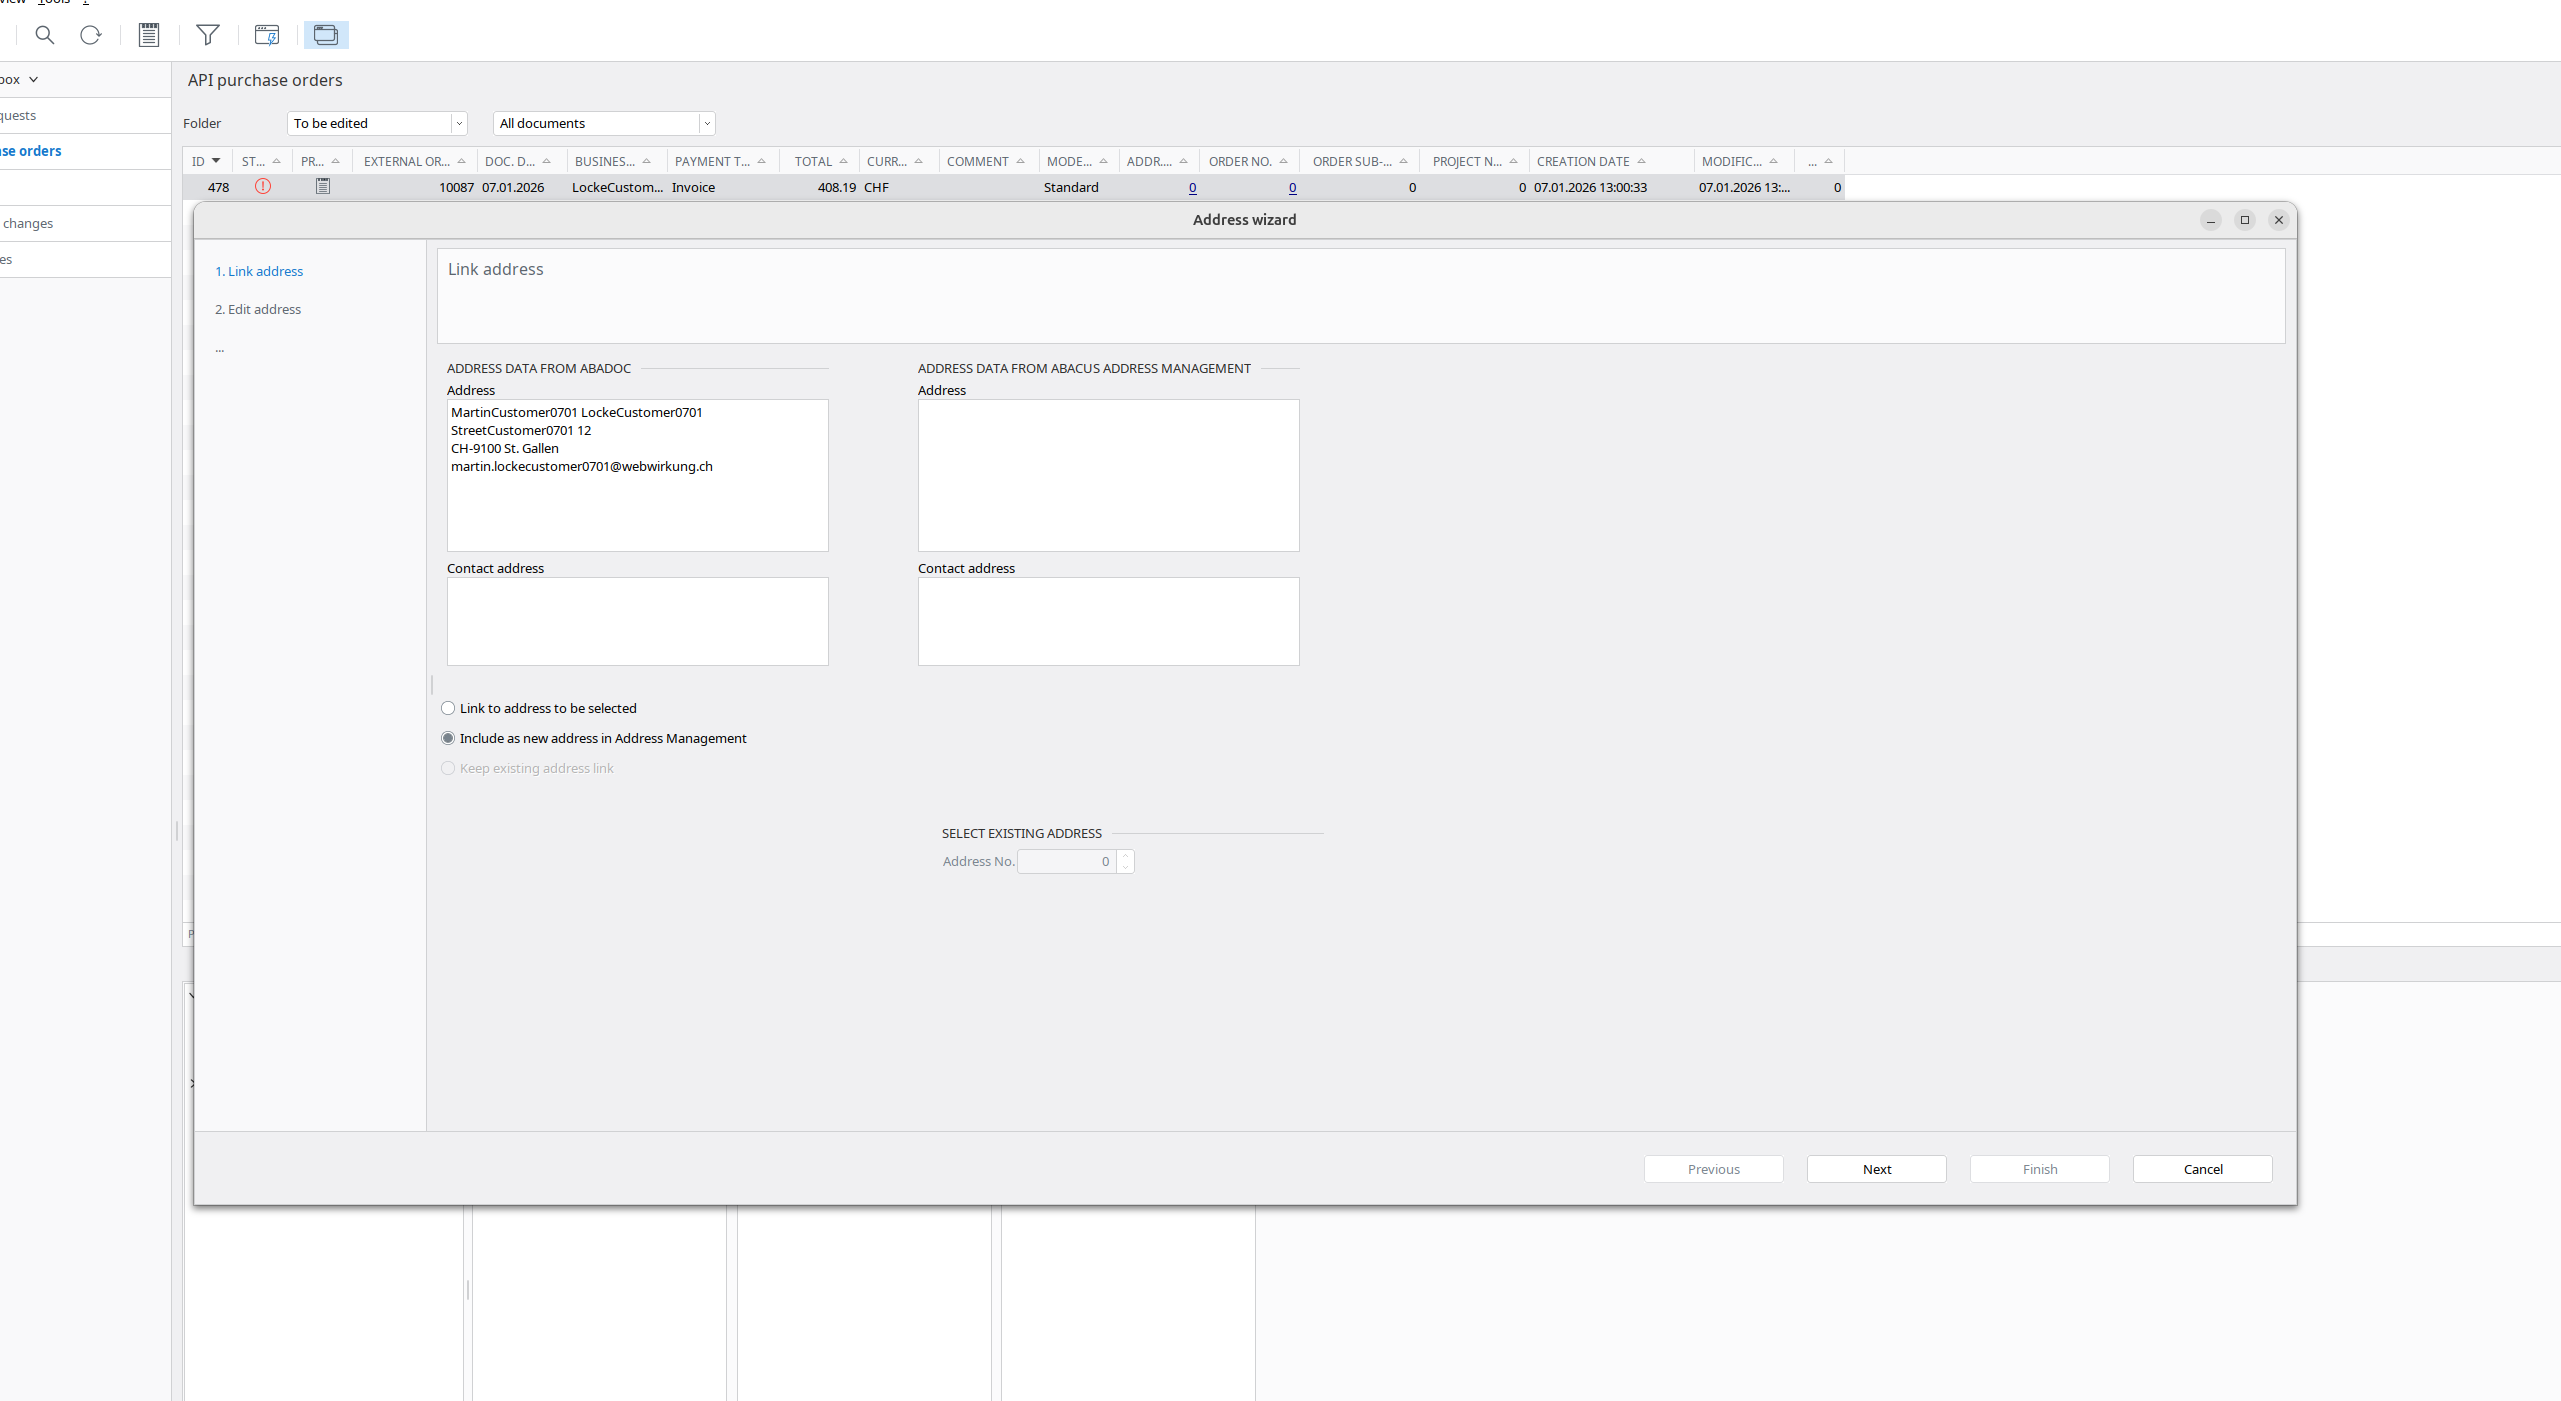 | 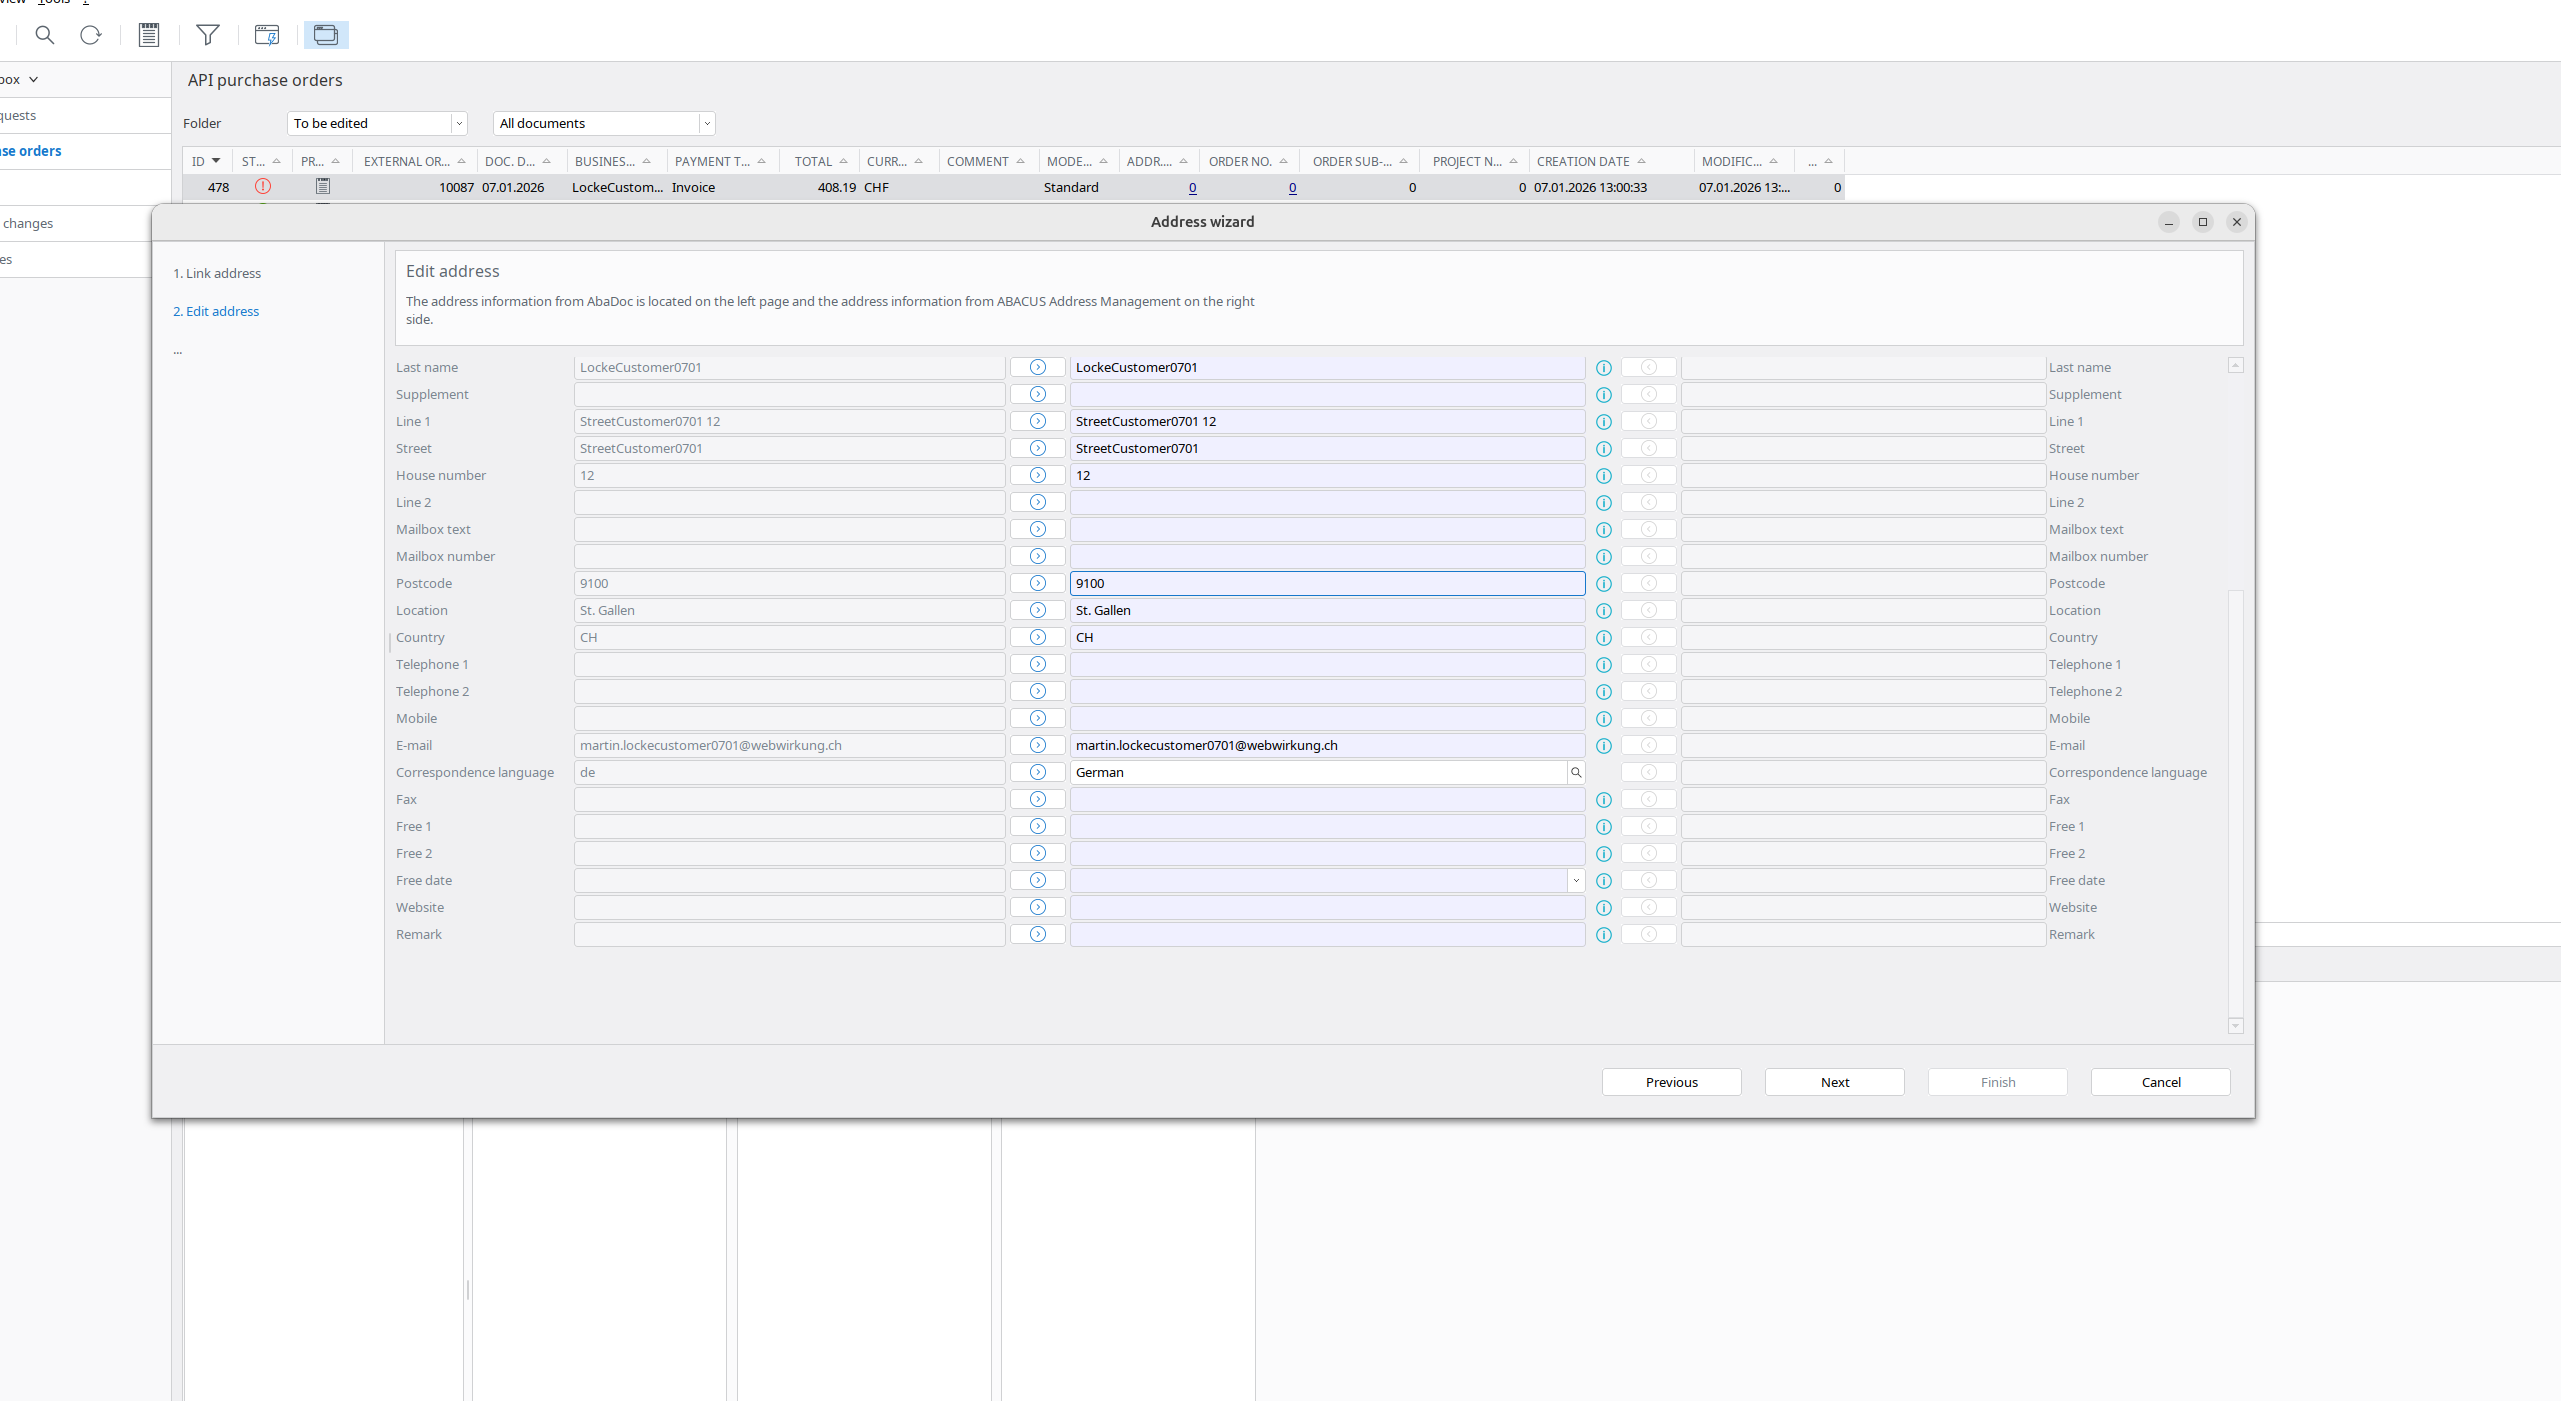 |
| Link supplier address | Edit supplier address |
|---|---|
 |  |
| Link invoice address | Edit invoice address |
|---|---|
| Same like in supplier address | Same like in supplier address |
In Shopware:
- Go to your Shopware and run the webwirkung.abacus.subscription.shopper task (manual sync) (See here how)
- Go to «Customers» and find your shopper
- Check if custom fields are filled with abacus data(in account and address)
| Account | Address |
|---|---|
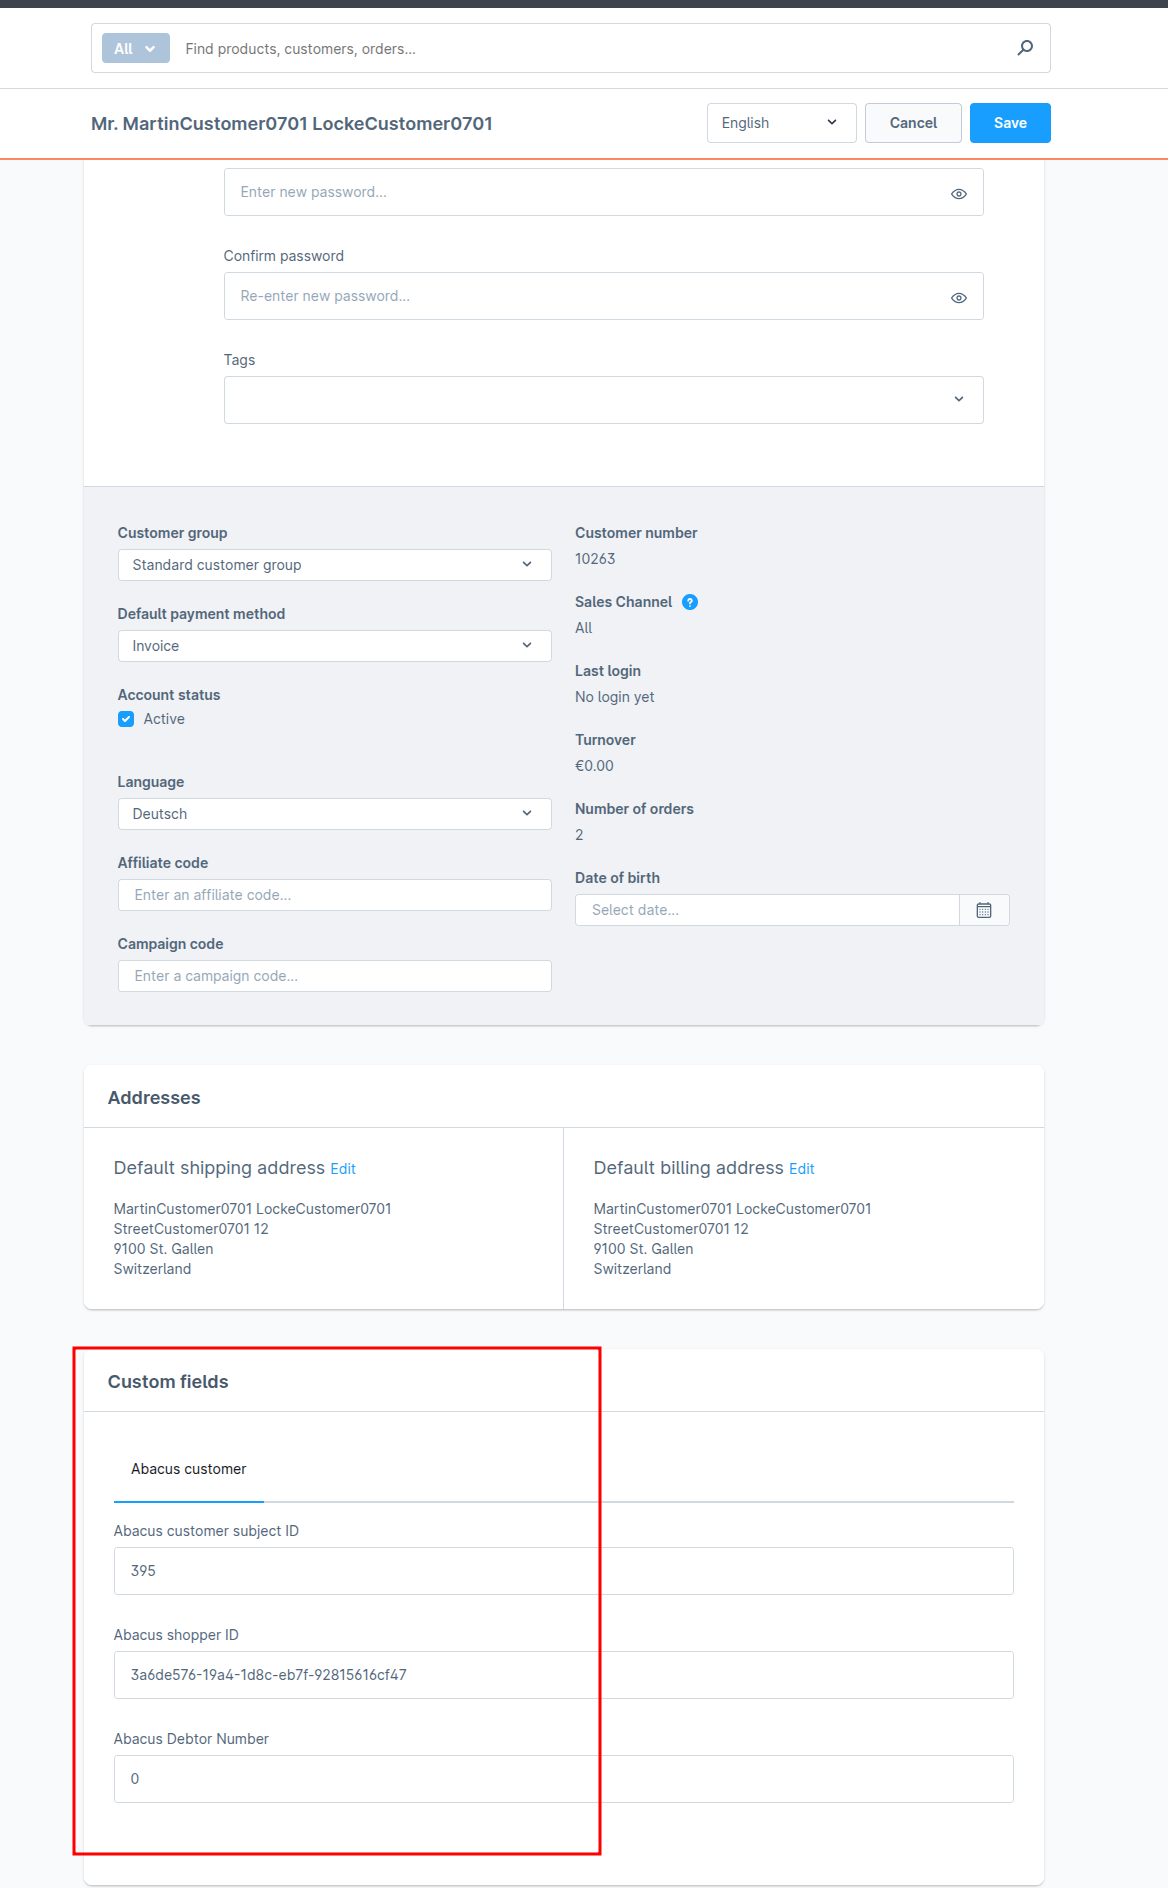 | 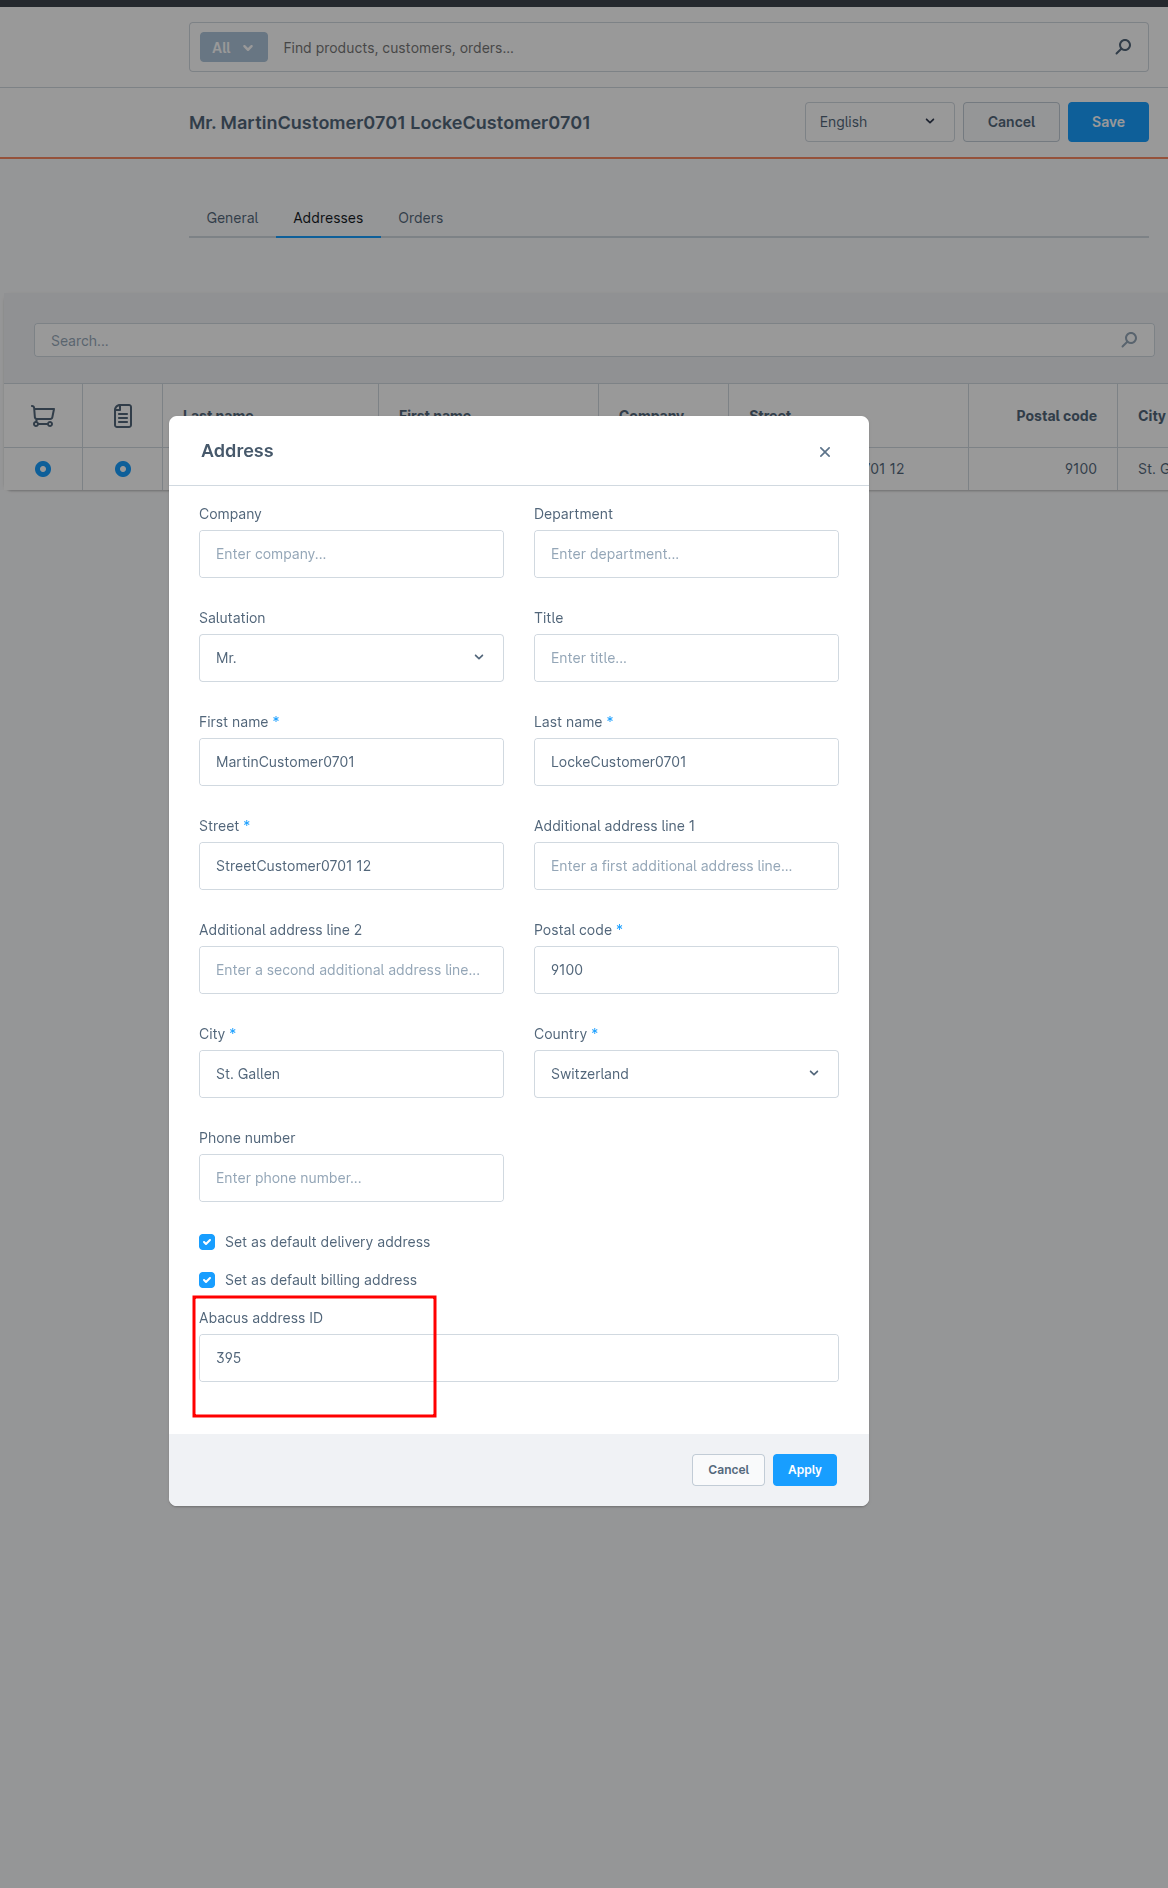 |
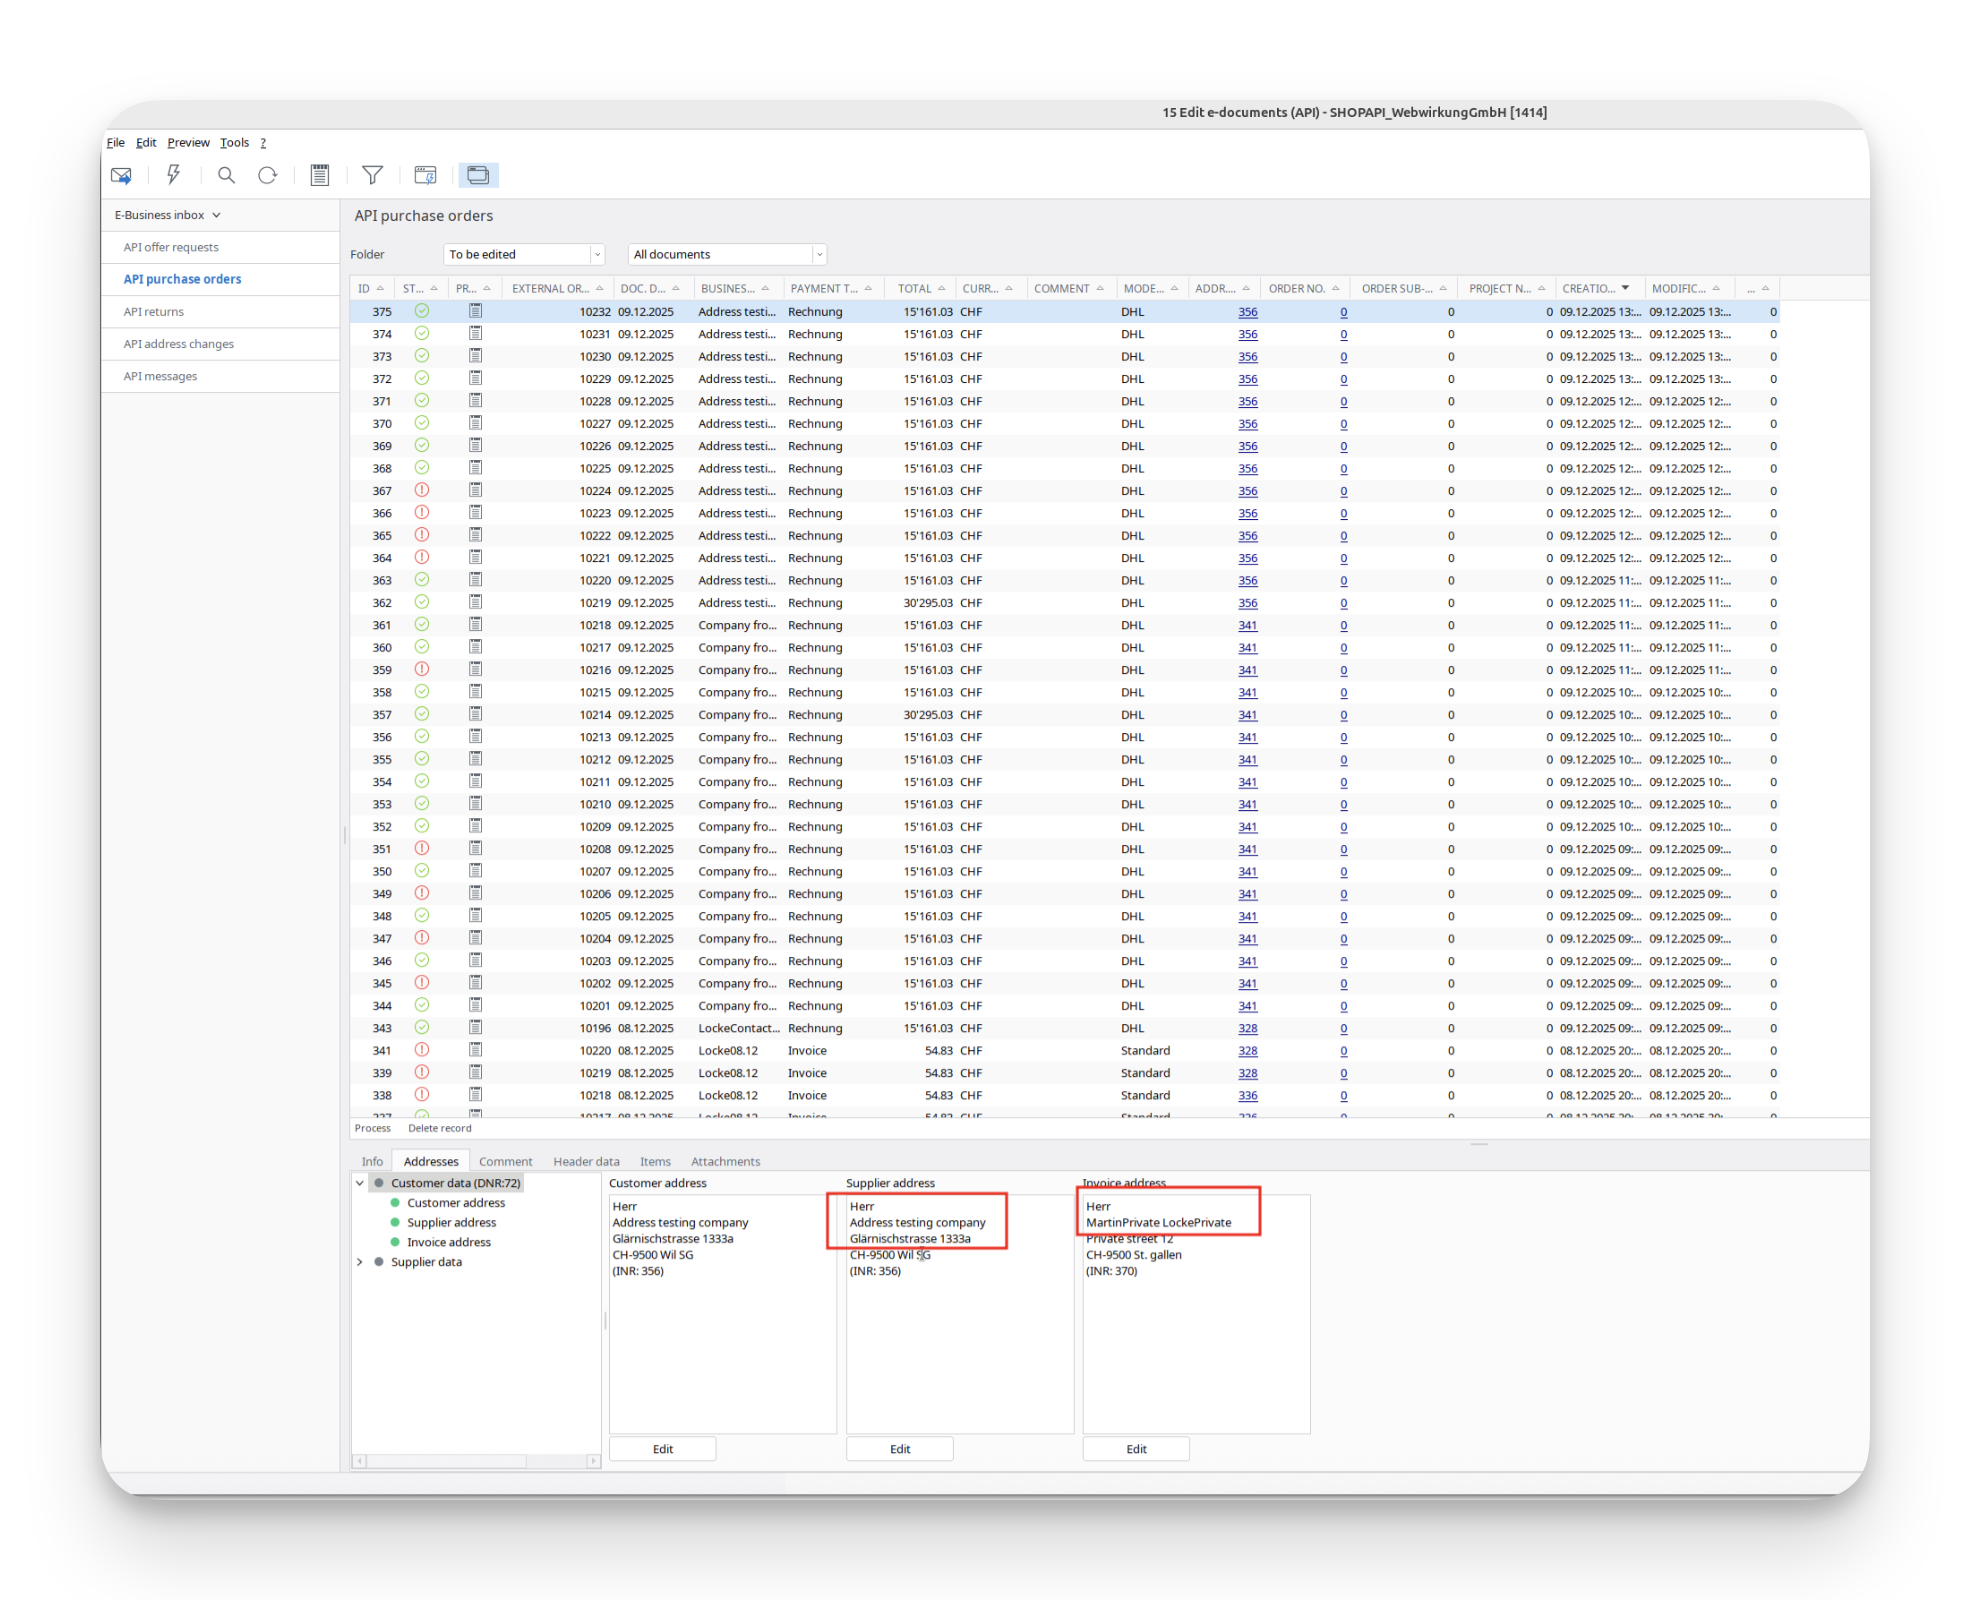
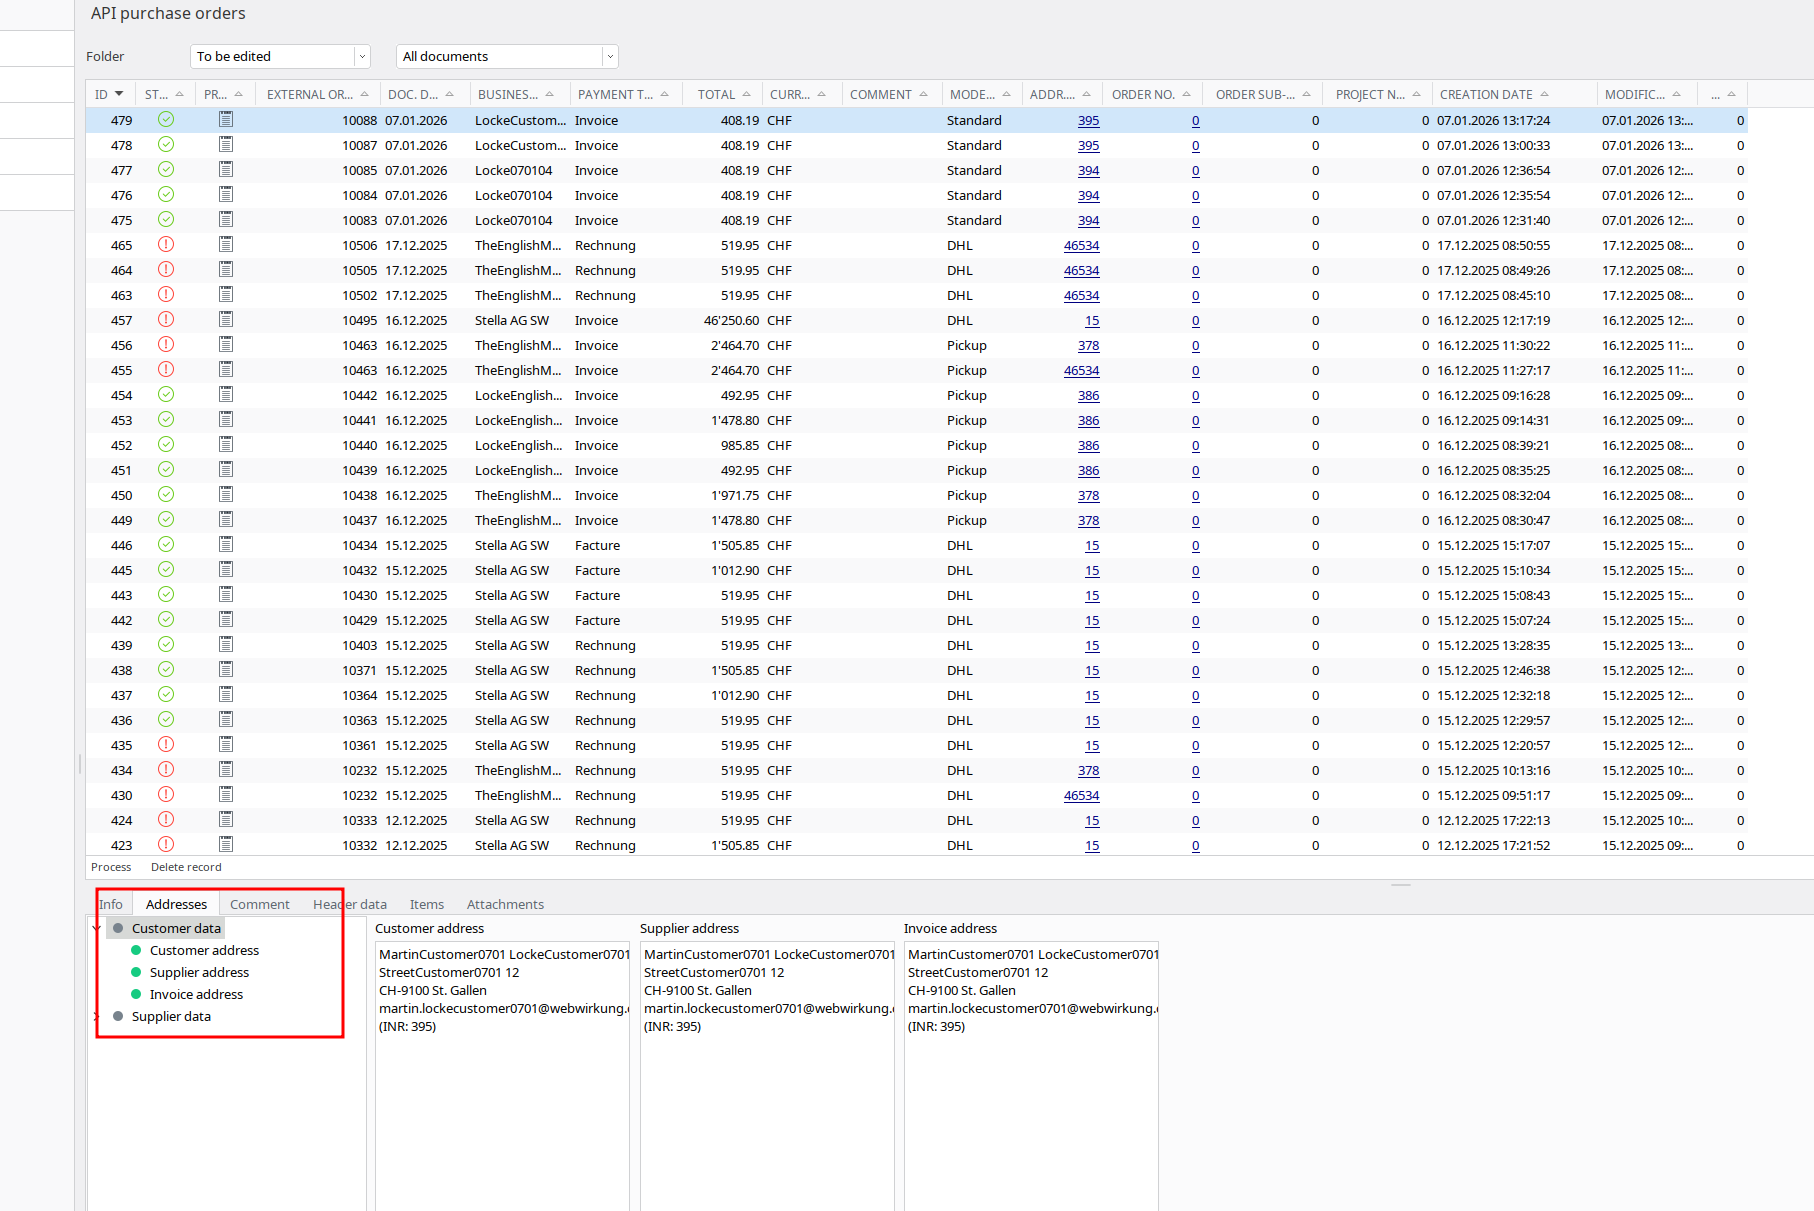
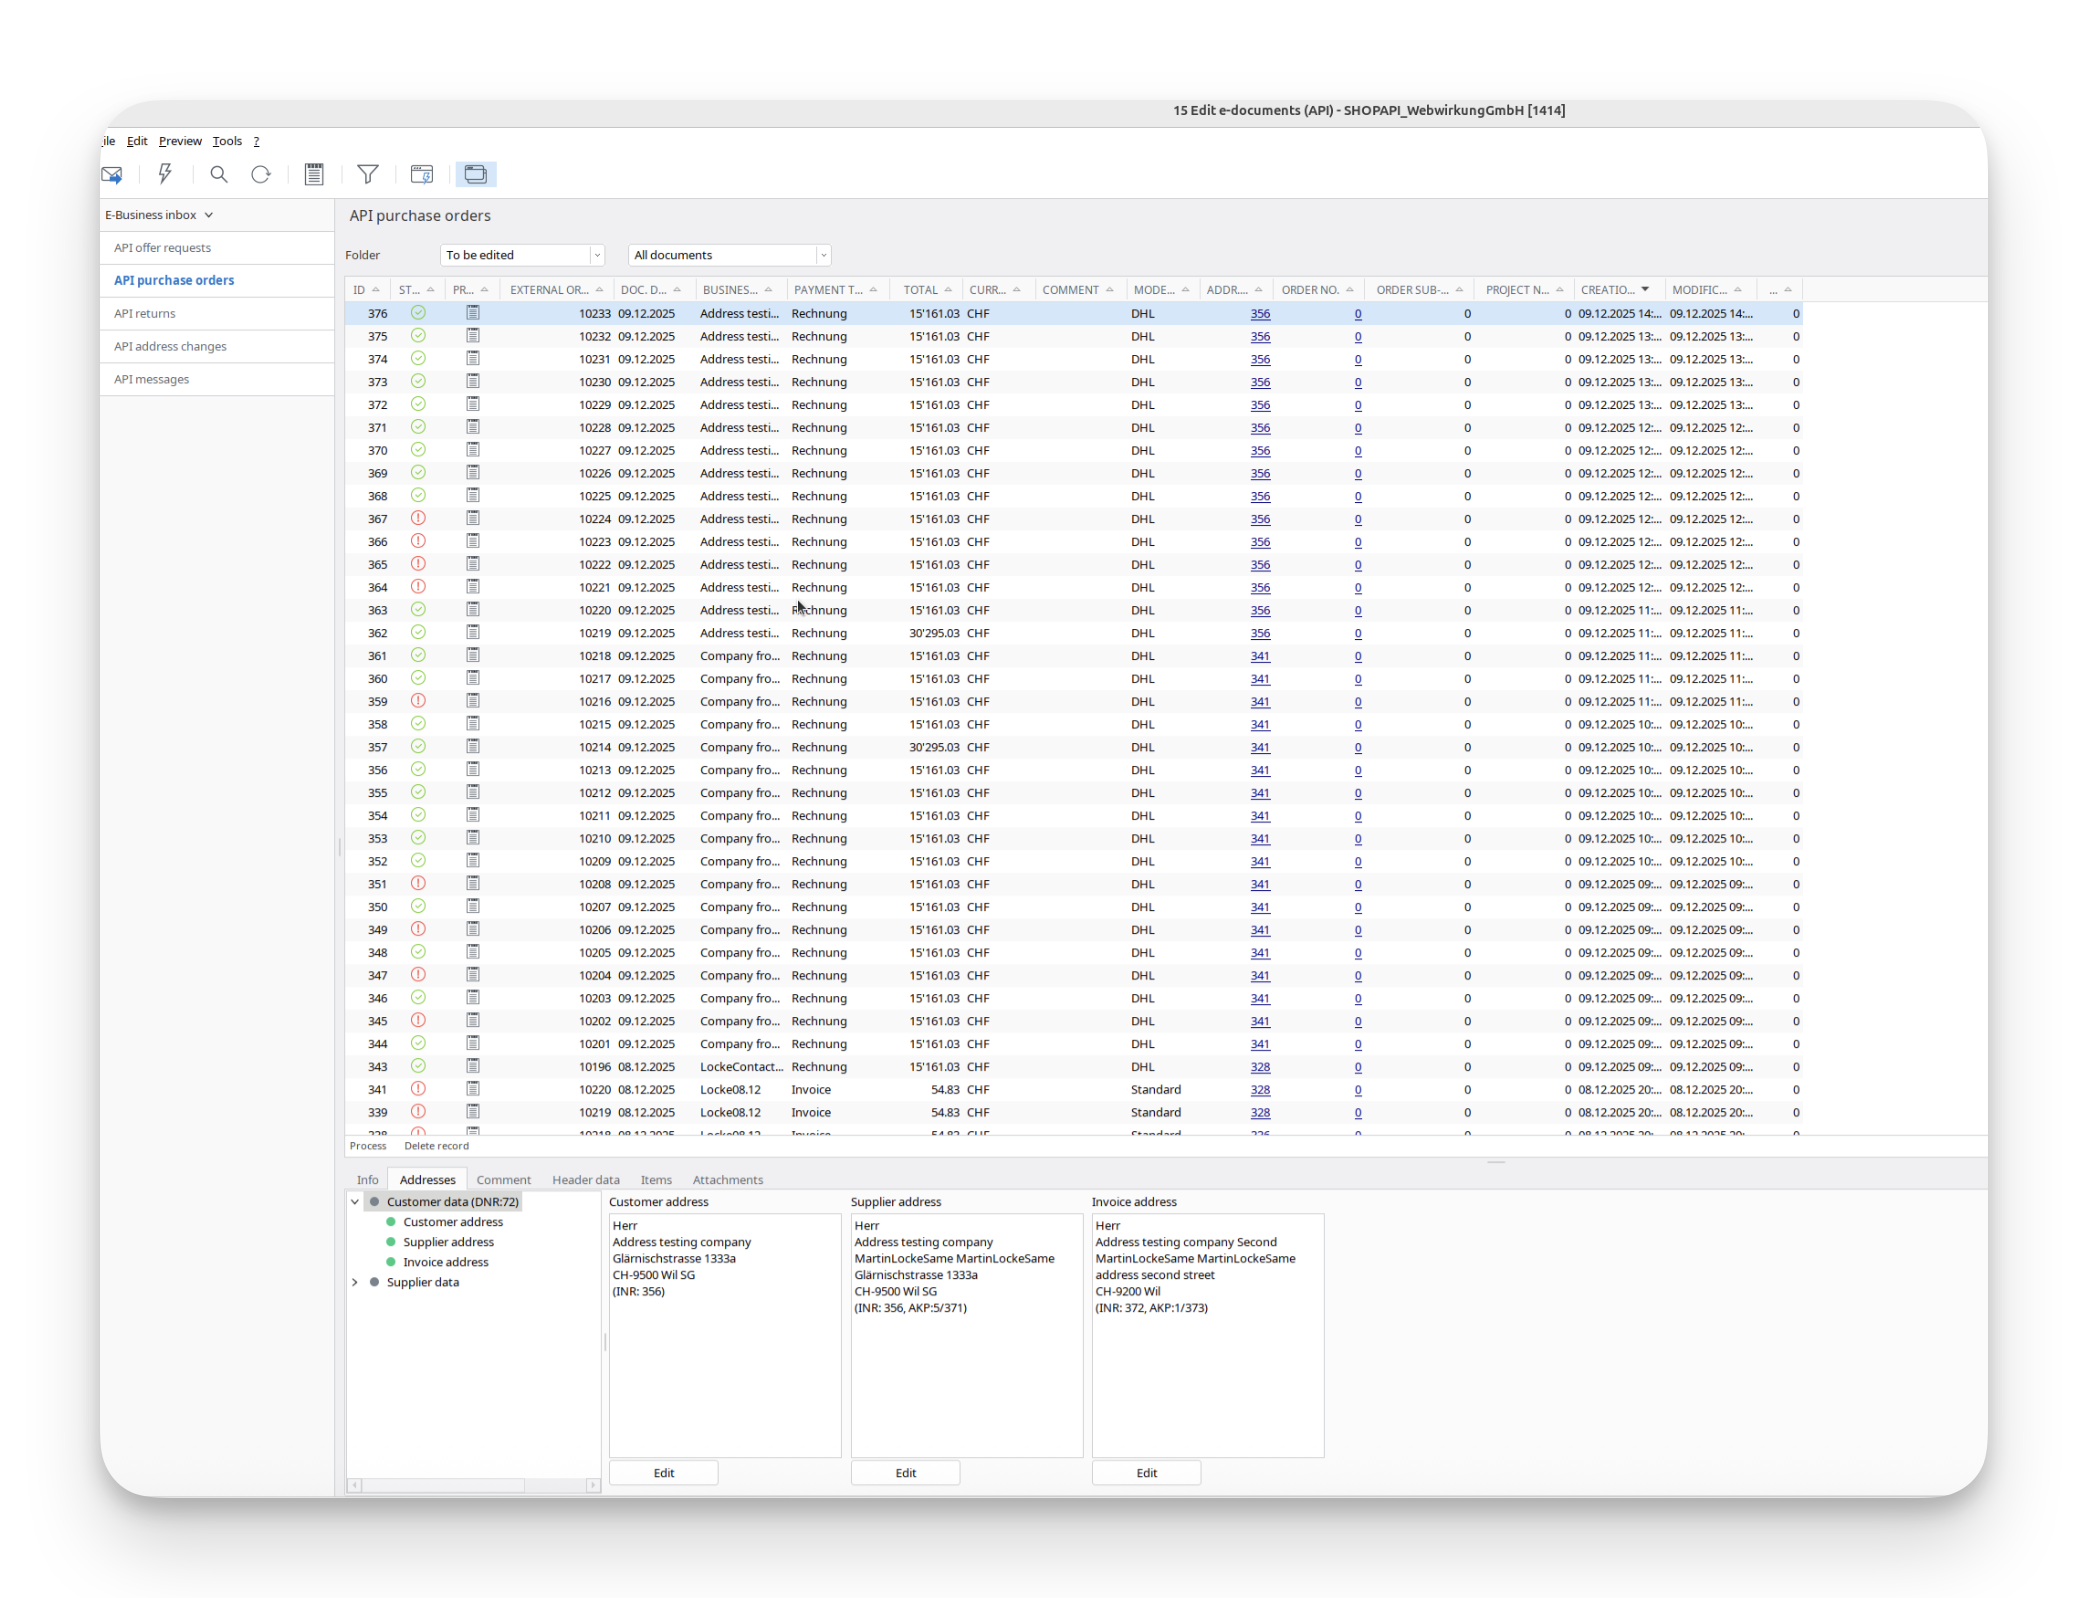
Result
The result should look like:
In Shopware:
- Log in to the account in the storefront and place a new order
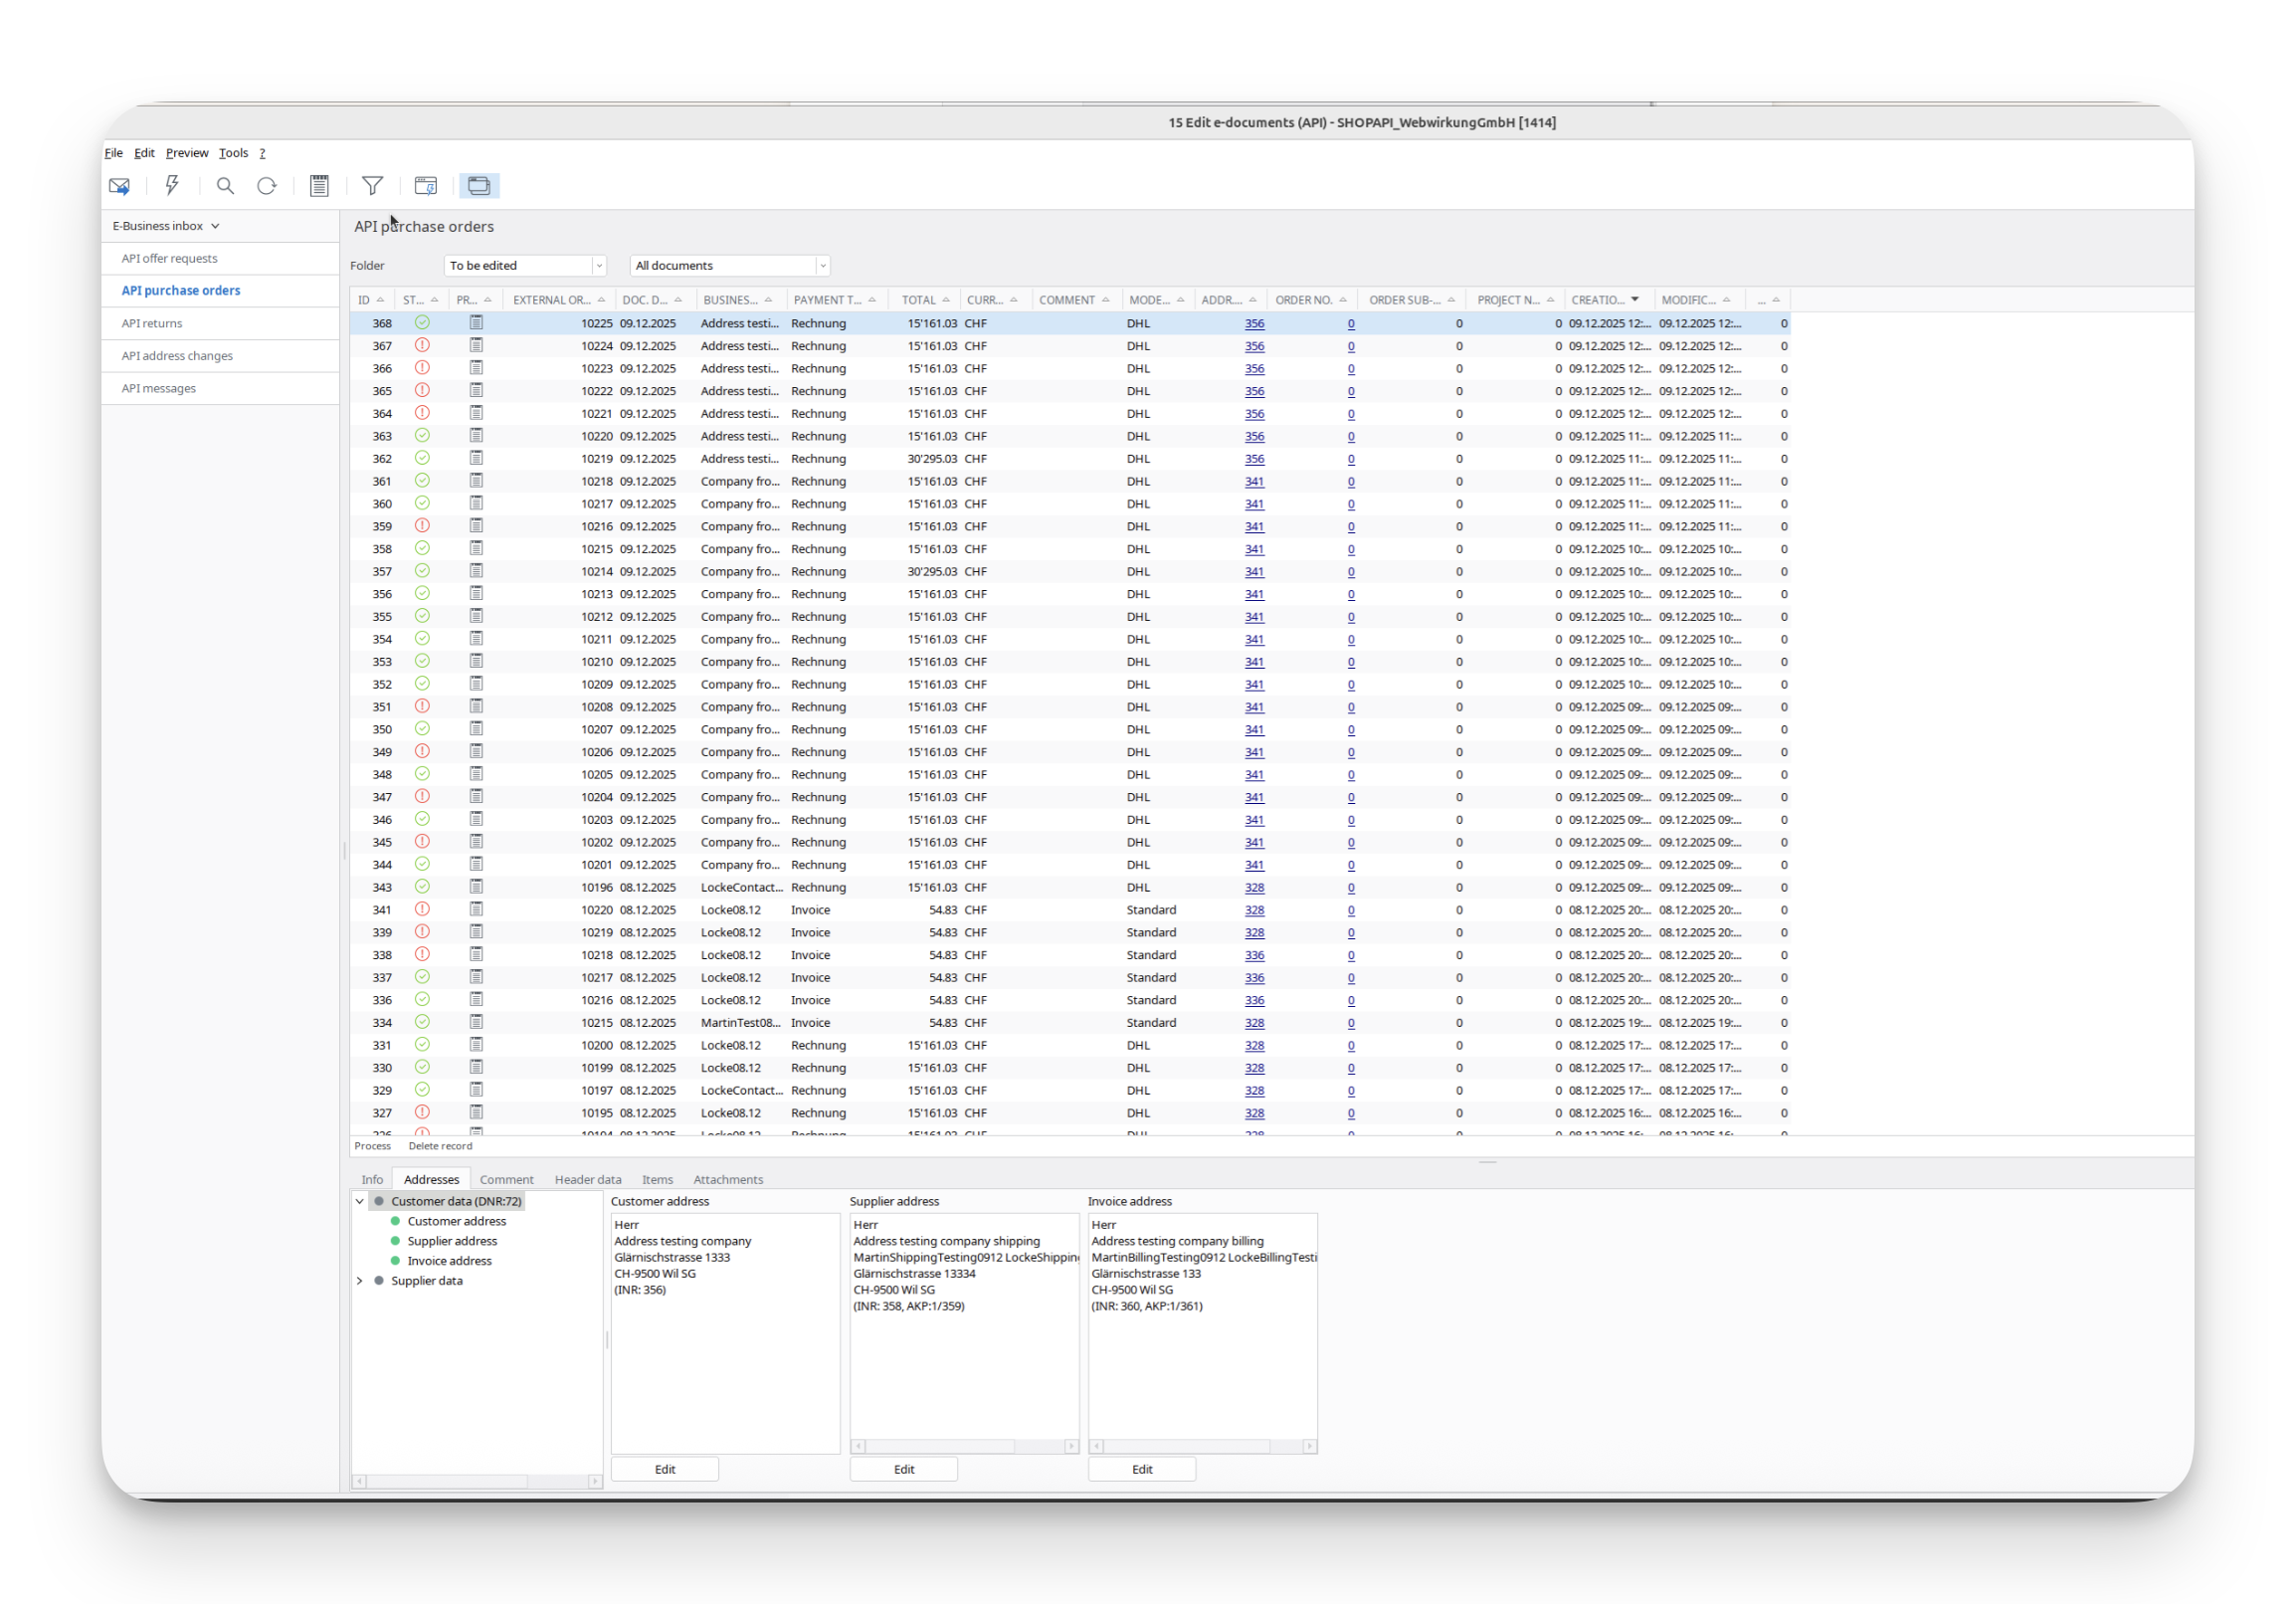
In Abacus:
- Go back to Abacus -> E-business -> Edit e-documents(API)(J15)
- Find your order
- Now all addresses should be "green," which means our mapping works
1.2 Order as existing customer with an address change
In Shopware:
- Go to «Customers» and find your customer
- Log in with the customer account
- Before placing an order, change the address. This example: street and house number changed
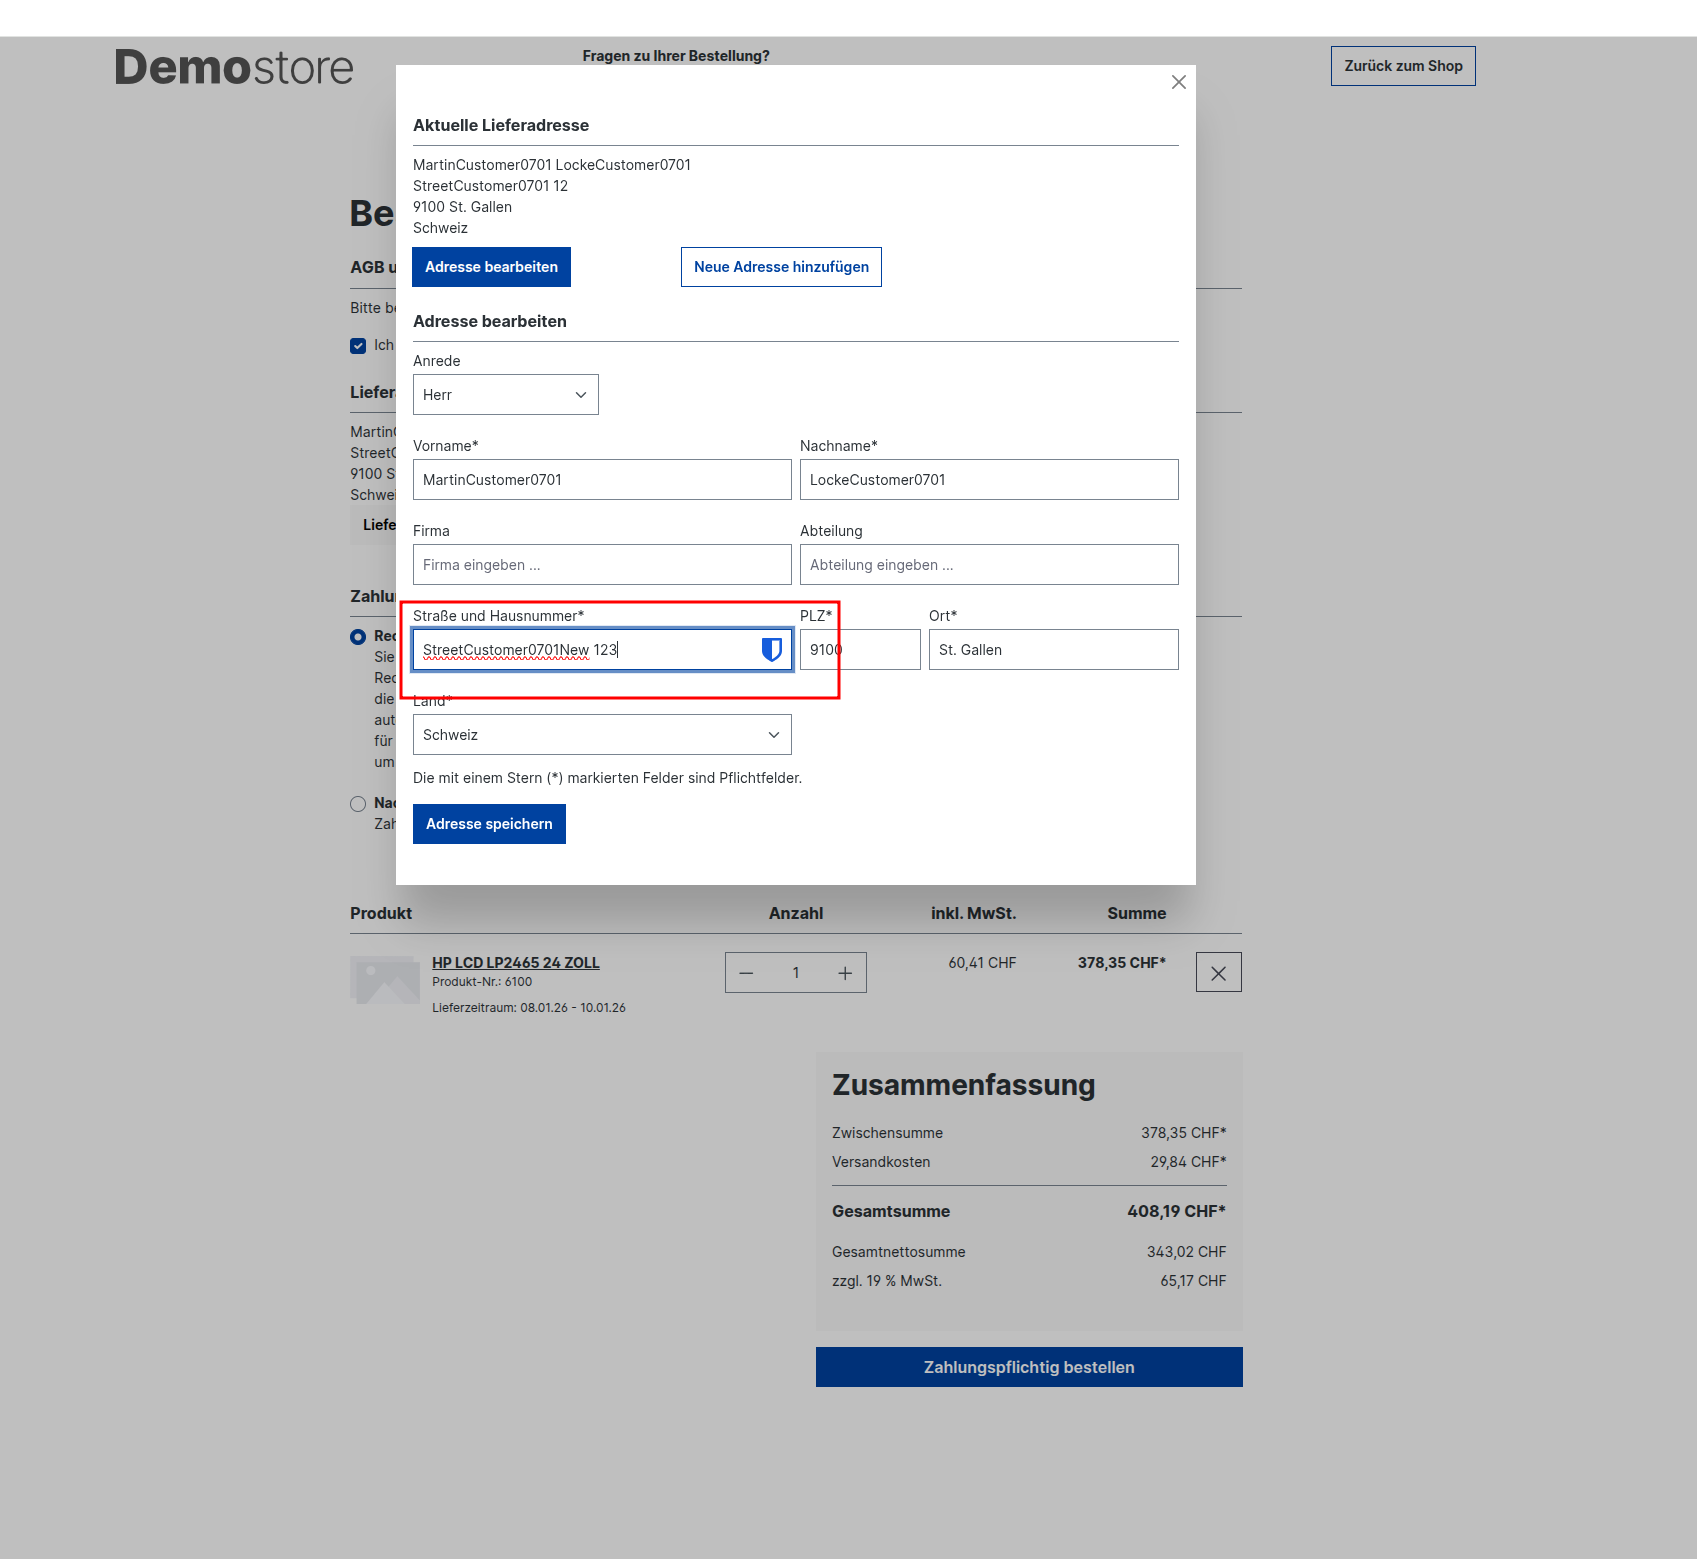
- Place a new order
In Abacus:
- Go back to Abacus -> E-business -> Edit e-documents(API)(J15)
- Find your order
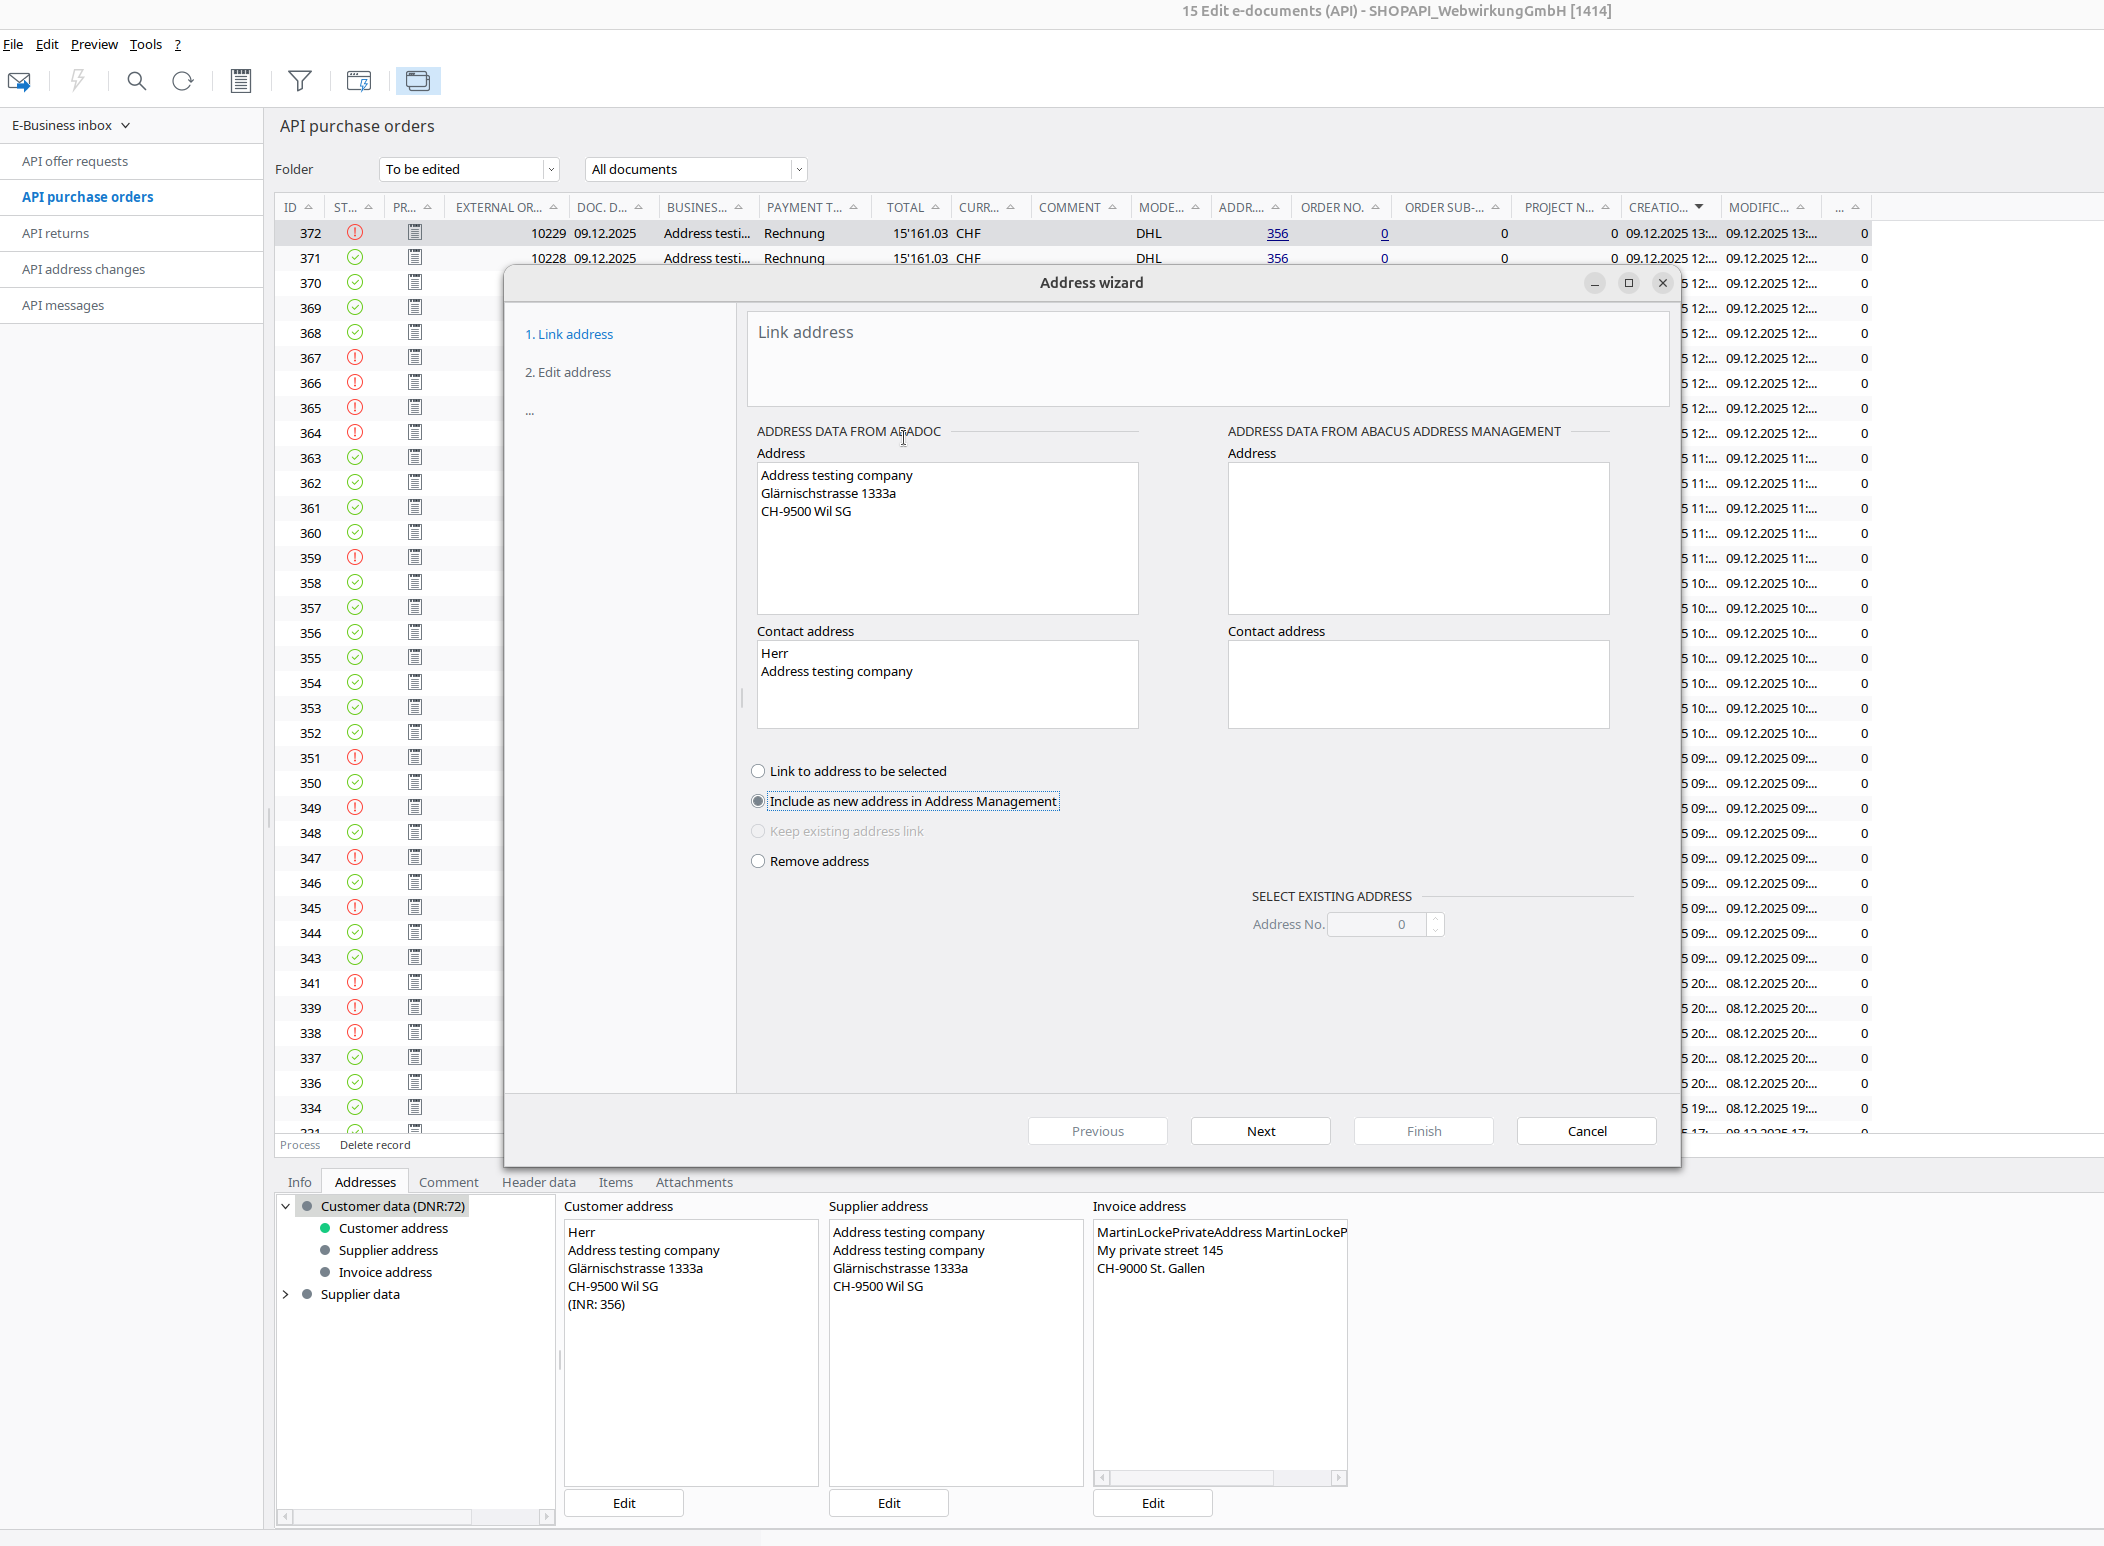
- Now you have to map addresses again because there is a difference between the data in the Abacus and the data from Shopware.
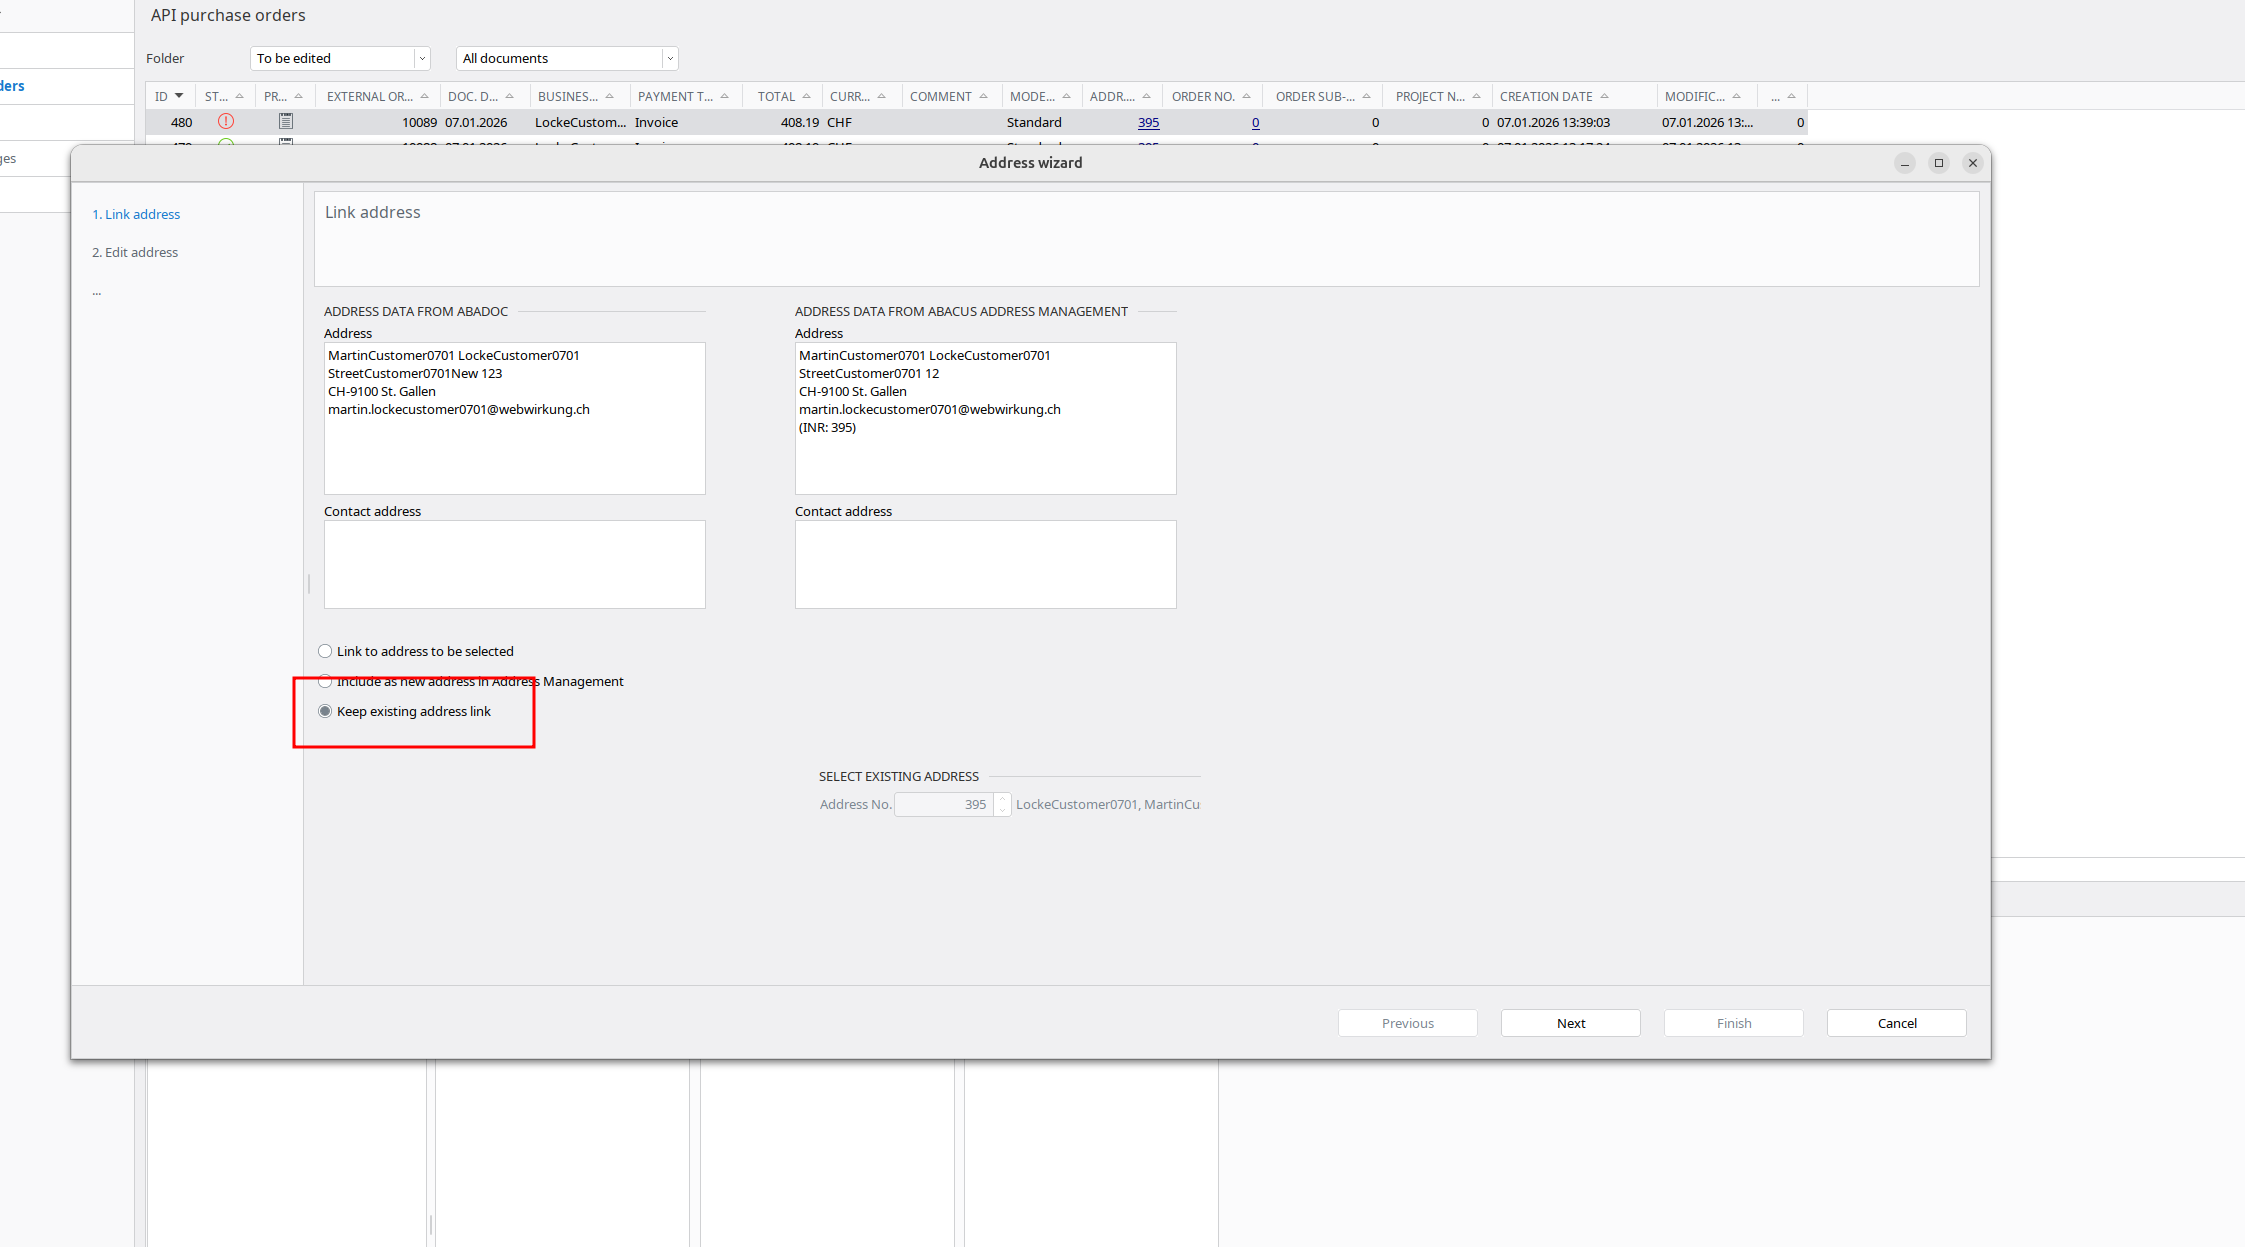 In this step, you have to change all differences in the abacus data by clicking on the arrows.
| Before | After |
|---|---|
 | 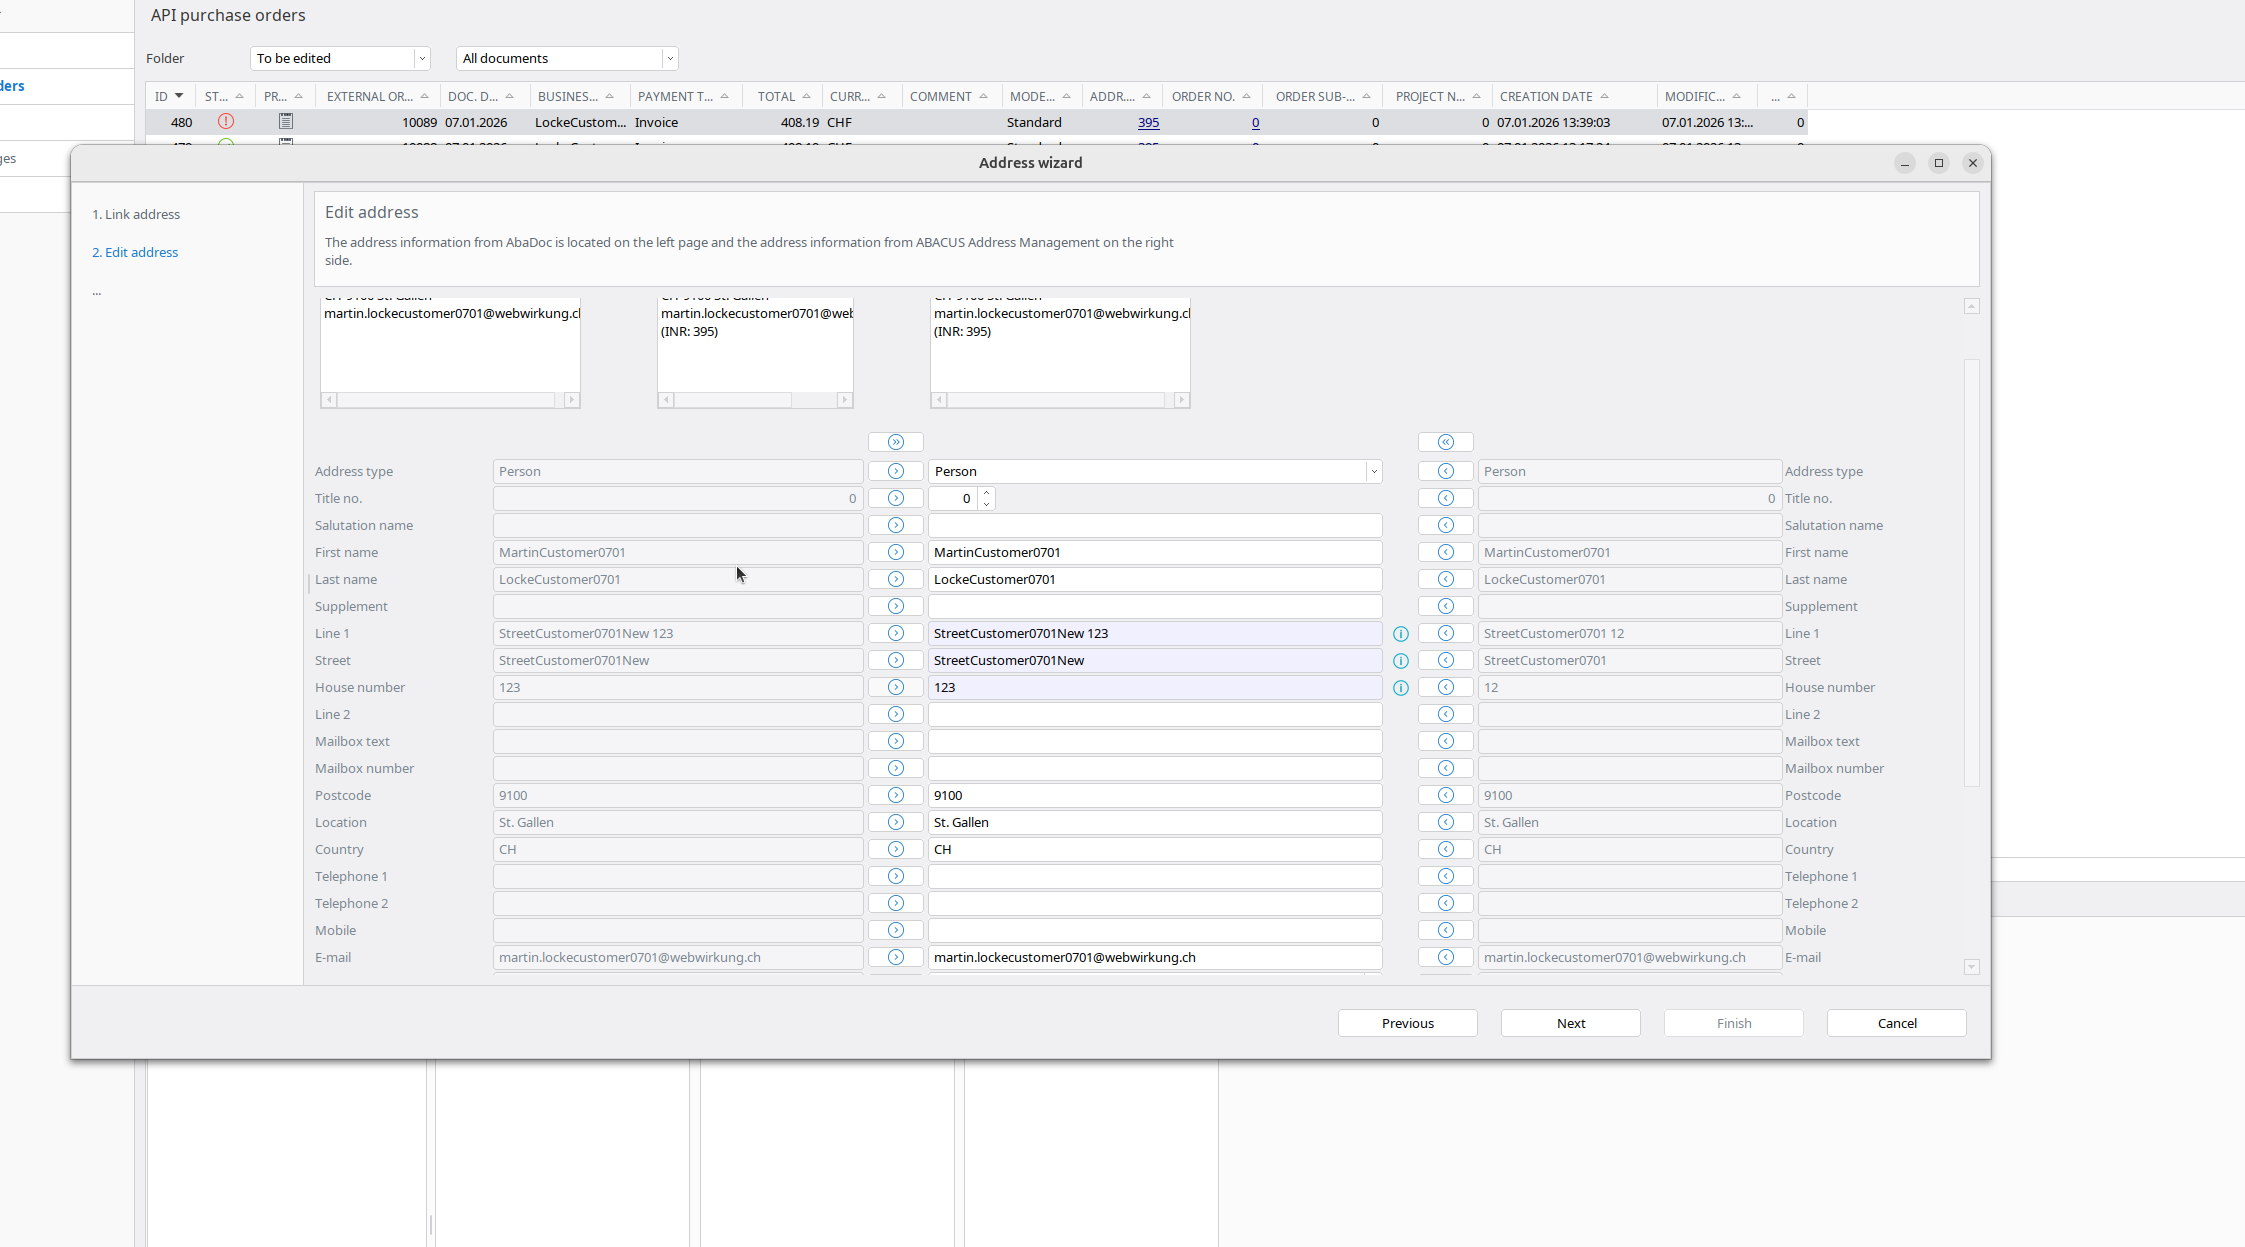 |
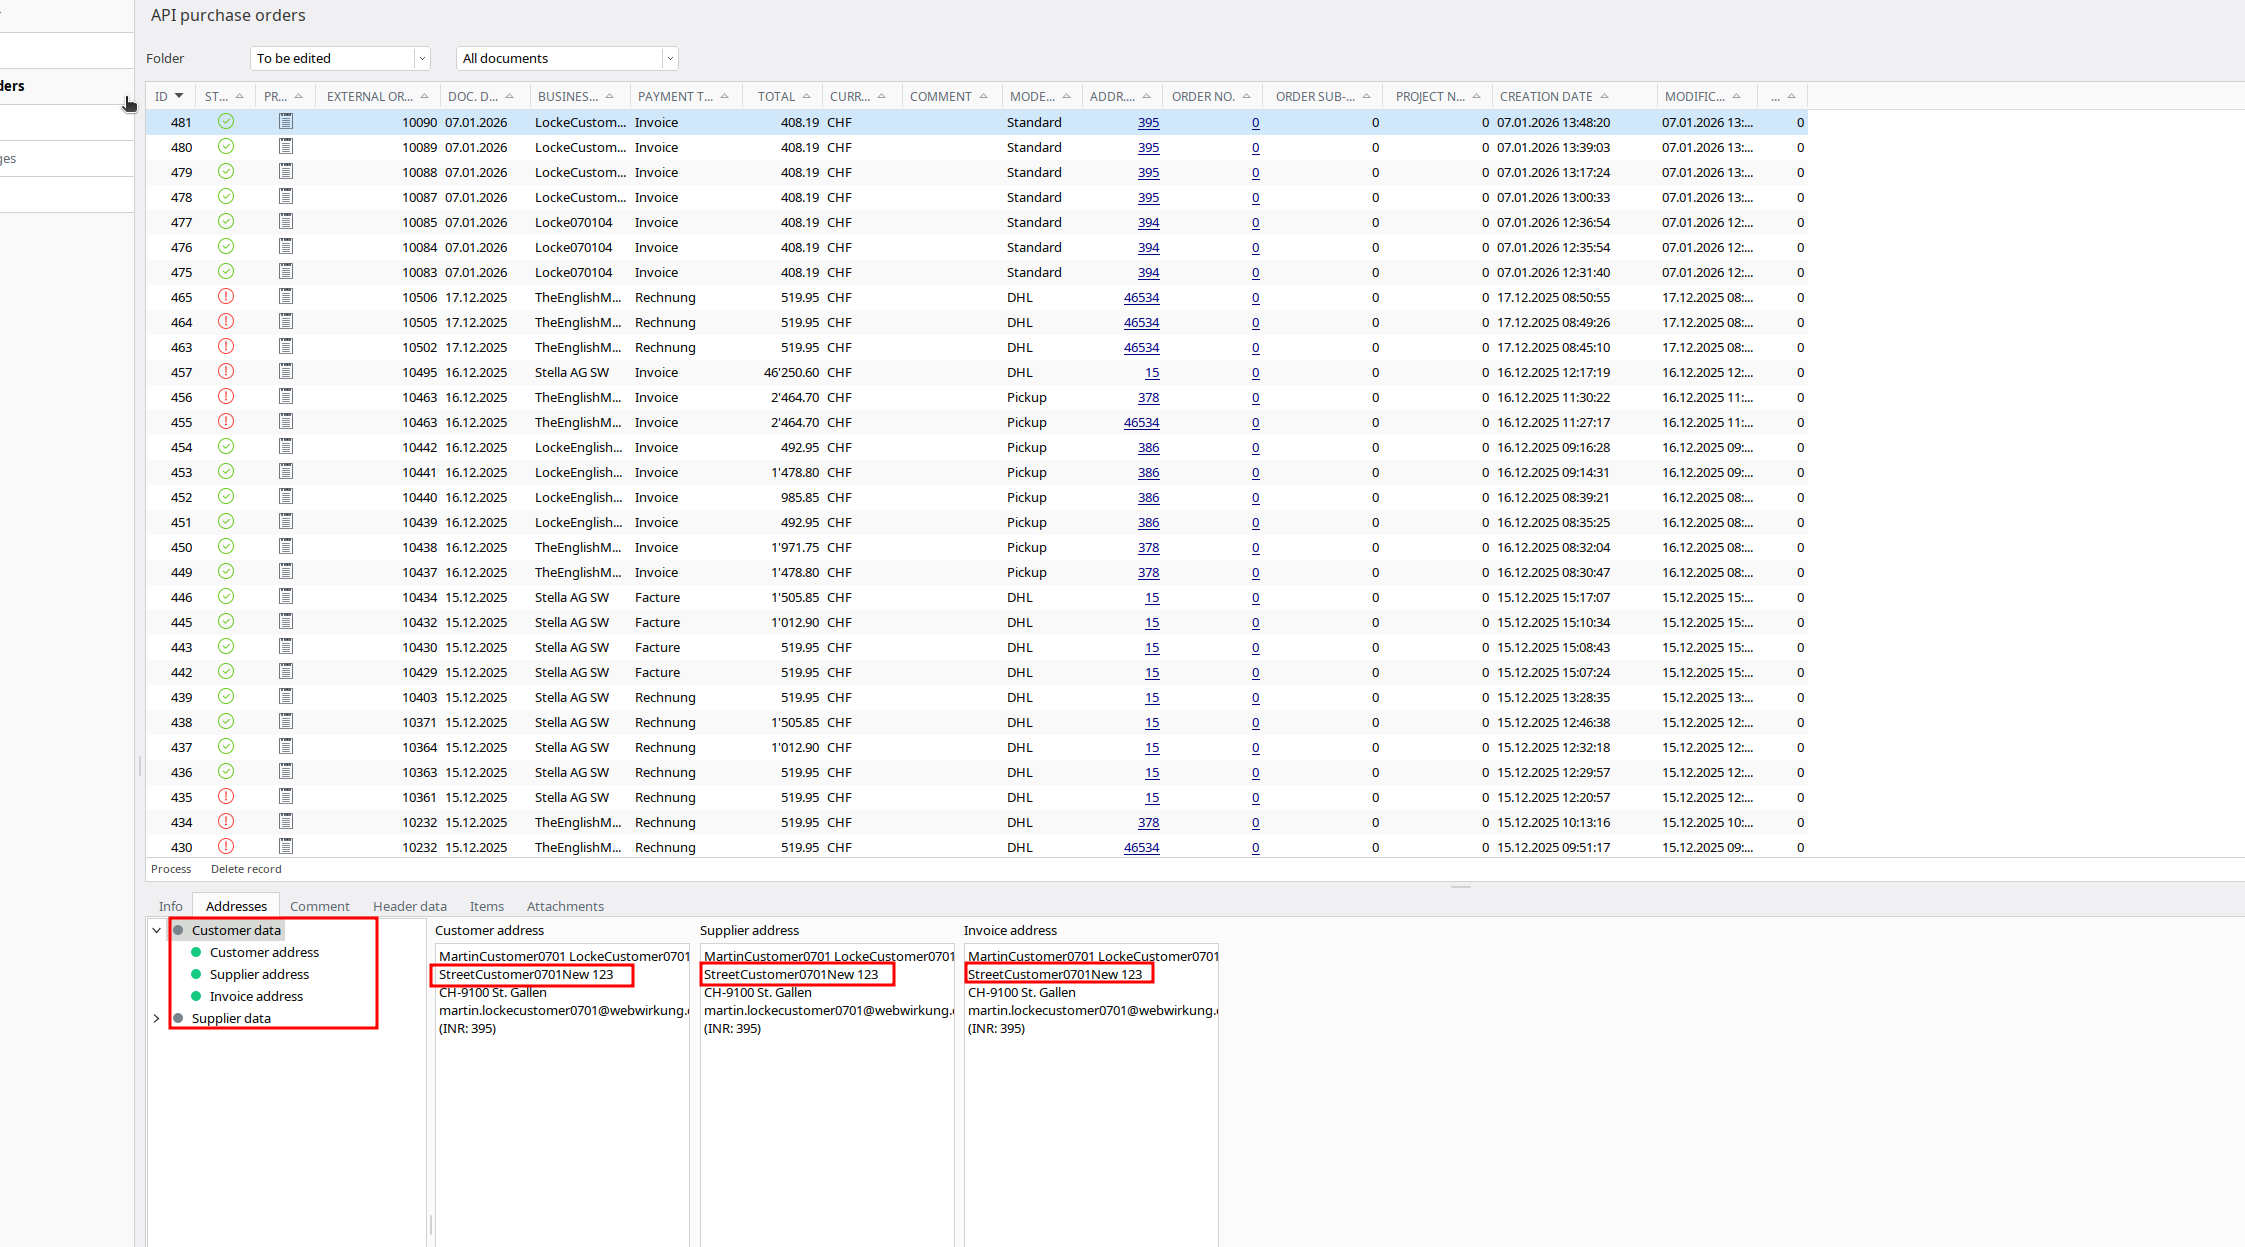
Result
The result should look like:
In Shopware:
- Log in to the account in the storefront and place a new order
In Abacus:
- Go back to Abacus -> E-business -> Edit e-documents(API)(J15)
- Find your order
- Now all addresses should be "green," which new addresses
1.3 Order as existing customer with same billing/shipping address
In Shopware:
- Go to «Customers» and find your customer
- Log in with the customer account
- Place an order with a changed address
In Abacus:
- Go back to Abacus -> E-business -> Edit e-documents(API)(J15)
- Find your order
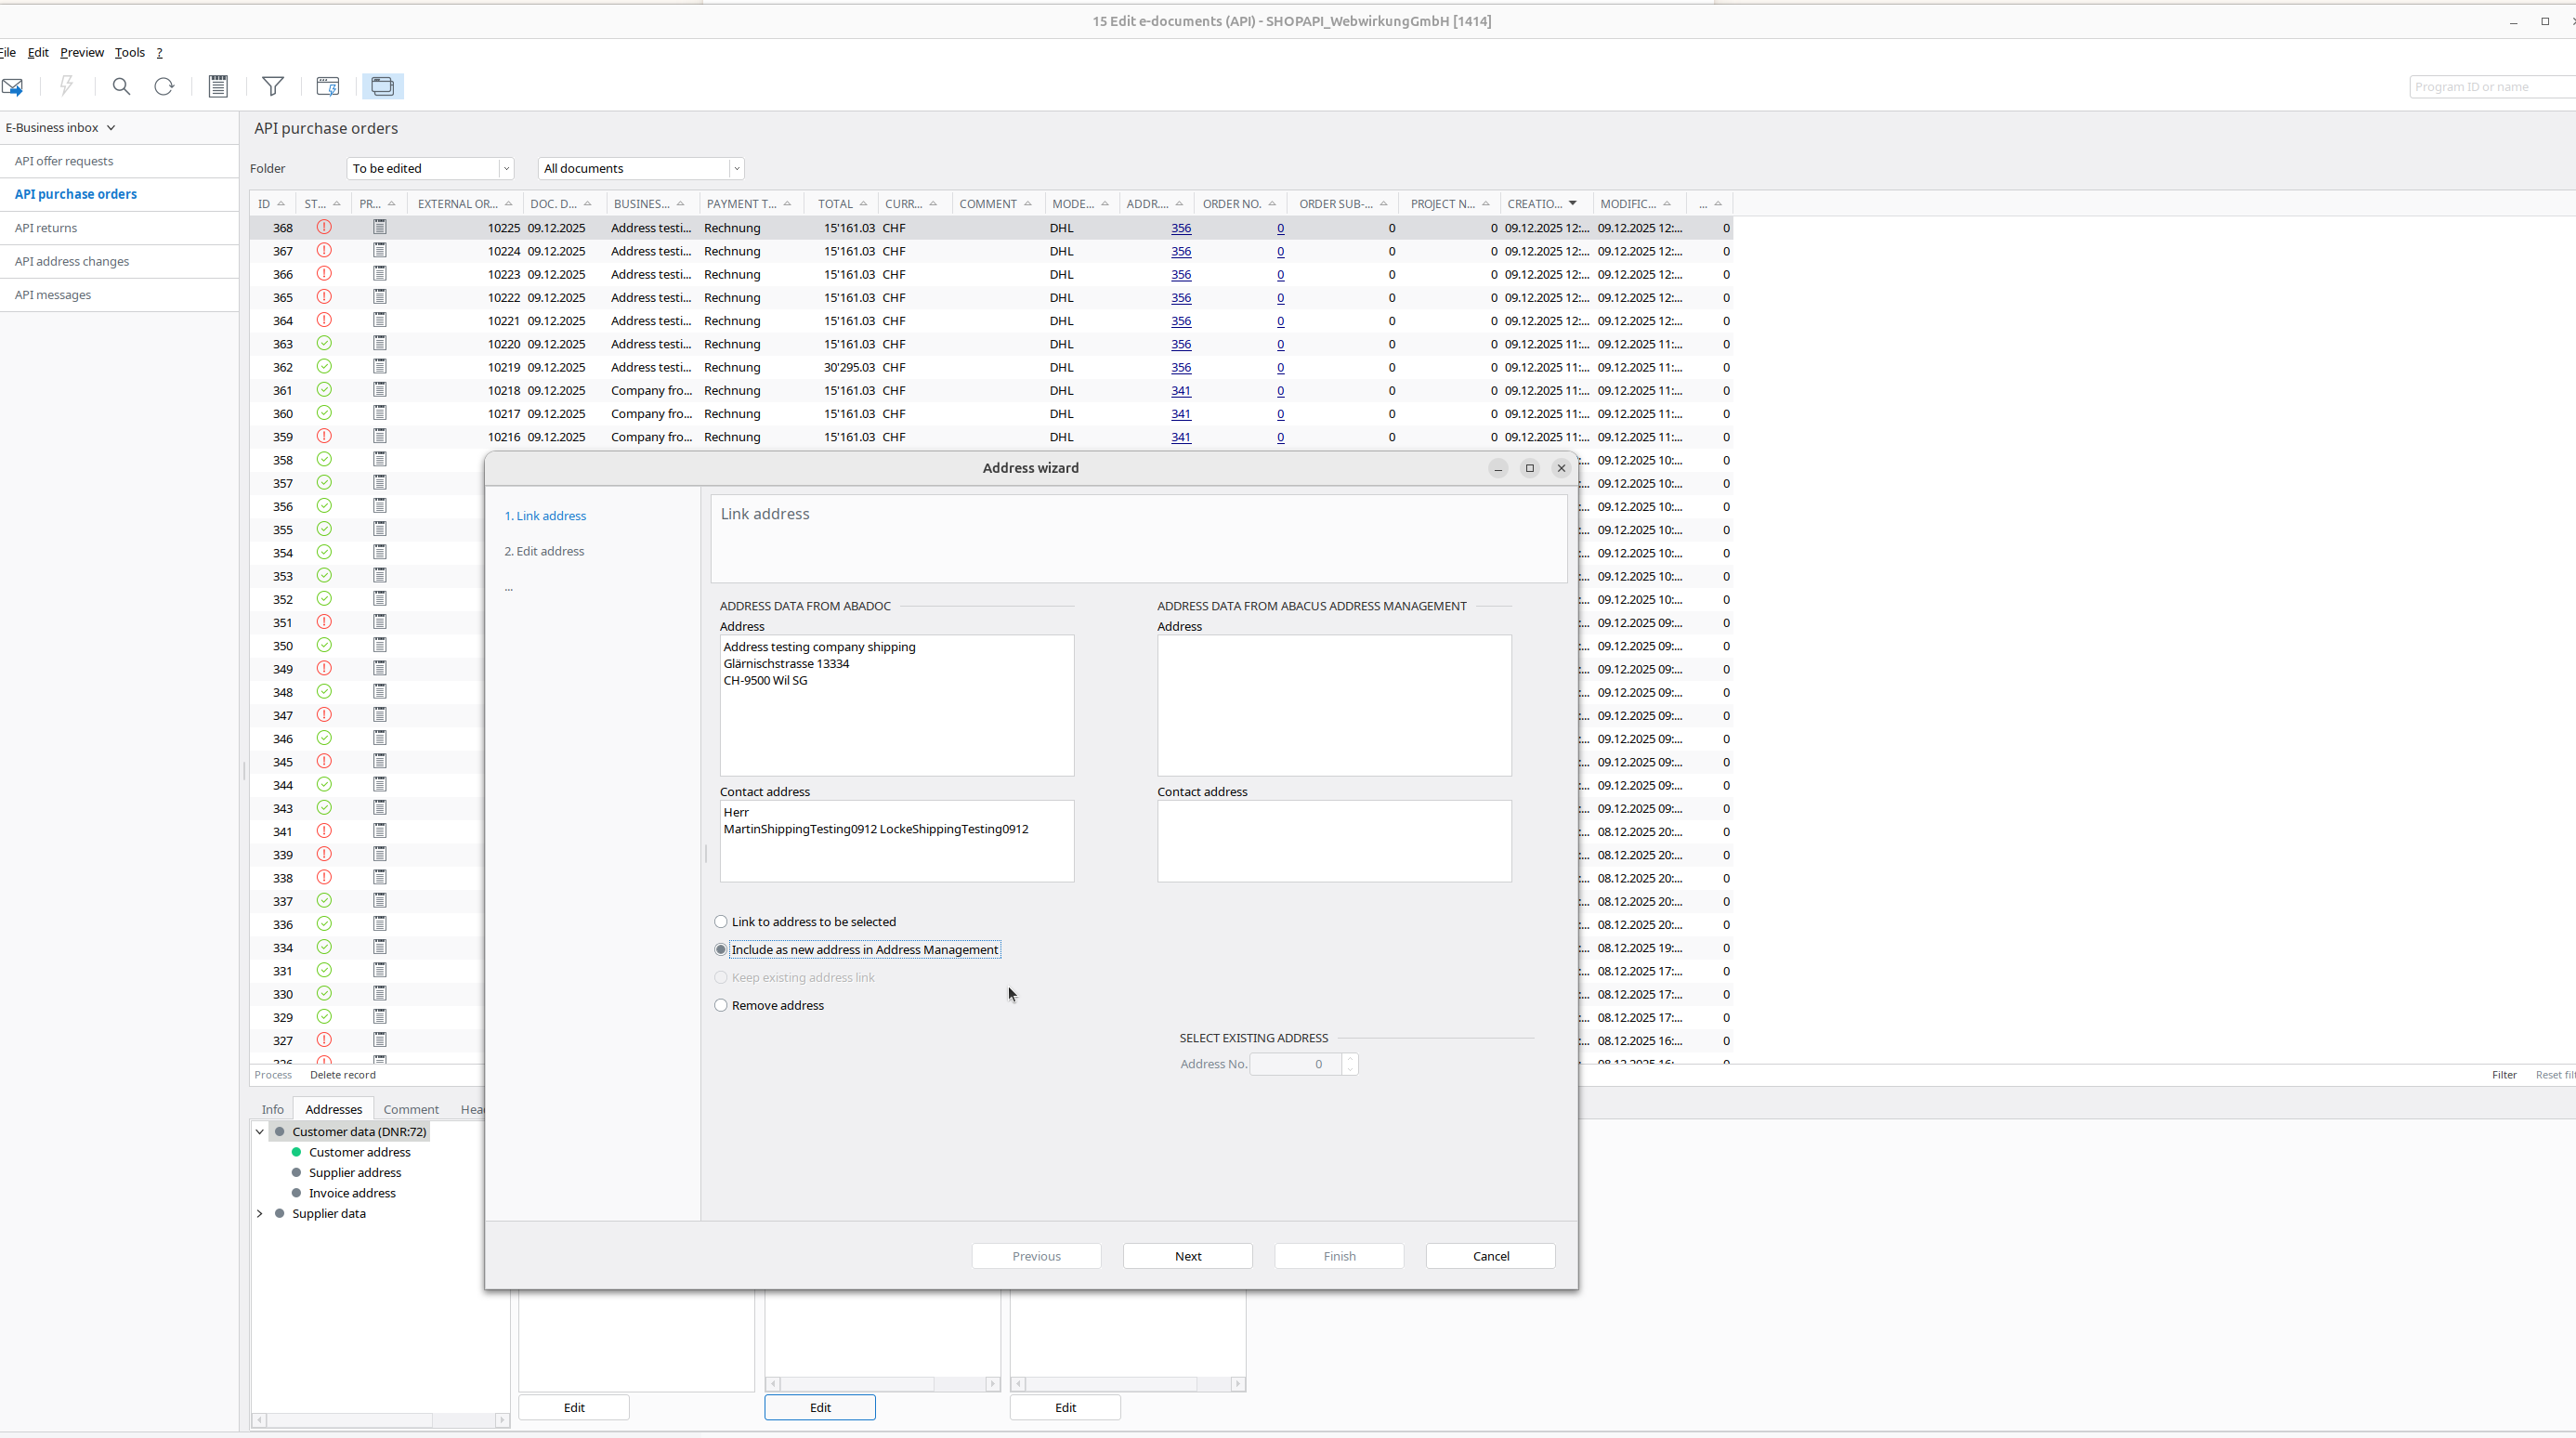
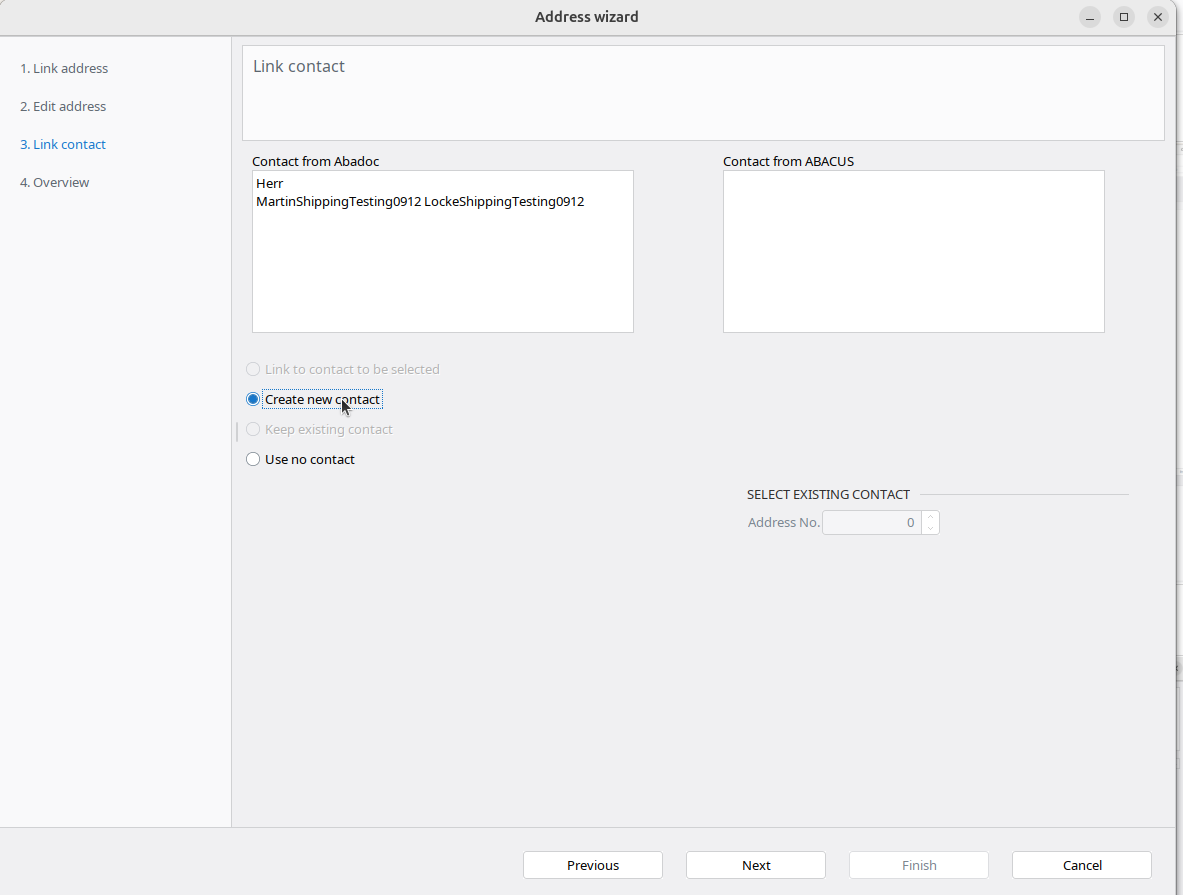
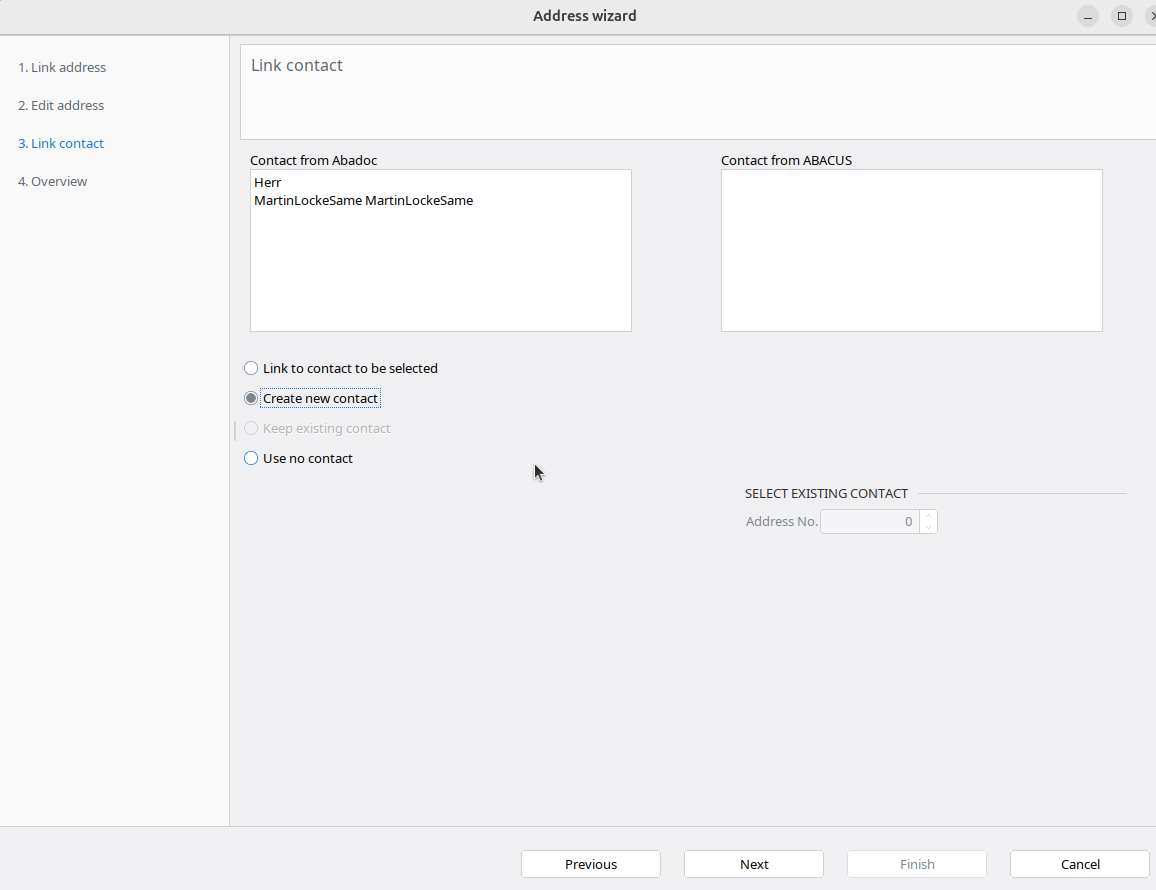
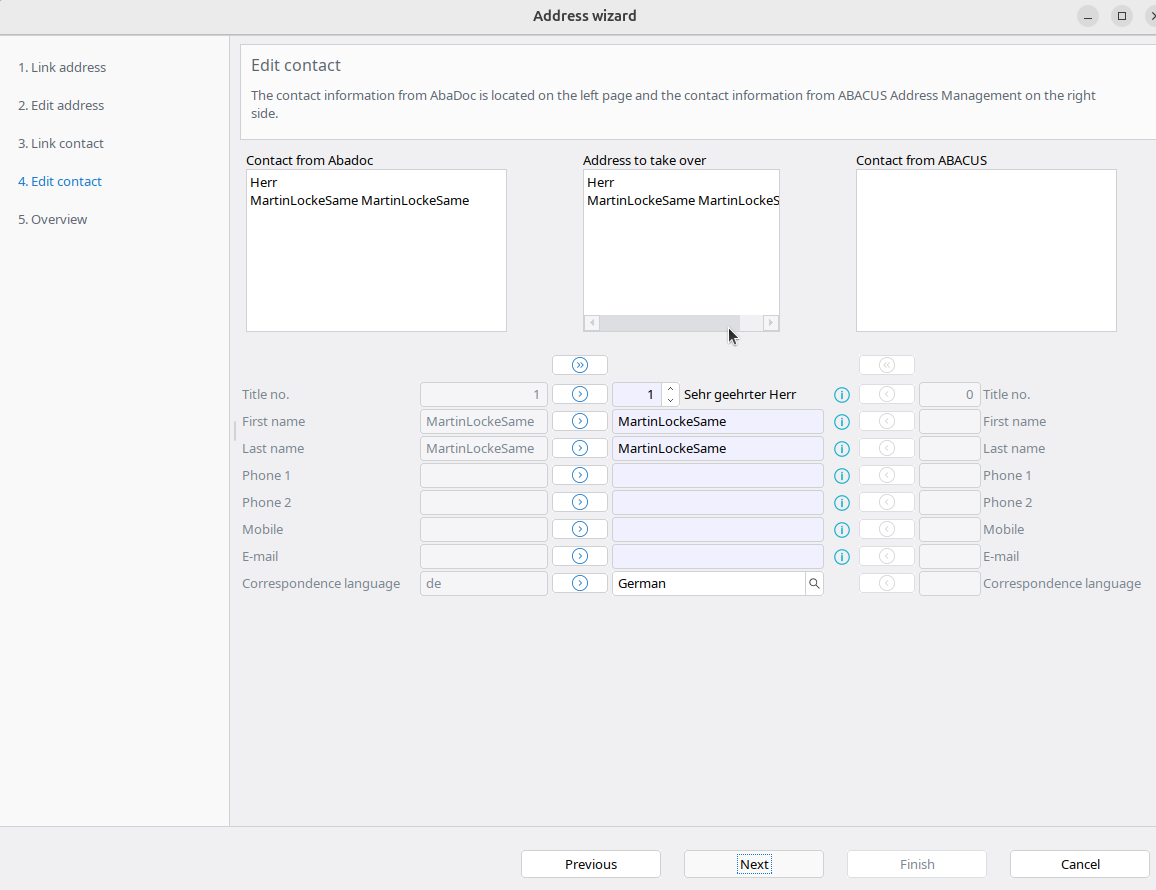
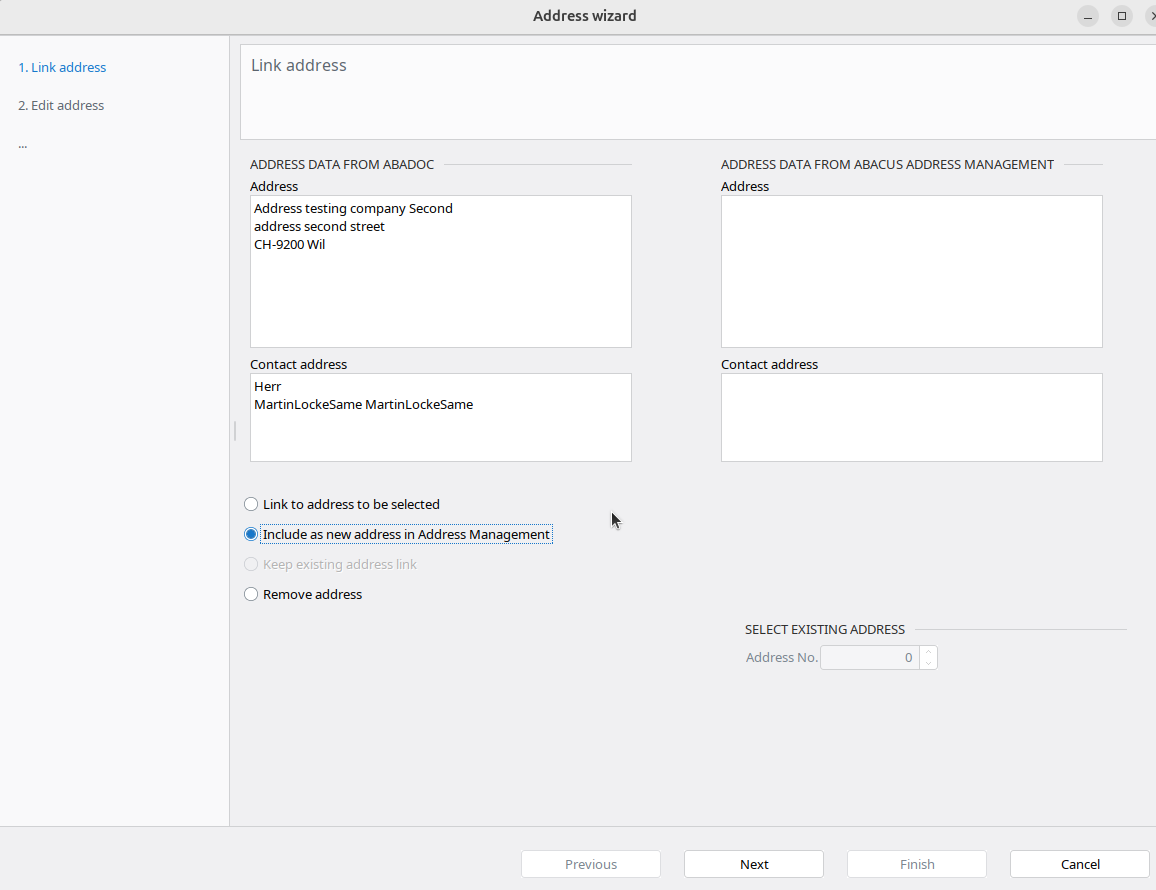
- Map(edit) the shipping addresses and the invoice address
| Link address | Edit address | Link contact | Edit contact |
|---|---|---|---|
 |  | 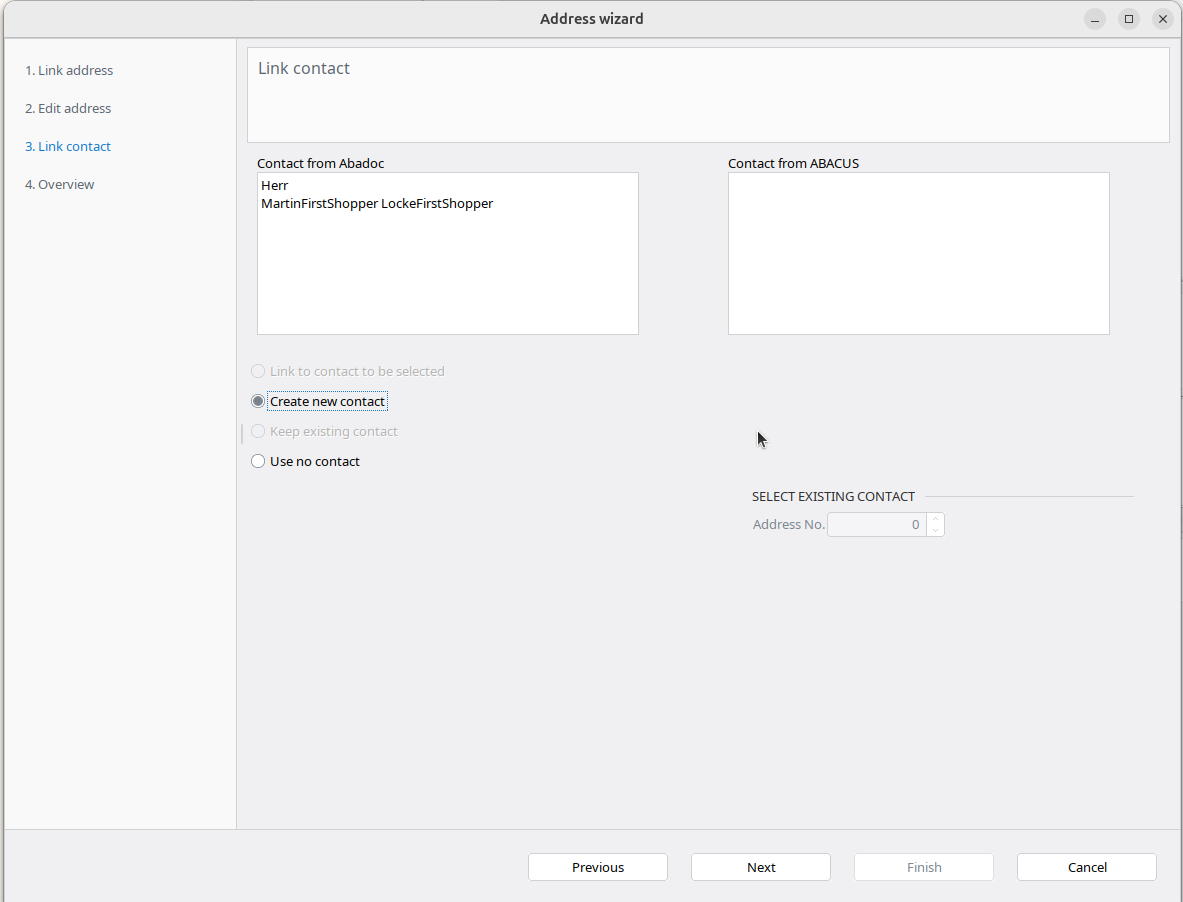 | 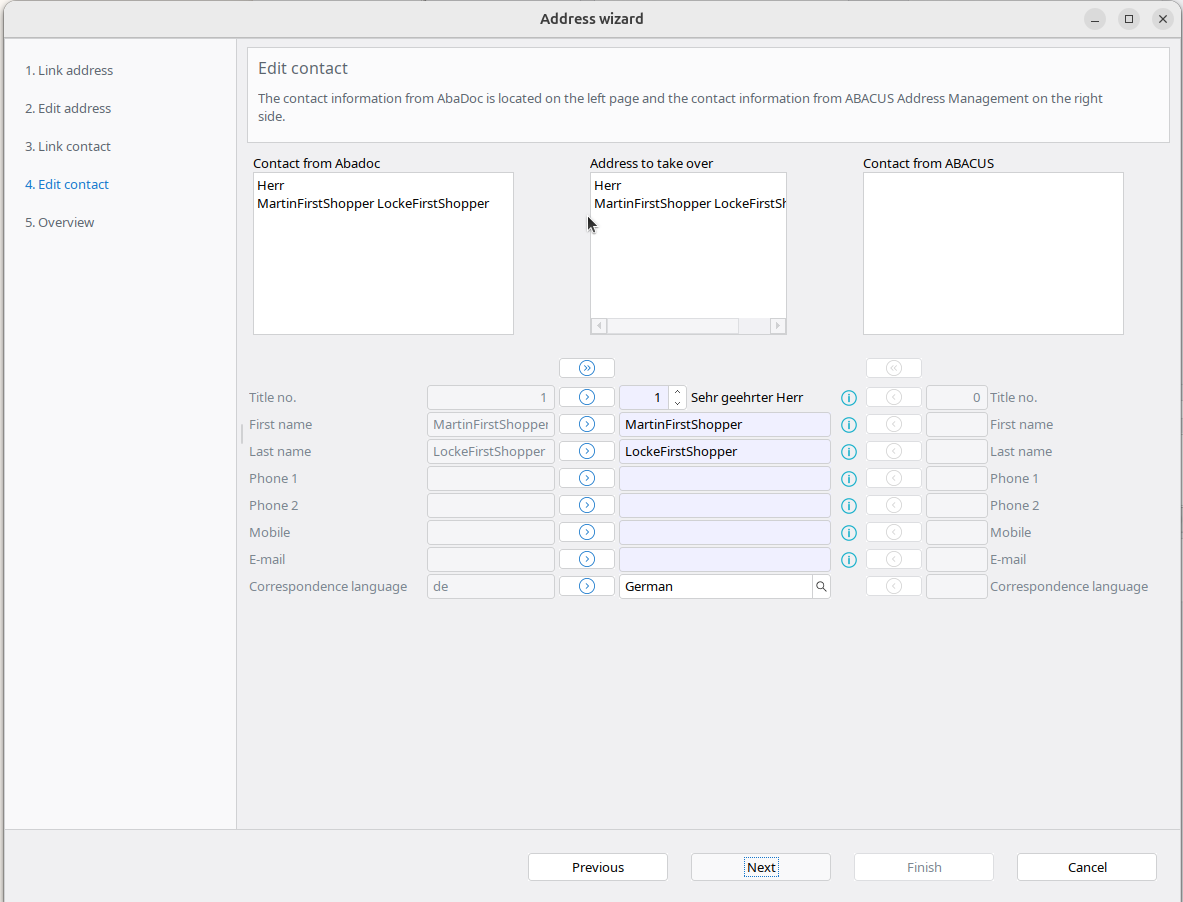 |
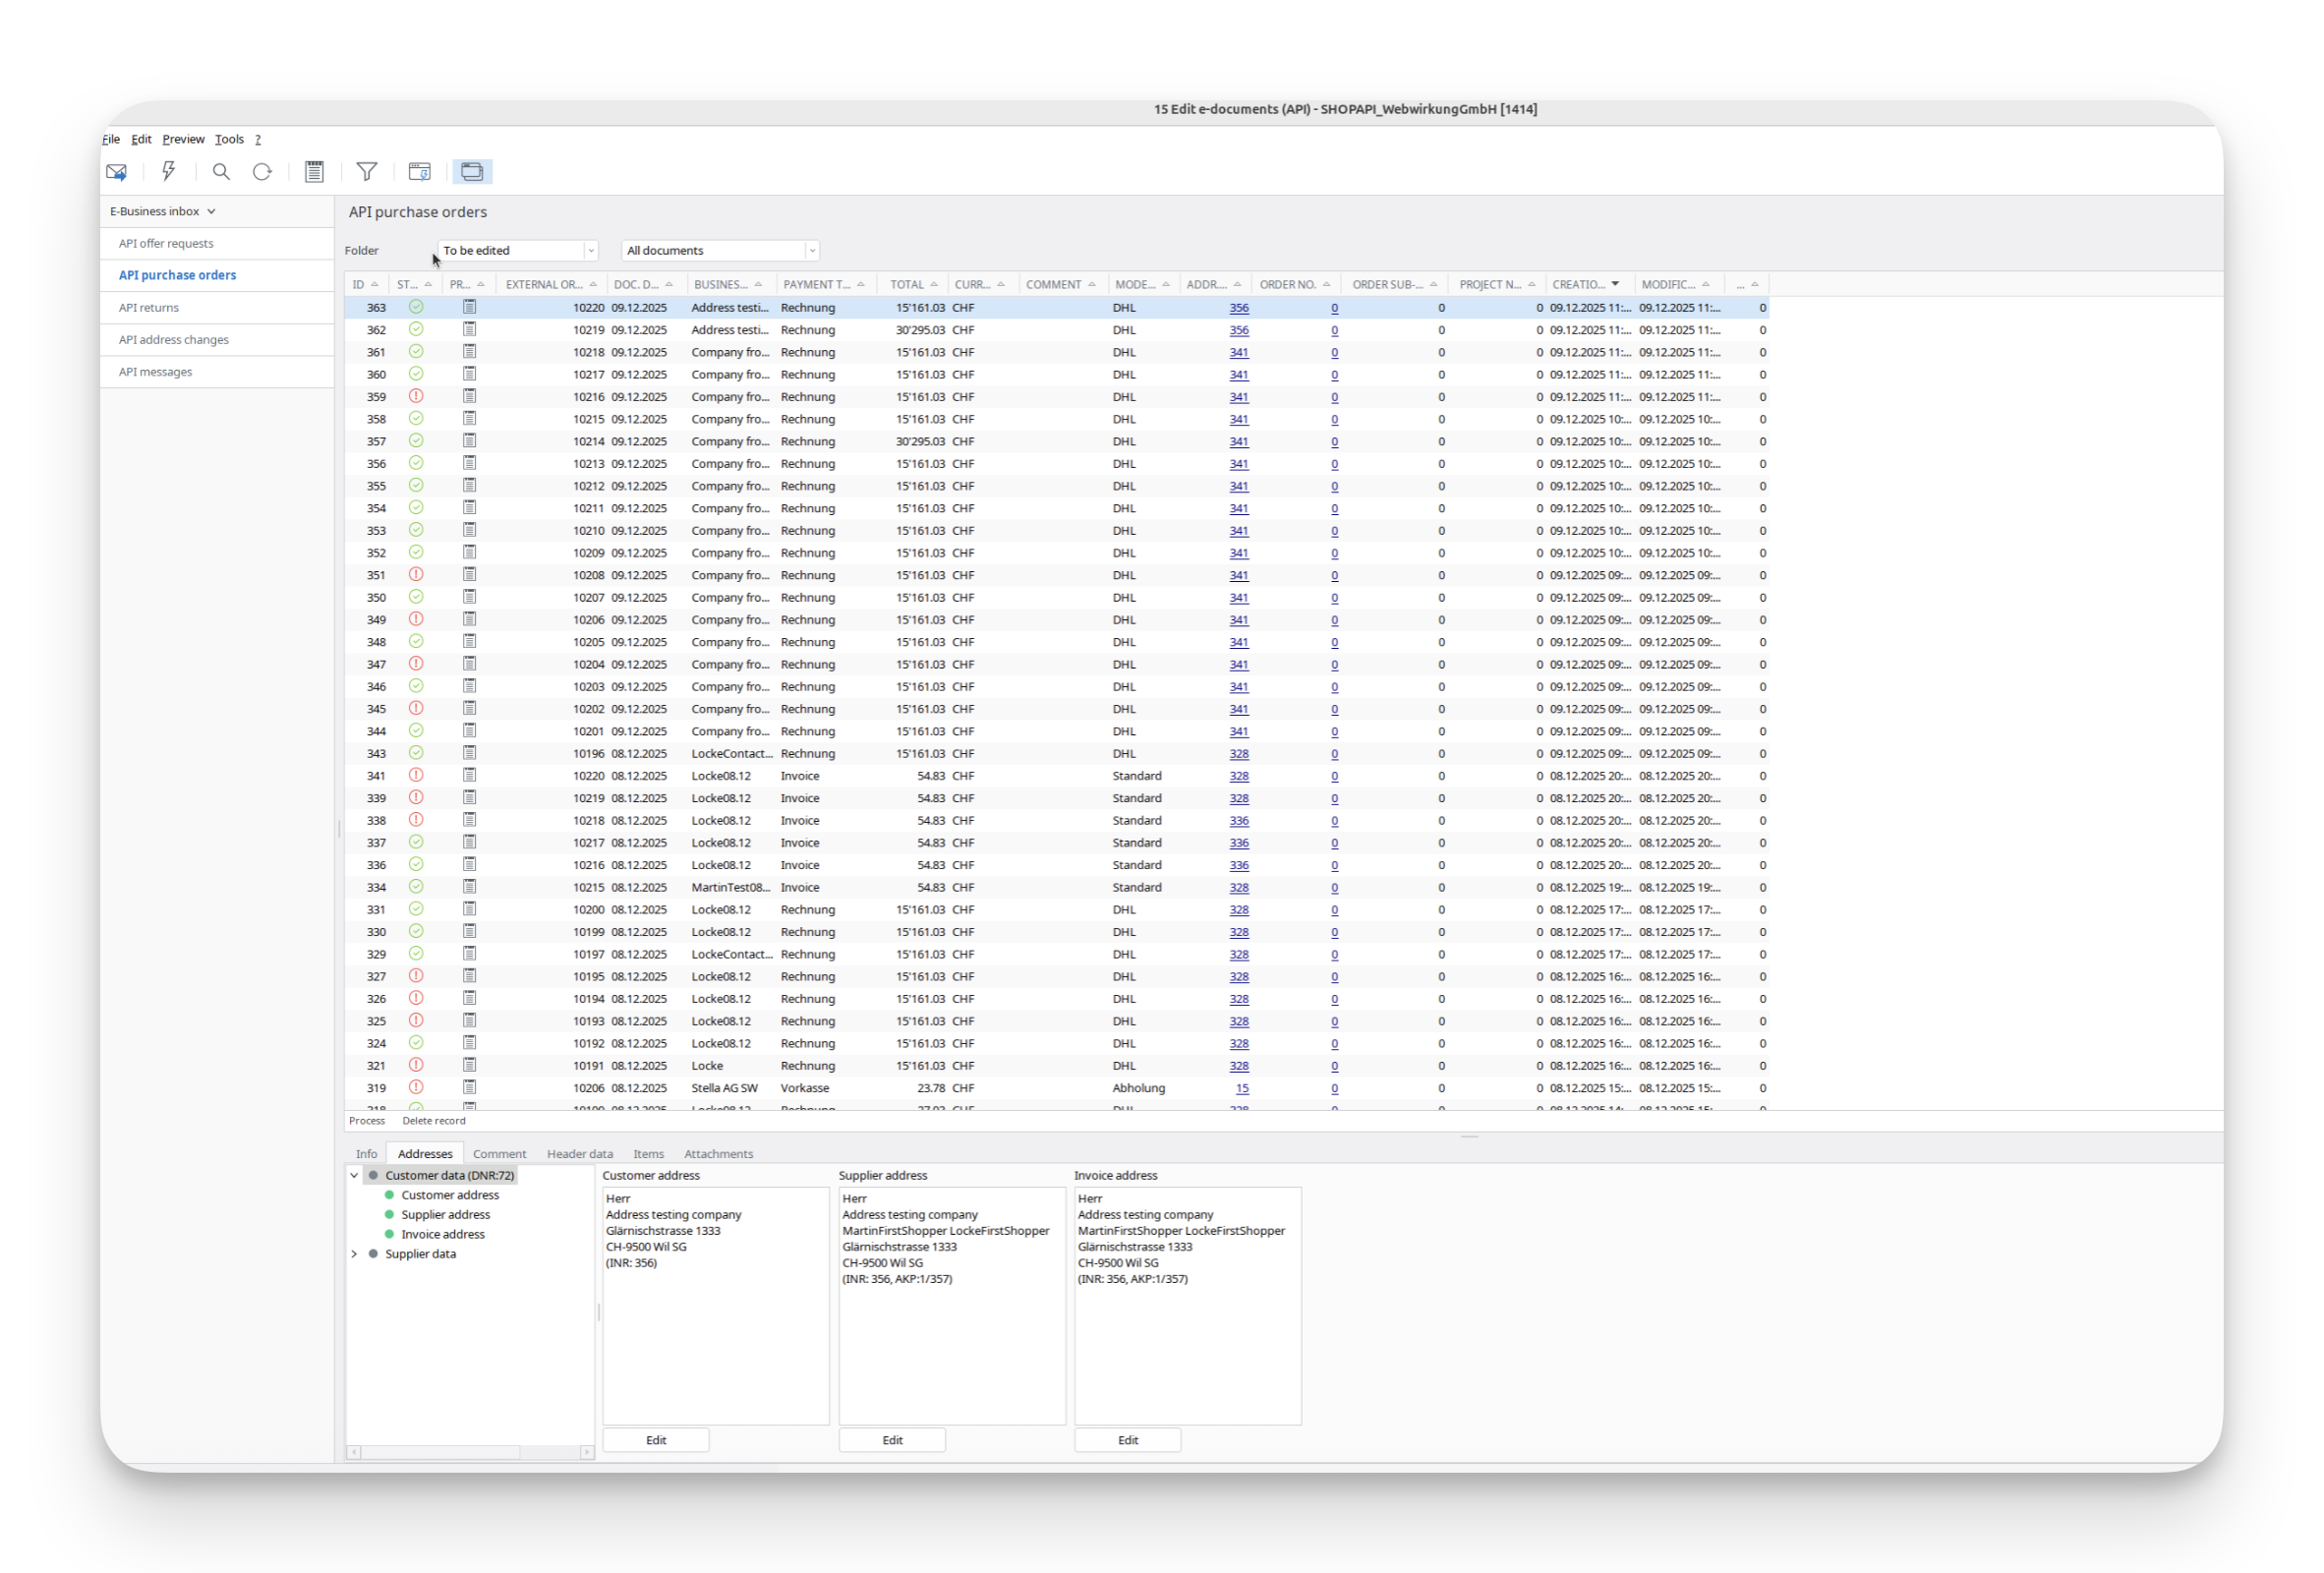
Result
In Abacus:
In Shopware:
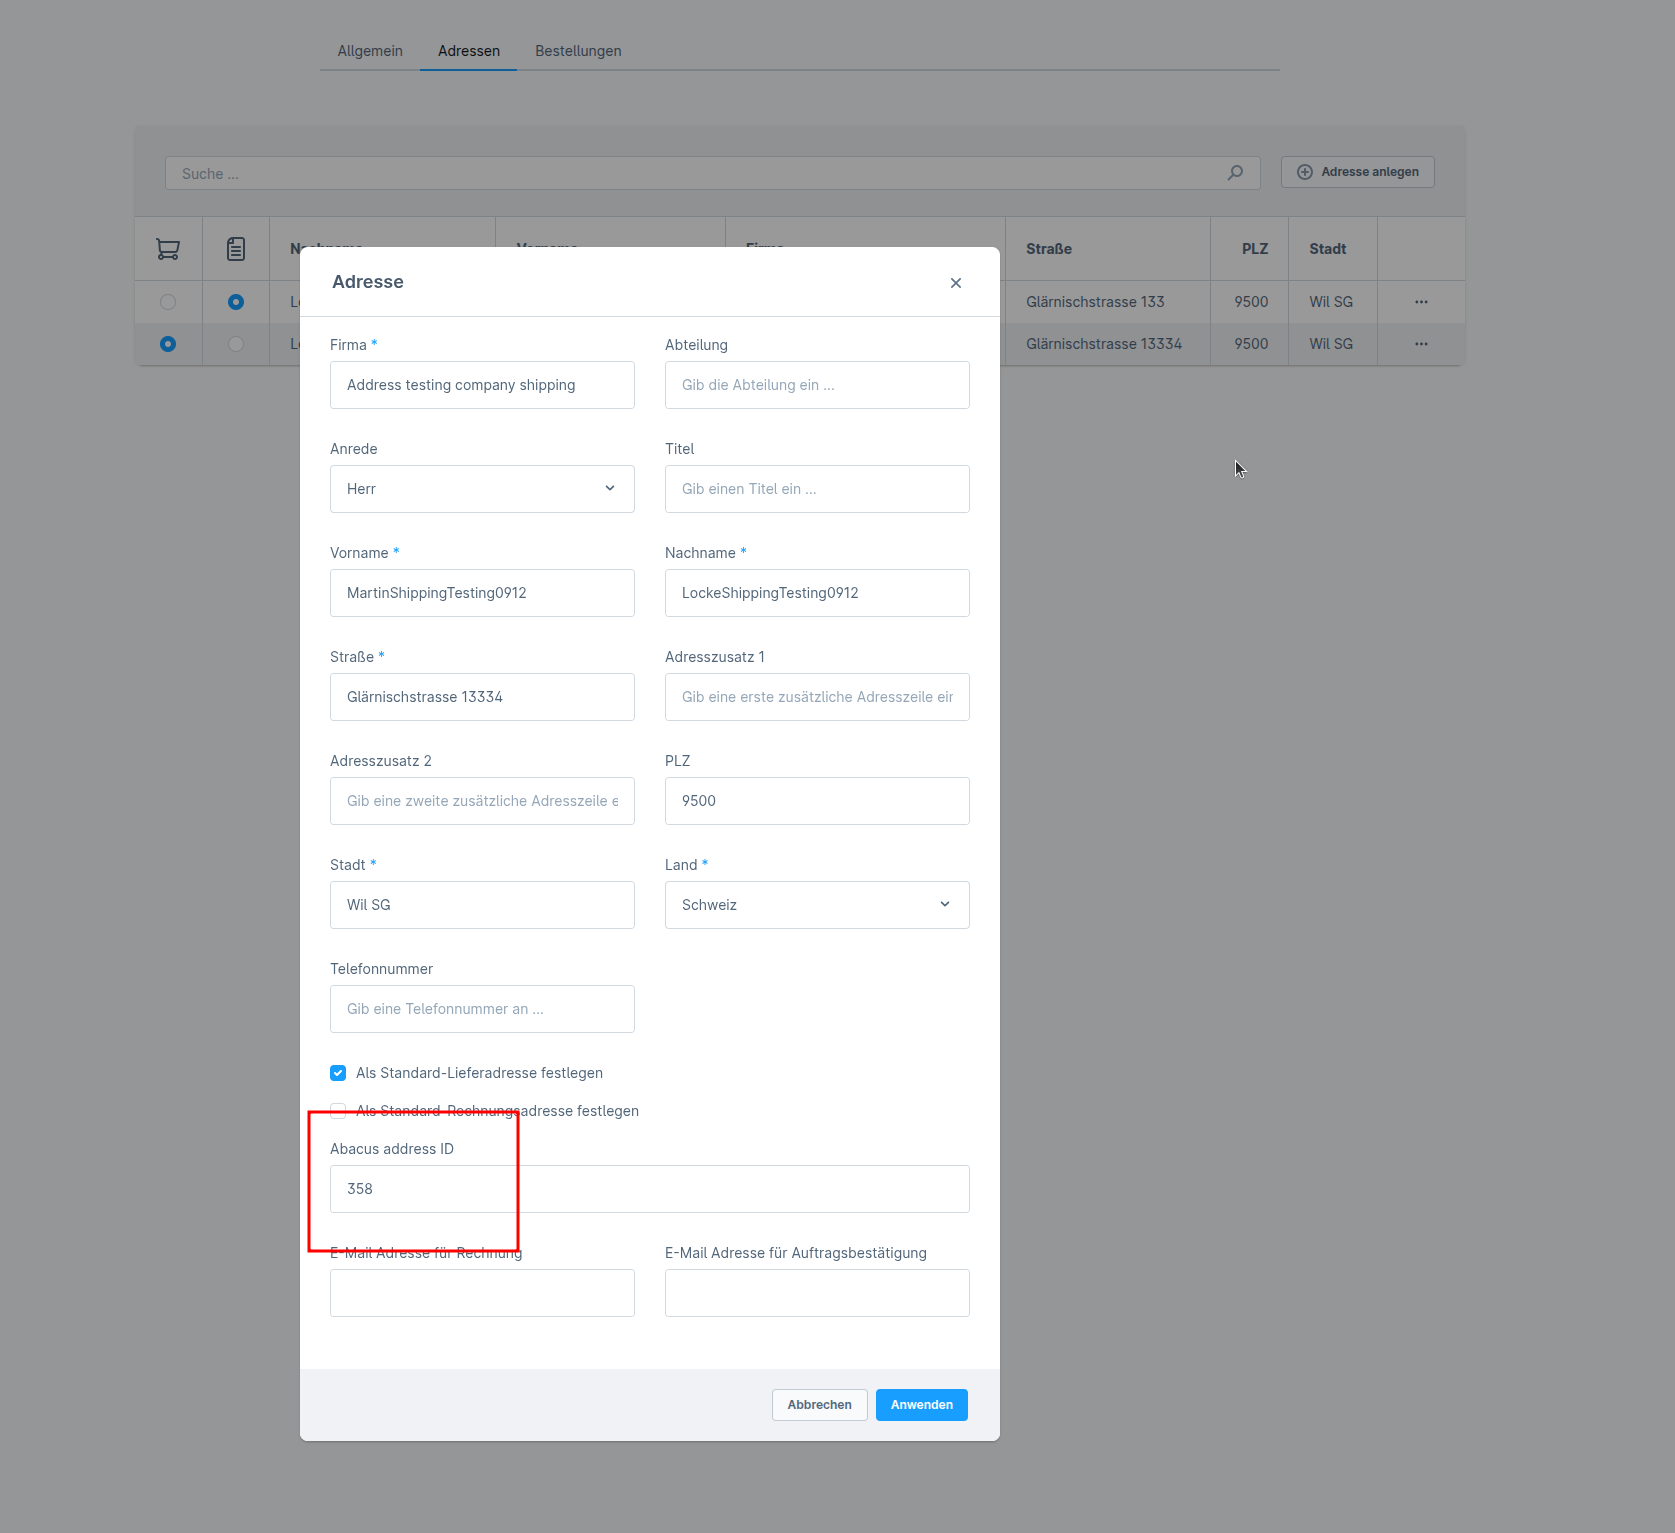
- Go back to Shopware and execute the task webwirkung.abacus.subscription.shopper to map address IDs (See here how)
- Under «Customers» find your shopper
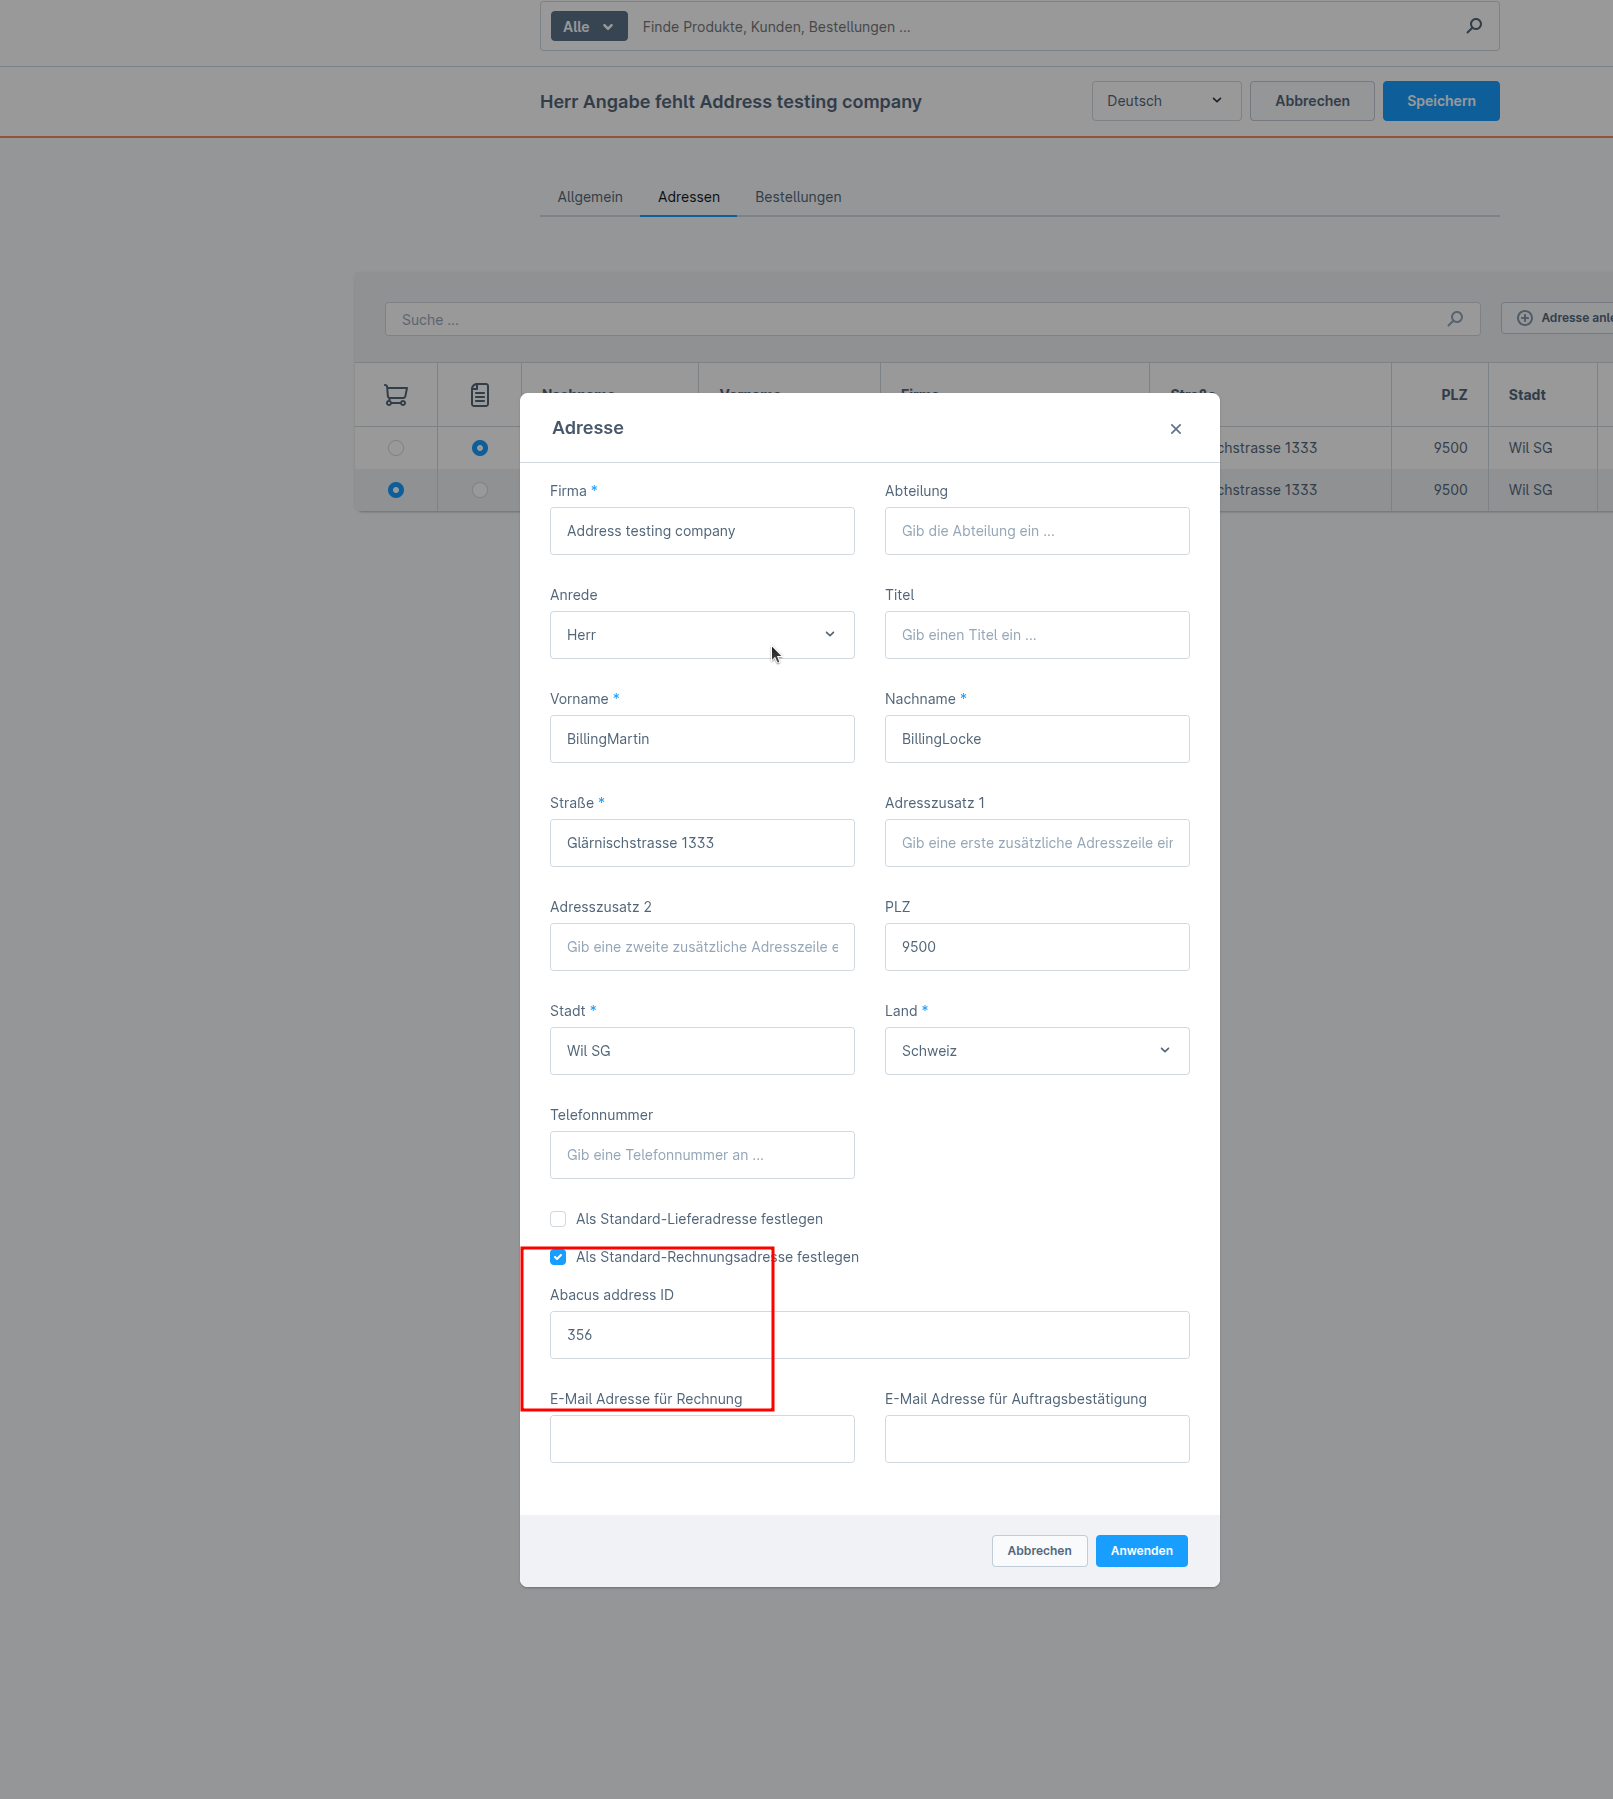
- In the address, you should now see the new custom field with the abacus address ID
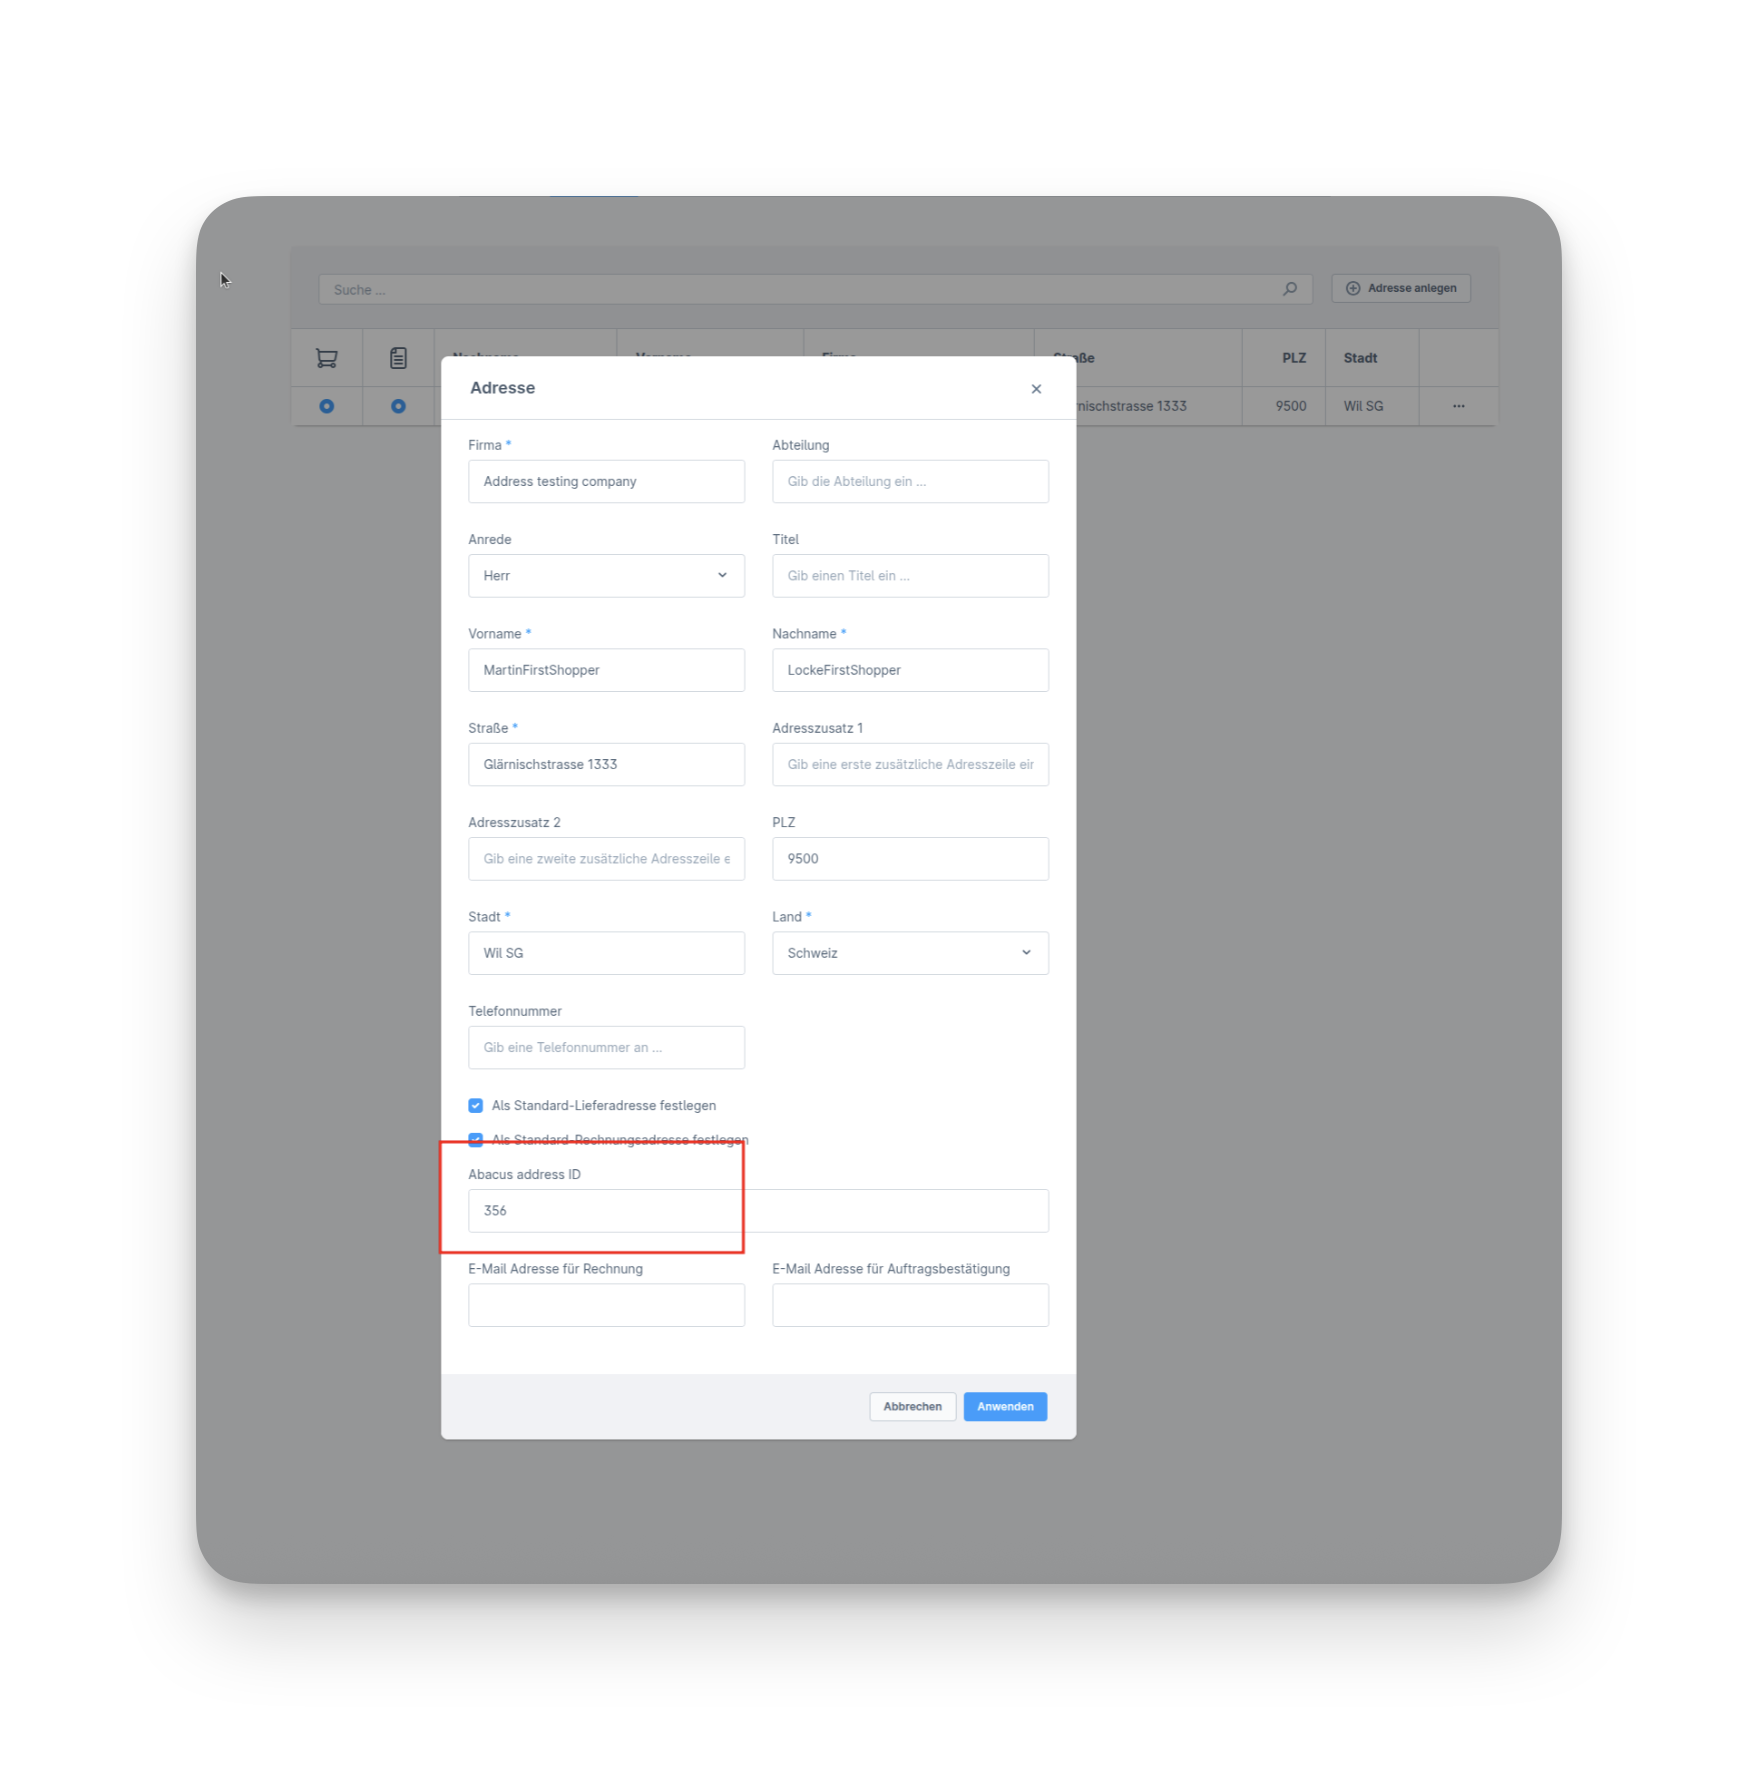
Final verification
- Login as the shopper in Storefront
- Place a new order
- Go back to Abacus -> E-business -> Edit e-documents(API)(J15)
- Now all 3 addresses should be "green," which means our mapping works
1.4 Order as existing customer with a different billing and shipping address
In Shopware:
- Go to «Customers» and find your customer
- Log in with the customer account
- Place an order with a different shipping address
In Abacus:
- Go back to Abacus > E-business > Edit e-documents(API)(J15)
- Find your order
- Map(edit) your shipping addresses (see screenshots below)
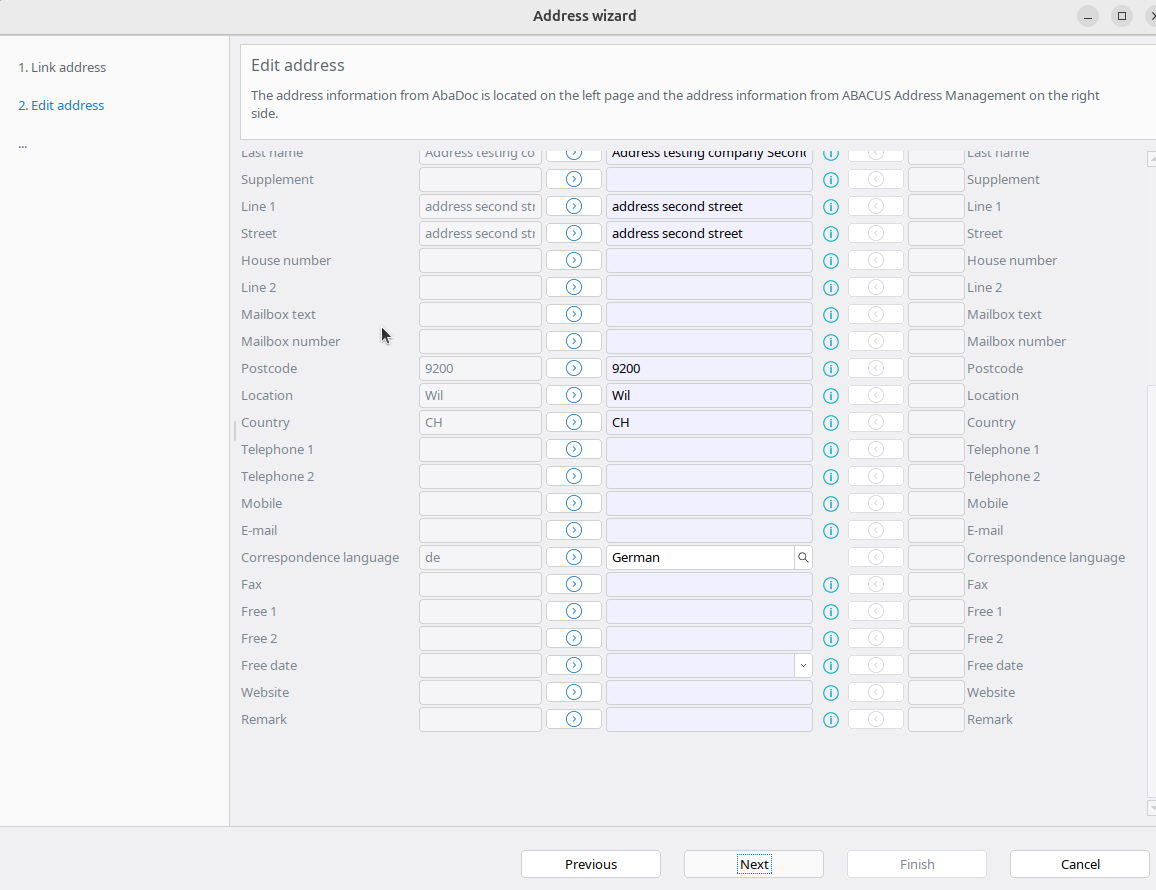
- Map(edit) your invoice address
Shipping & Invoice address mapping
| Link address | Edit address | Link contact | Edit contact | Same on invoice |
|---|---|---|---|---|
 |  |  |  |  |
Result
The result should look like (now marked green):
In Shopware:
- Go to your Shopware and run the webwirkung.abacus.subscription.shopper task to map address IDs (See here how)
- Go to «Customers» and find your shoppwe
- In the addresses you should see the custom field filled with the abacus address ID. This ID is different for every address:
| First address with different ID | Second address with different ID |
|---|---|
 |  |
Final verification
- Login as the shopper in Storefront
- Place a new order
- Go back to Abacus -> E-business -> Edit e-documents(API)(J15)
- Now all 3 addresses should be "green," which means our mapping works
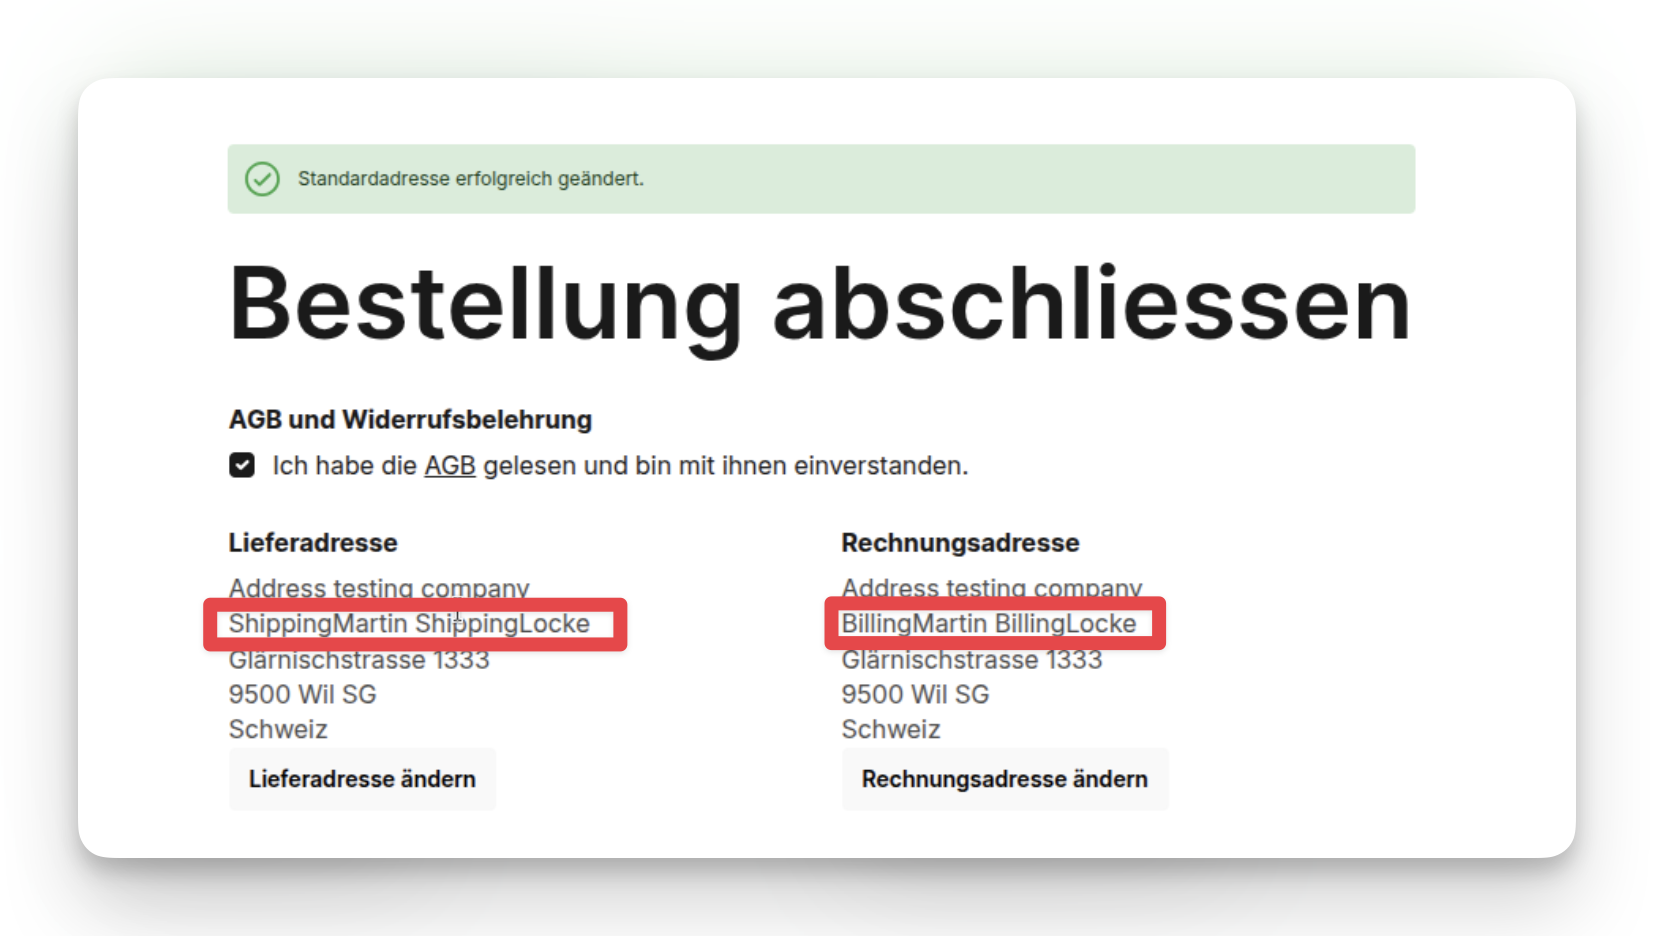
1.5 Order as existing customer with different contact persons
In Shopware:
- Go to «Customers» and find your customer
- Log in with the customer account
- Place an order with the same address and company name but different first and last names
In Abacus:
- Go back to Abacus > E-business > Edit e-documents(API)(J15)
- Find your order
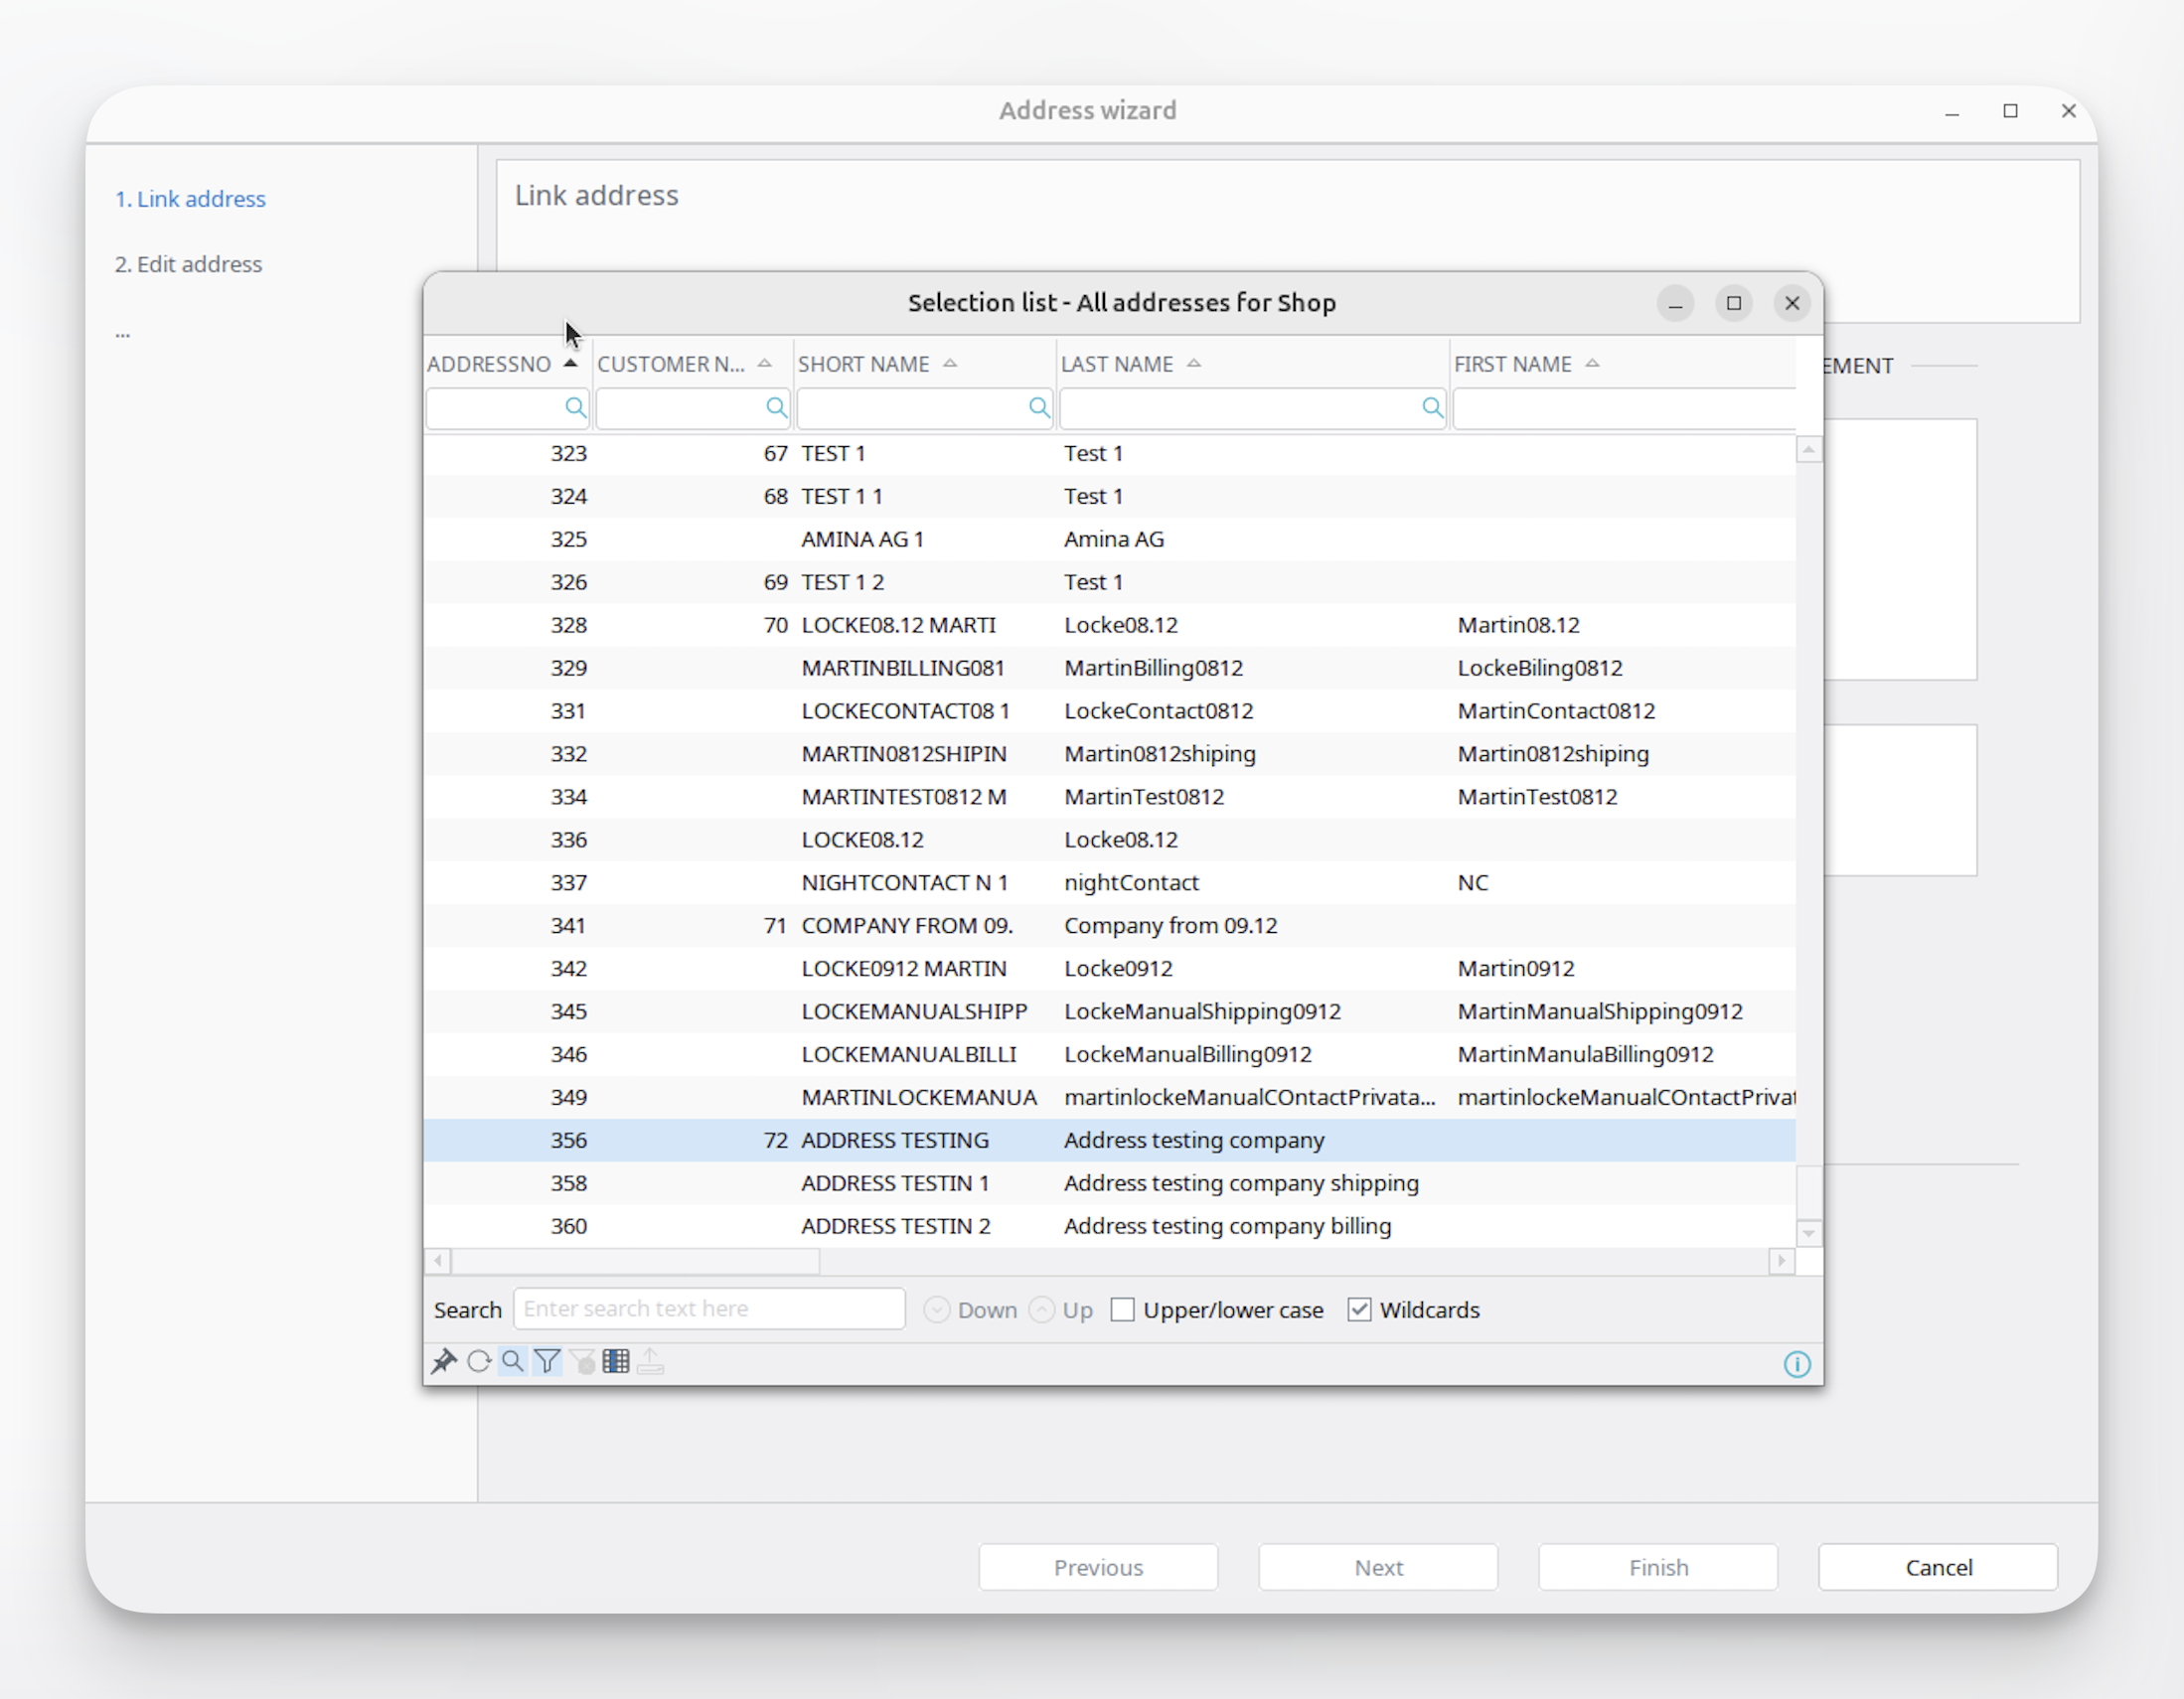
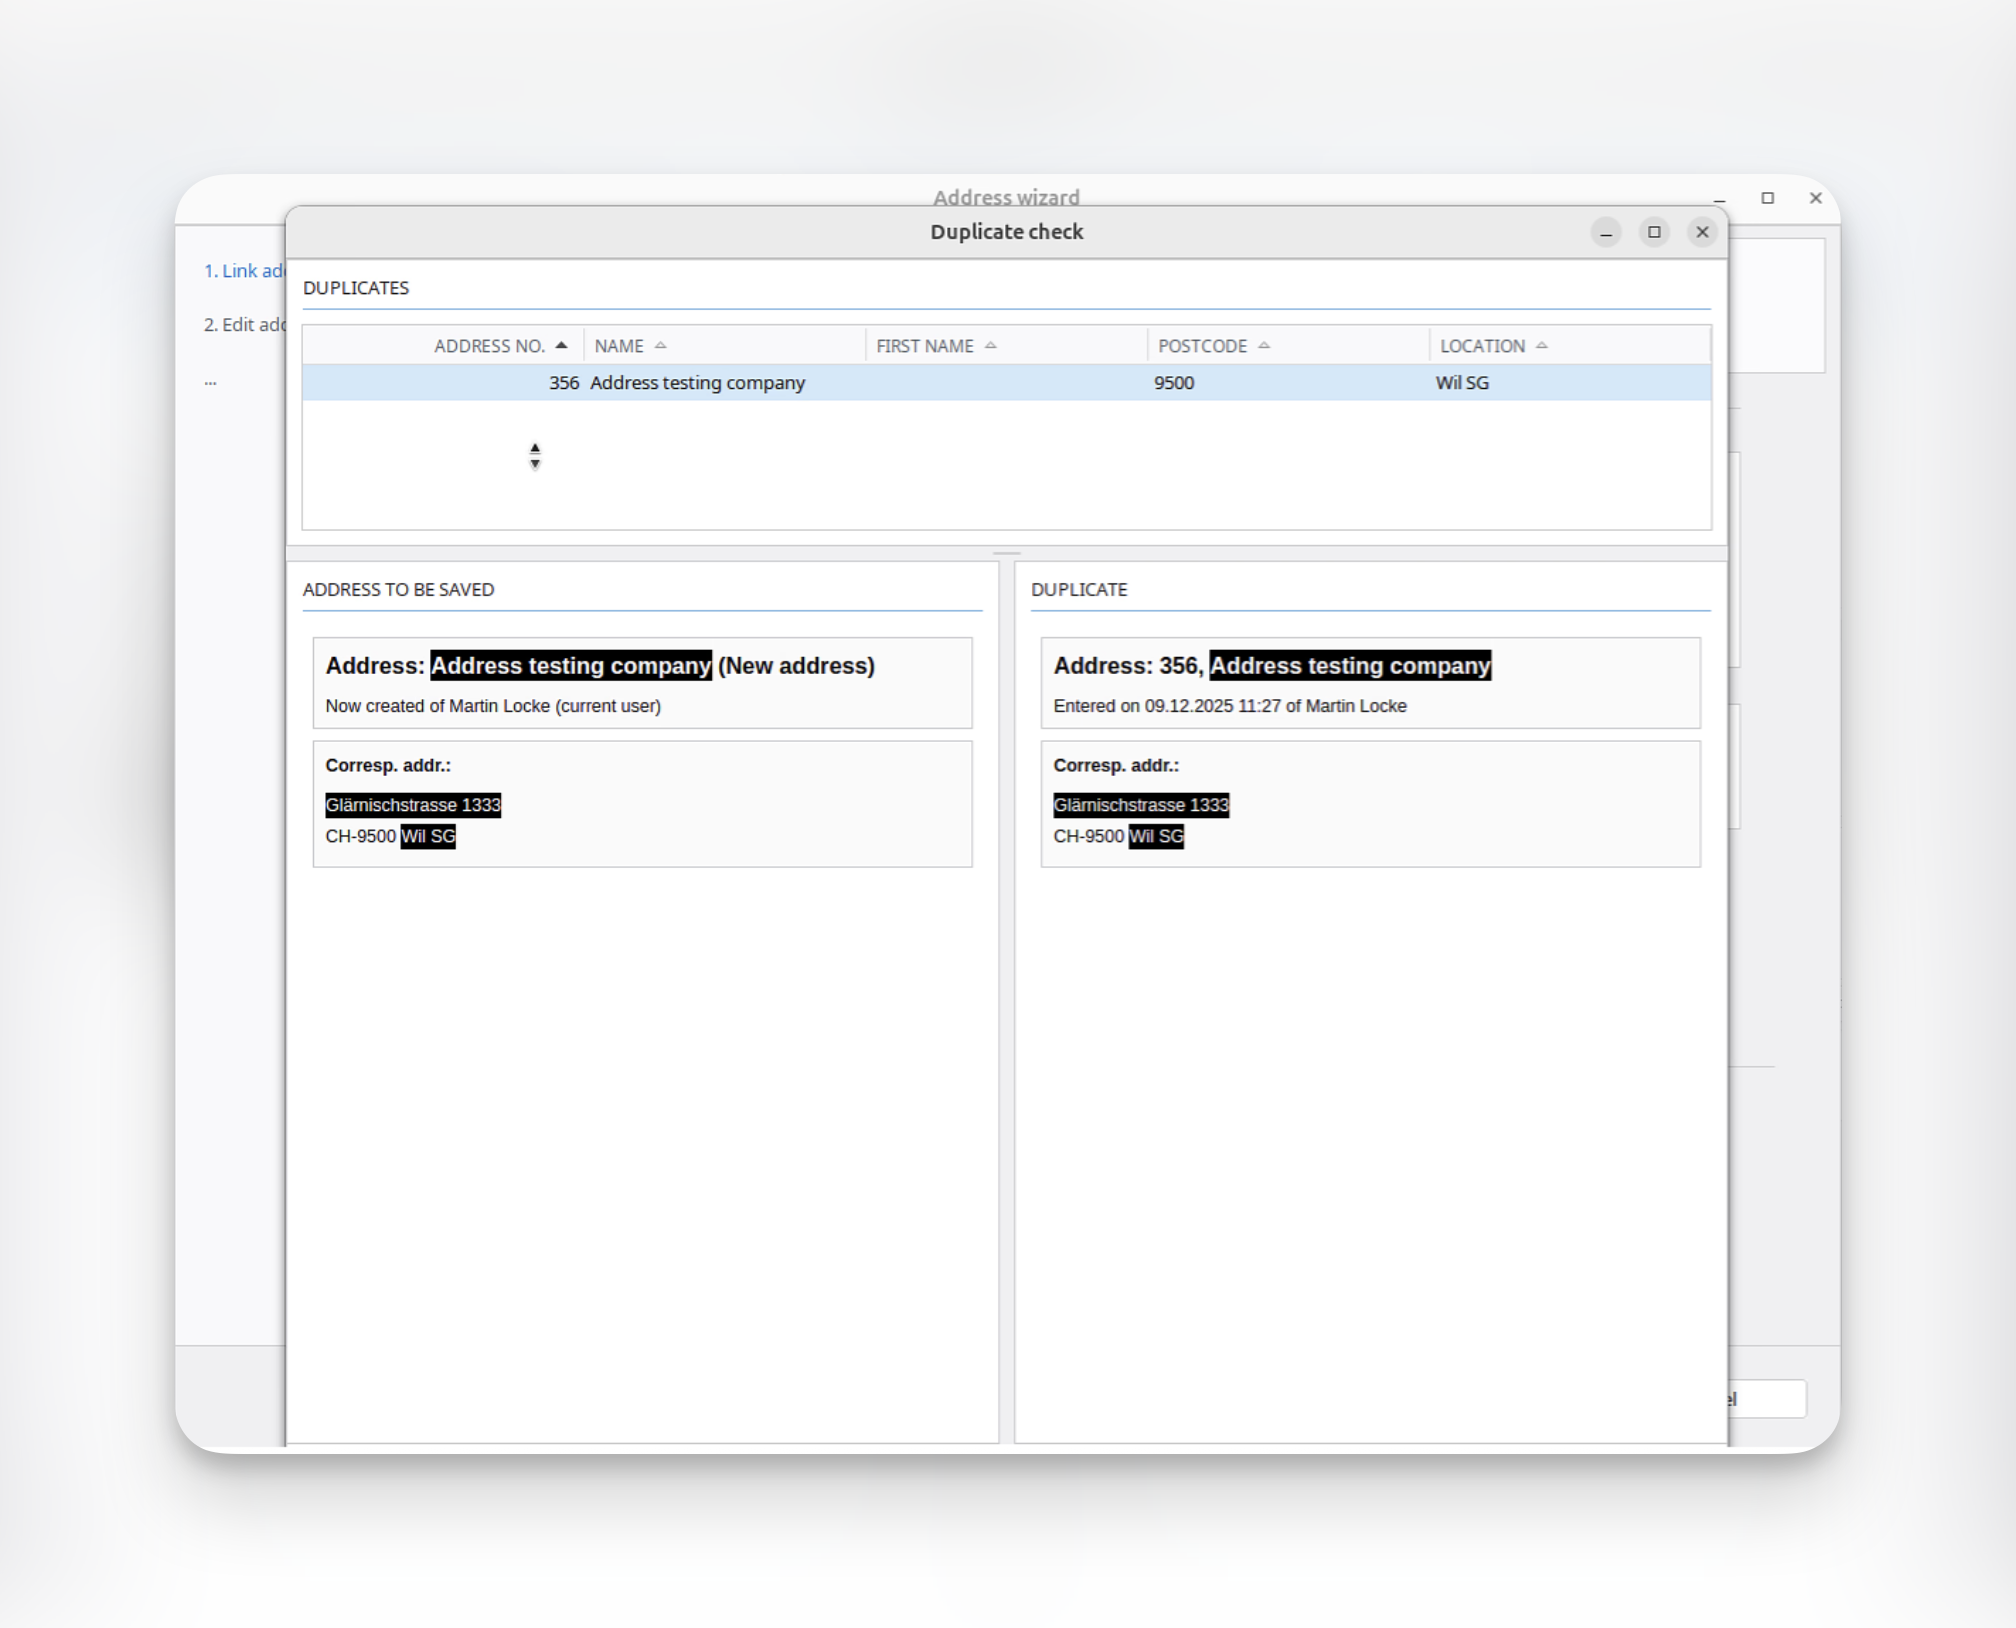
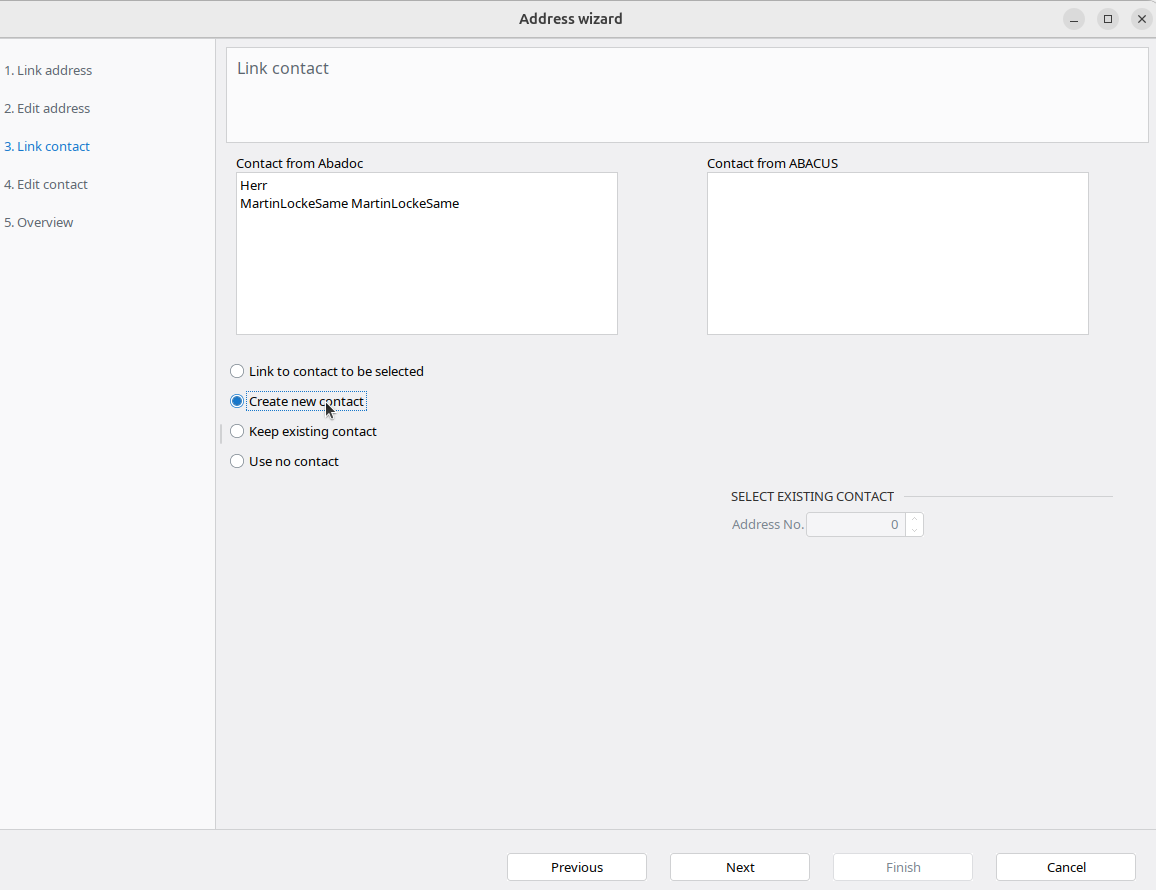
- Map(edit) your addresses. Here you have to choose your address from the list or Abacus will find duplicate addresses
| Select address in list | Duplicate address warning |
|---|---|
 |  |
| Link address | Select in list | Link contact | Edit contact | Same on invoice |
|---|---|---|---|---|
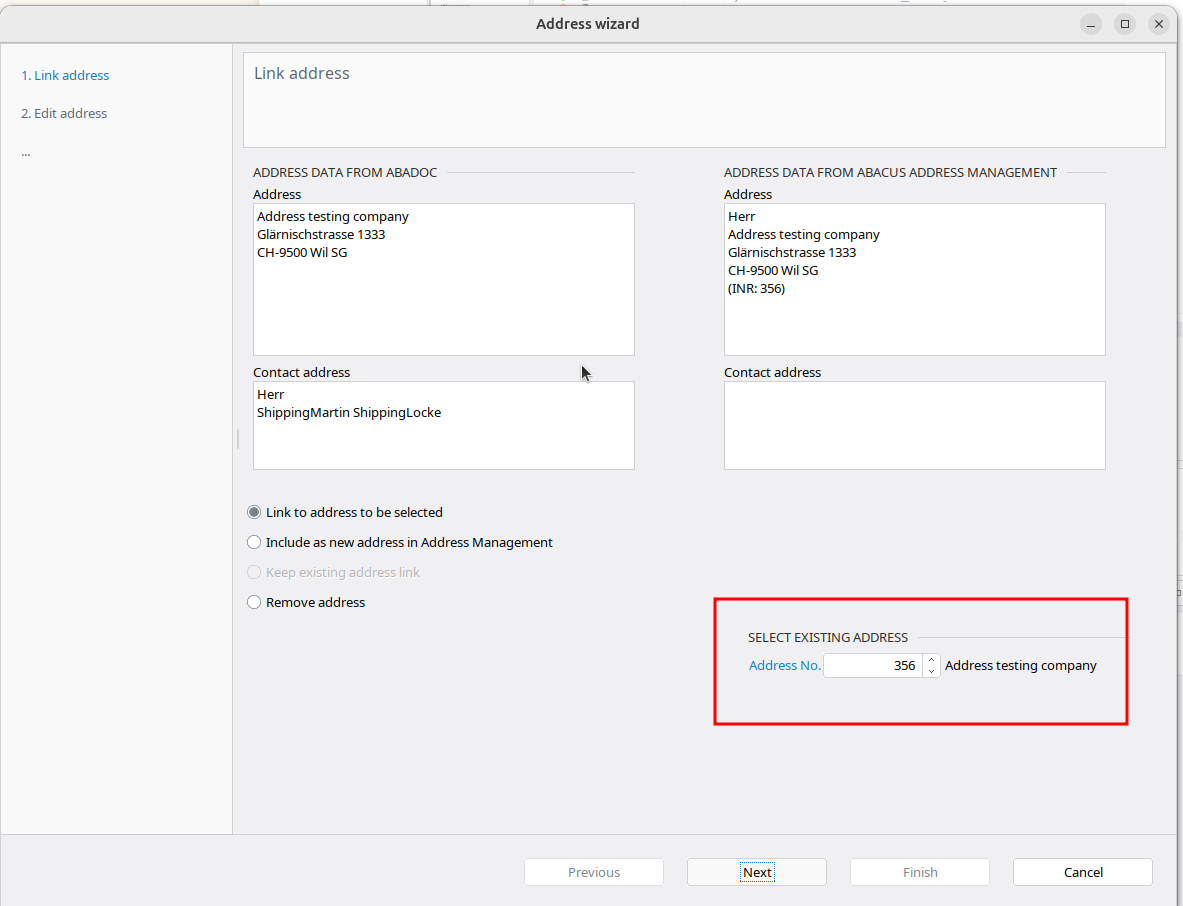 | 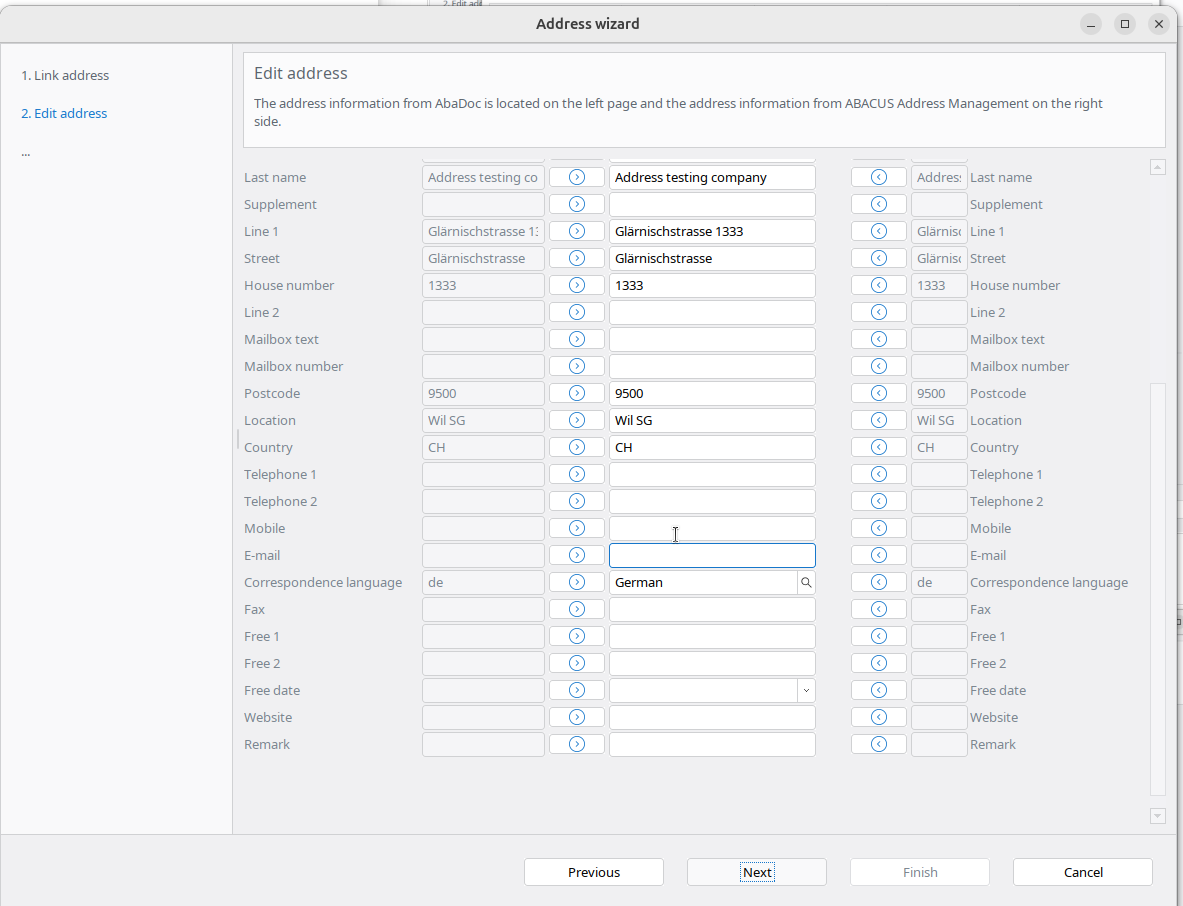 | 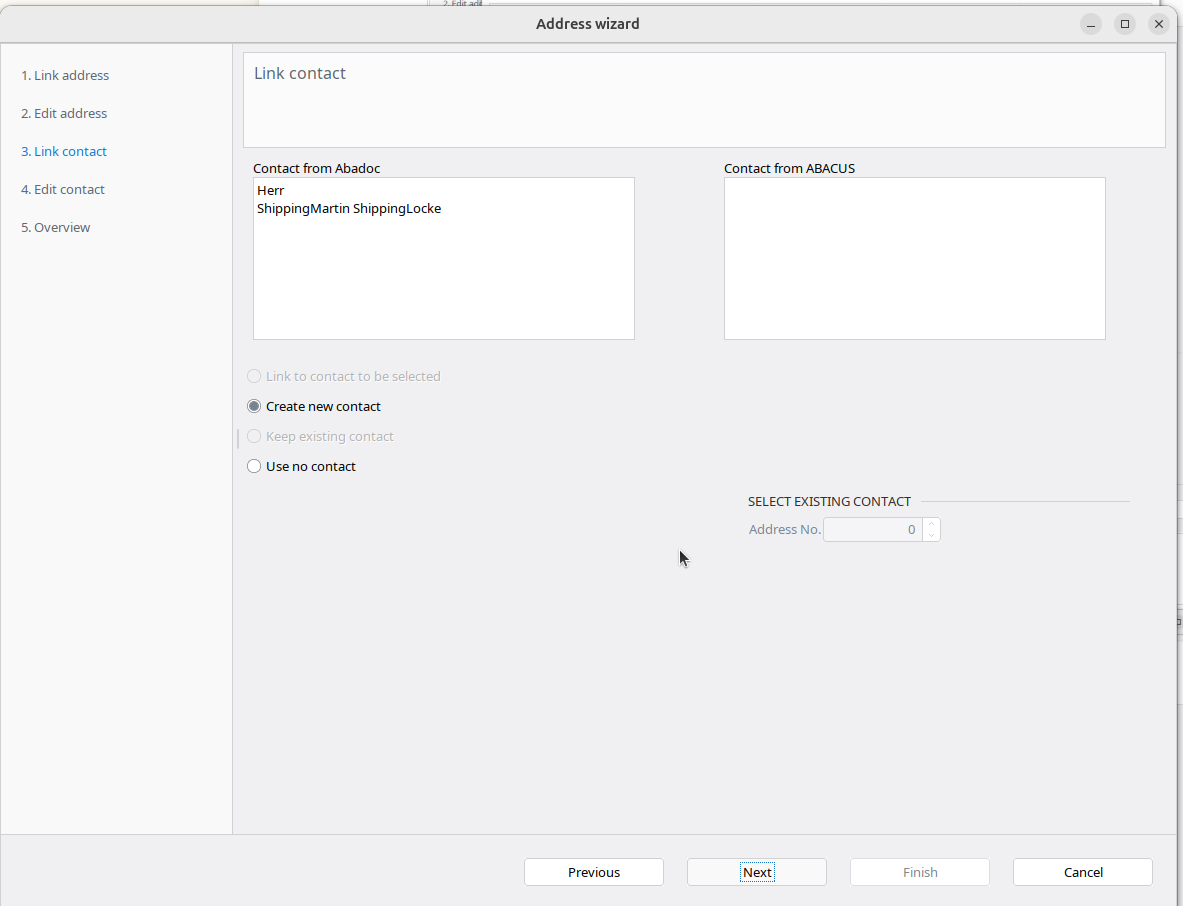 | 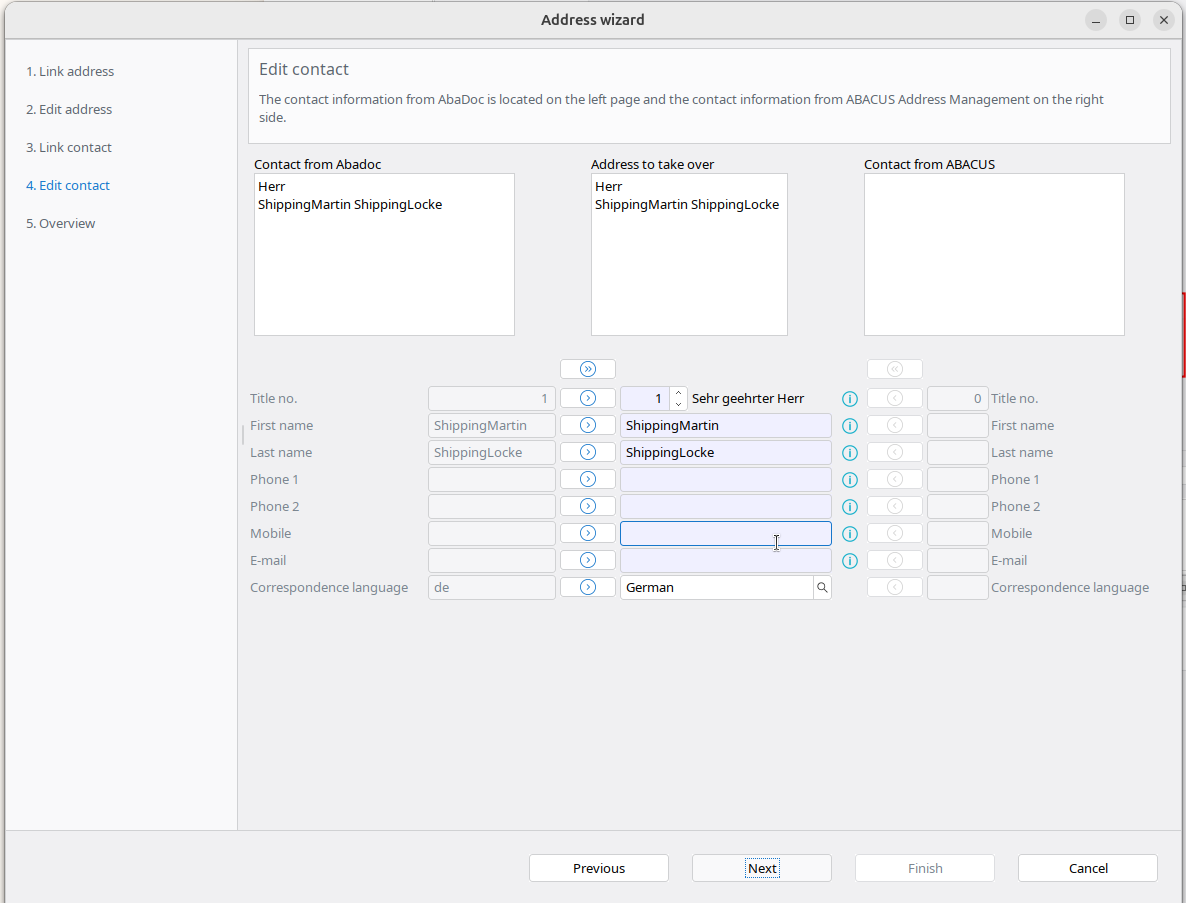 | 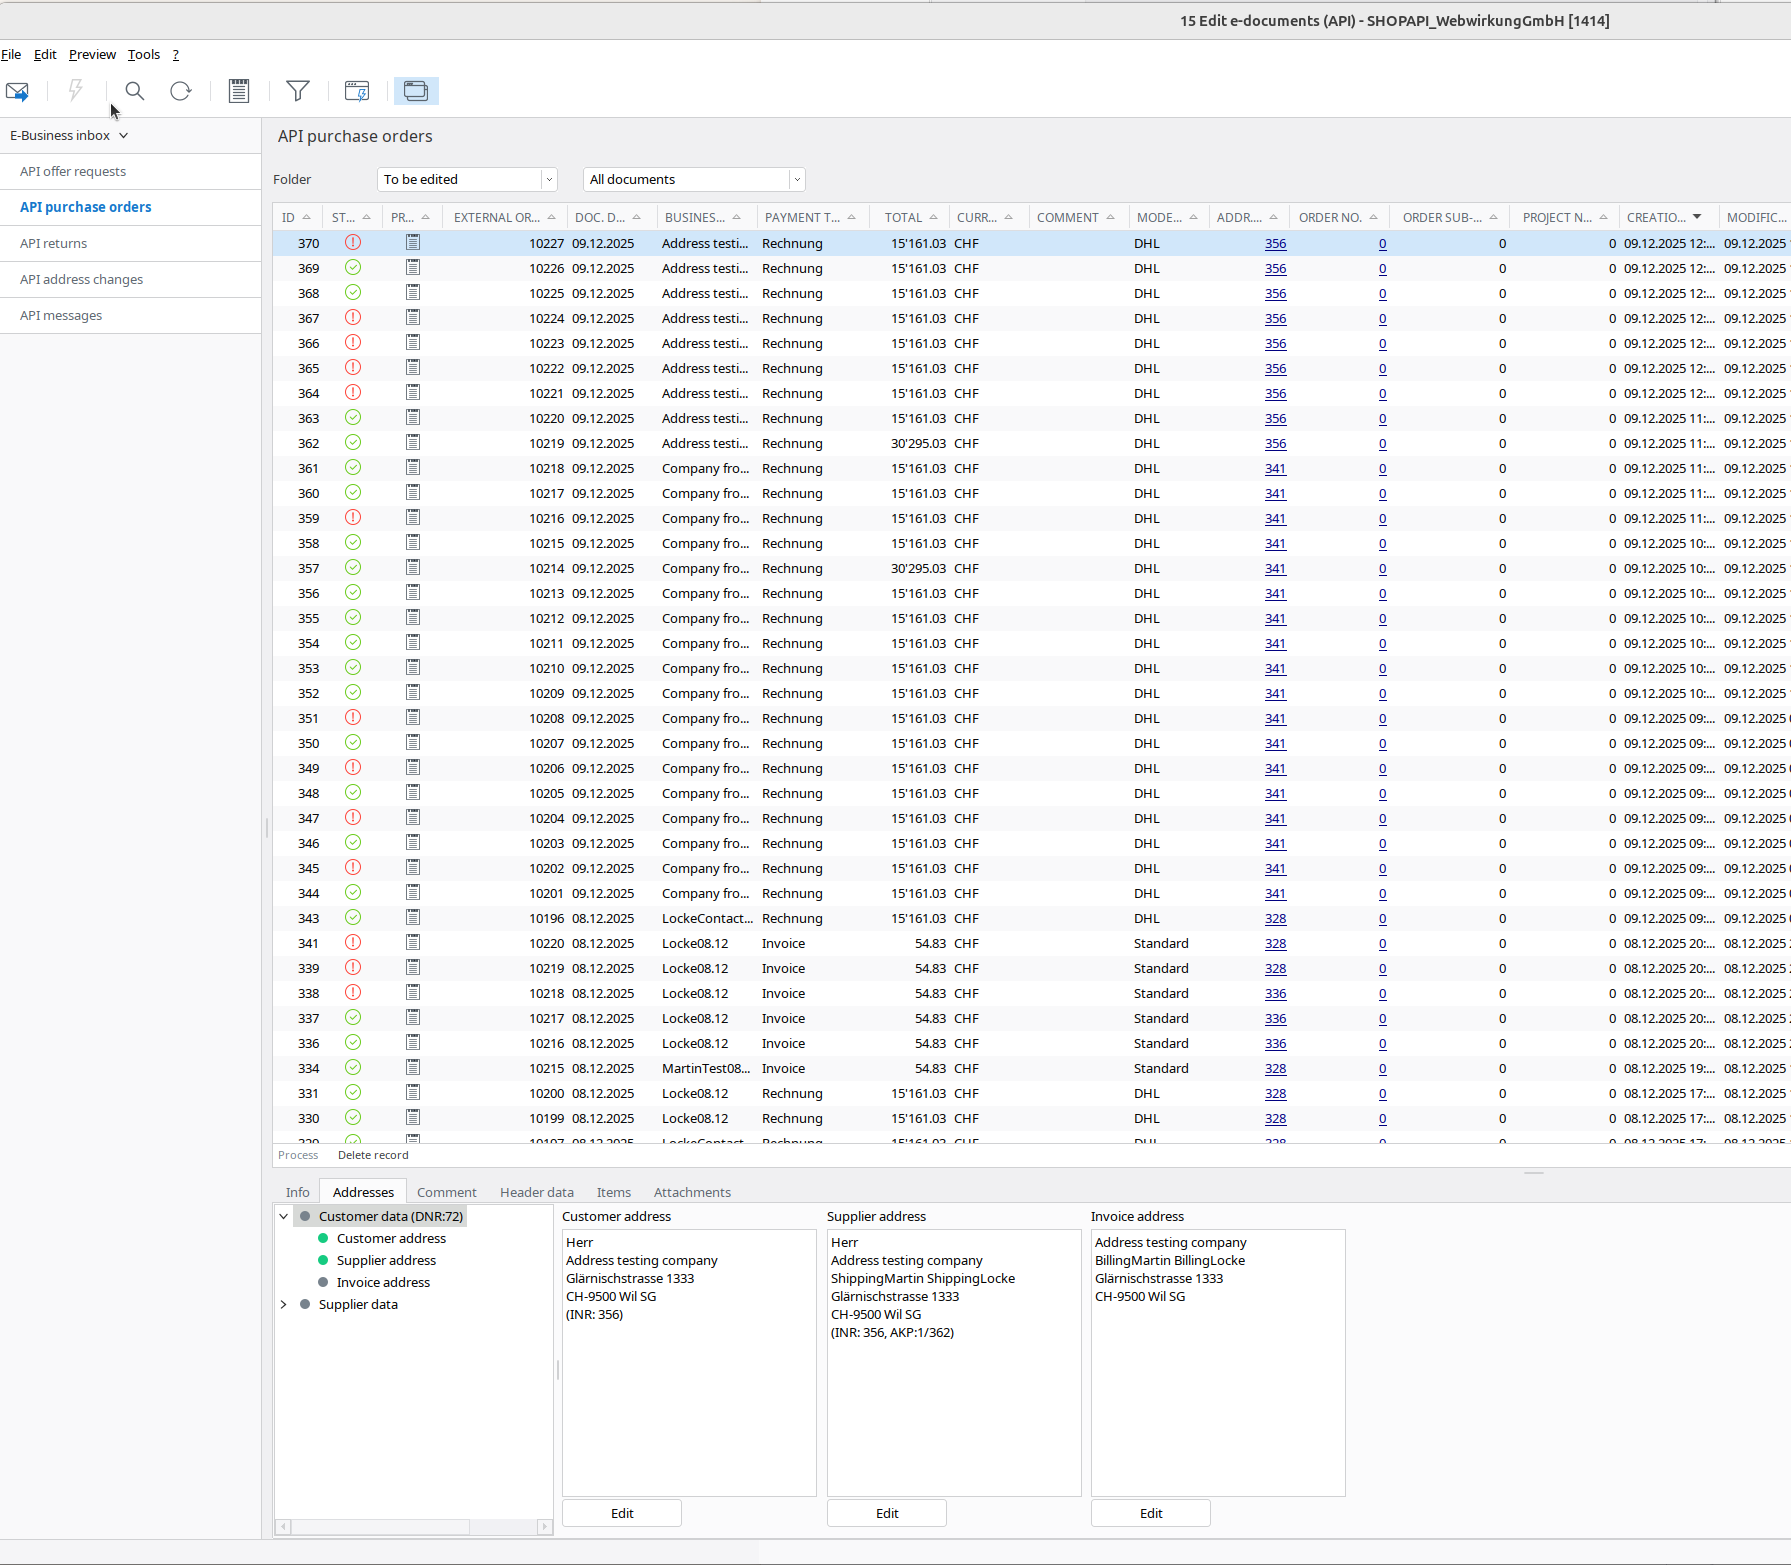 |
Result
The result should look like:
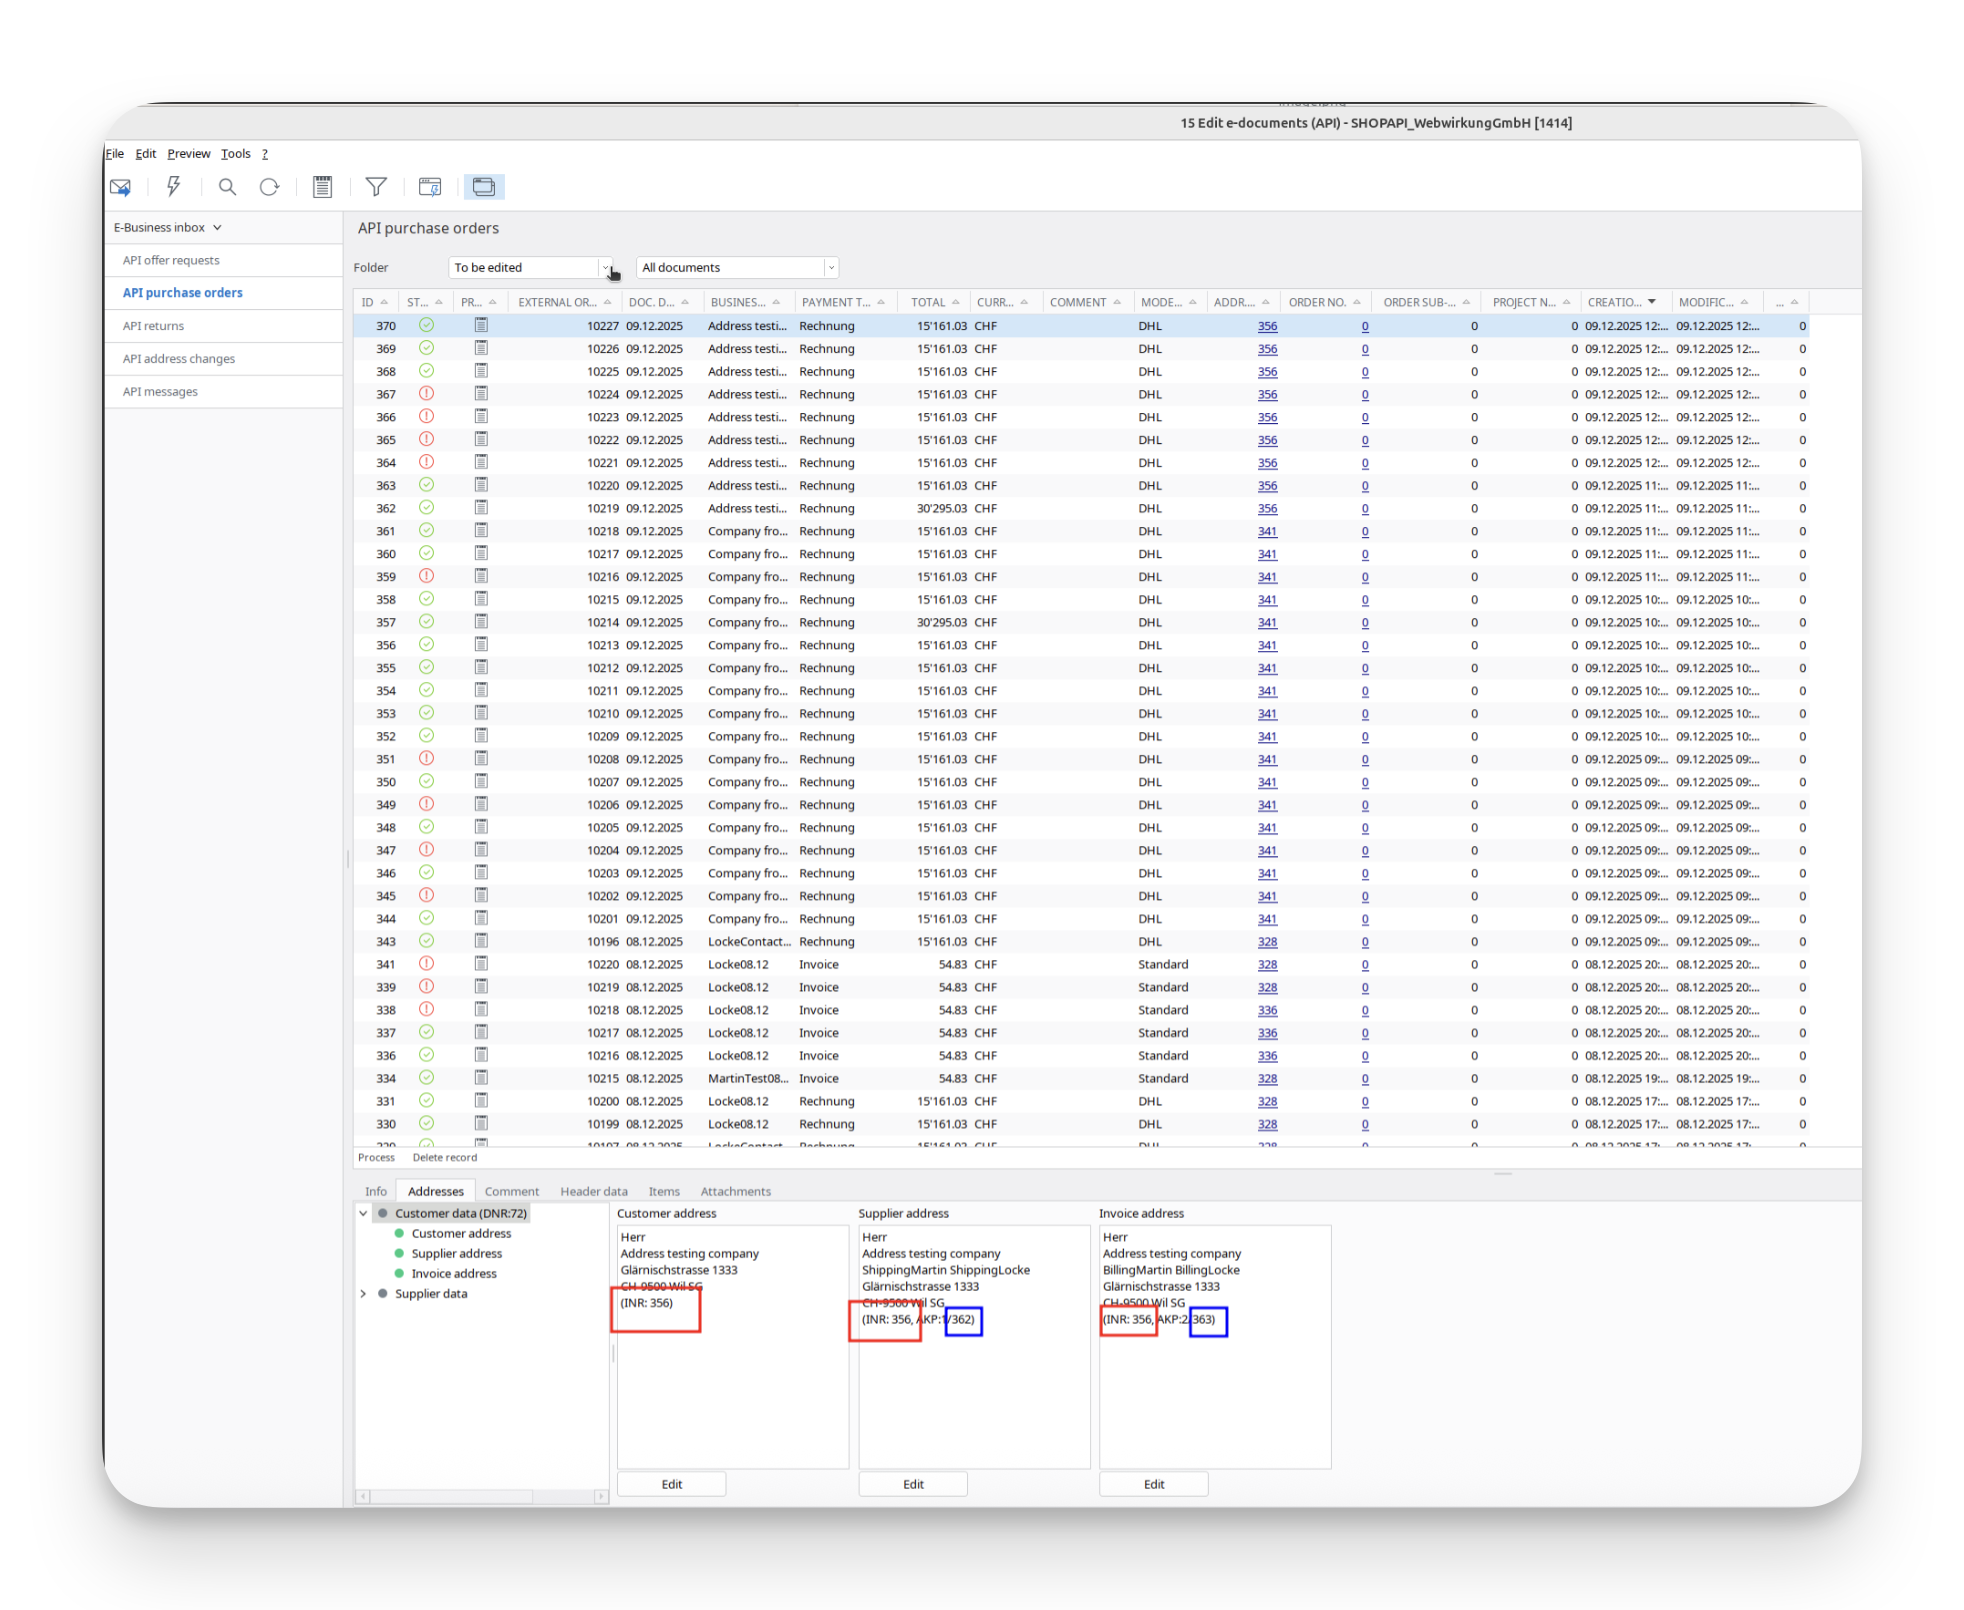
As you see address ID is the same, butthe the contact ID is different!
In Shopware:
- Go to your Shopware and run the webwirkung.abacus.subscription.shopper task (See here how)
- Go to the «Customers» and find your shopper
- In the addresses you should see the custom field filled with the abacus address ID. This ID is same for every address:
| First address same ID | Second address same ID |
|---|---|
 |  |
Final verification
- Login as the shopper in Storefront
- Place a new order
- Go back to Abacus > E-business > Edit e-documents(API)(J15)
- Now all addresses should be "green," which means our mapping works
1.6 Order as existing customer with different addresses and different contact
In Shopware:
- Go to «Customers» and find your customer
- Log in with the customer account
- Place an order with a different address and different names
In Abacus:
- Go back to Abacus > E-business > Edit e-documents(API)(J15)
- Find your order
- Map(edit) your shipping address
| Link address | Edit address | Link contact | Edit contact |
|---|---|---|---|
 |  |  |  |
- Same with an invoice address:
| Link address | Edit address | Link contact | Edit contact |
|---|---|---|---|
 |  |  |  |
Result
The result should look like:
In Shopware:
- Go to your Shopware and run the webwirkung.abacus.subscription.shopper task to map address IDs (See here how)
- Go to the «Customers» and find your shopper
- In the addresses you should see the custom field filled with the abacus address ID. This ID is different for every address:
Final verification
- Login as the shopper in Storefront
- Place a new order
- Go back to Abacus -> E-business -> Edit e-documents(API)(J15)
- Now all addresses should be "green," which means our mapping works

1.7 Order as existing customer with different addresses and types (private/business)
In Shopware:
- Go to «Customers» and find your customer
- Log in with the customer account
- Place an order with a different address and type (business or private)
In Abacus:
- Go back to Abacus > E-business > Edit e-documents(API)(J15)
- Find your order
- Map(edit) your shipping address
| Link address | Link contact | Edit contact |
|---|---|---|
 |  | 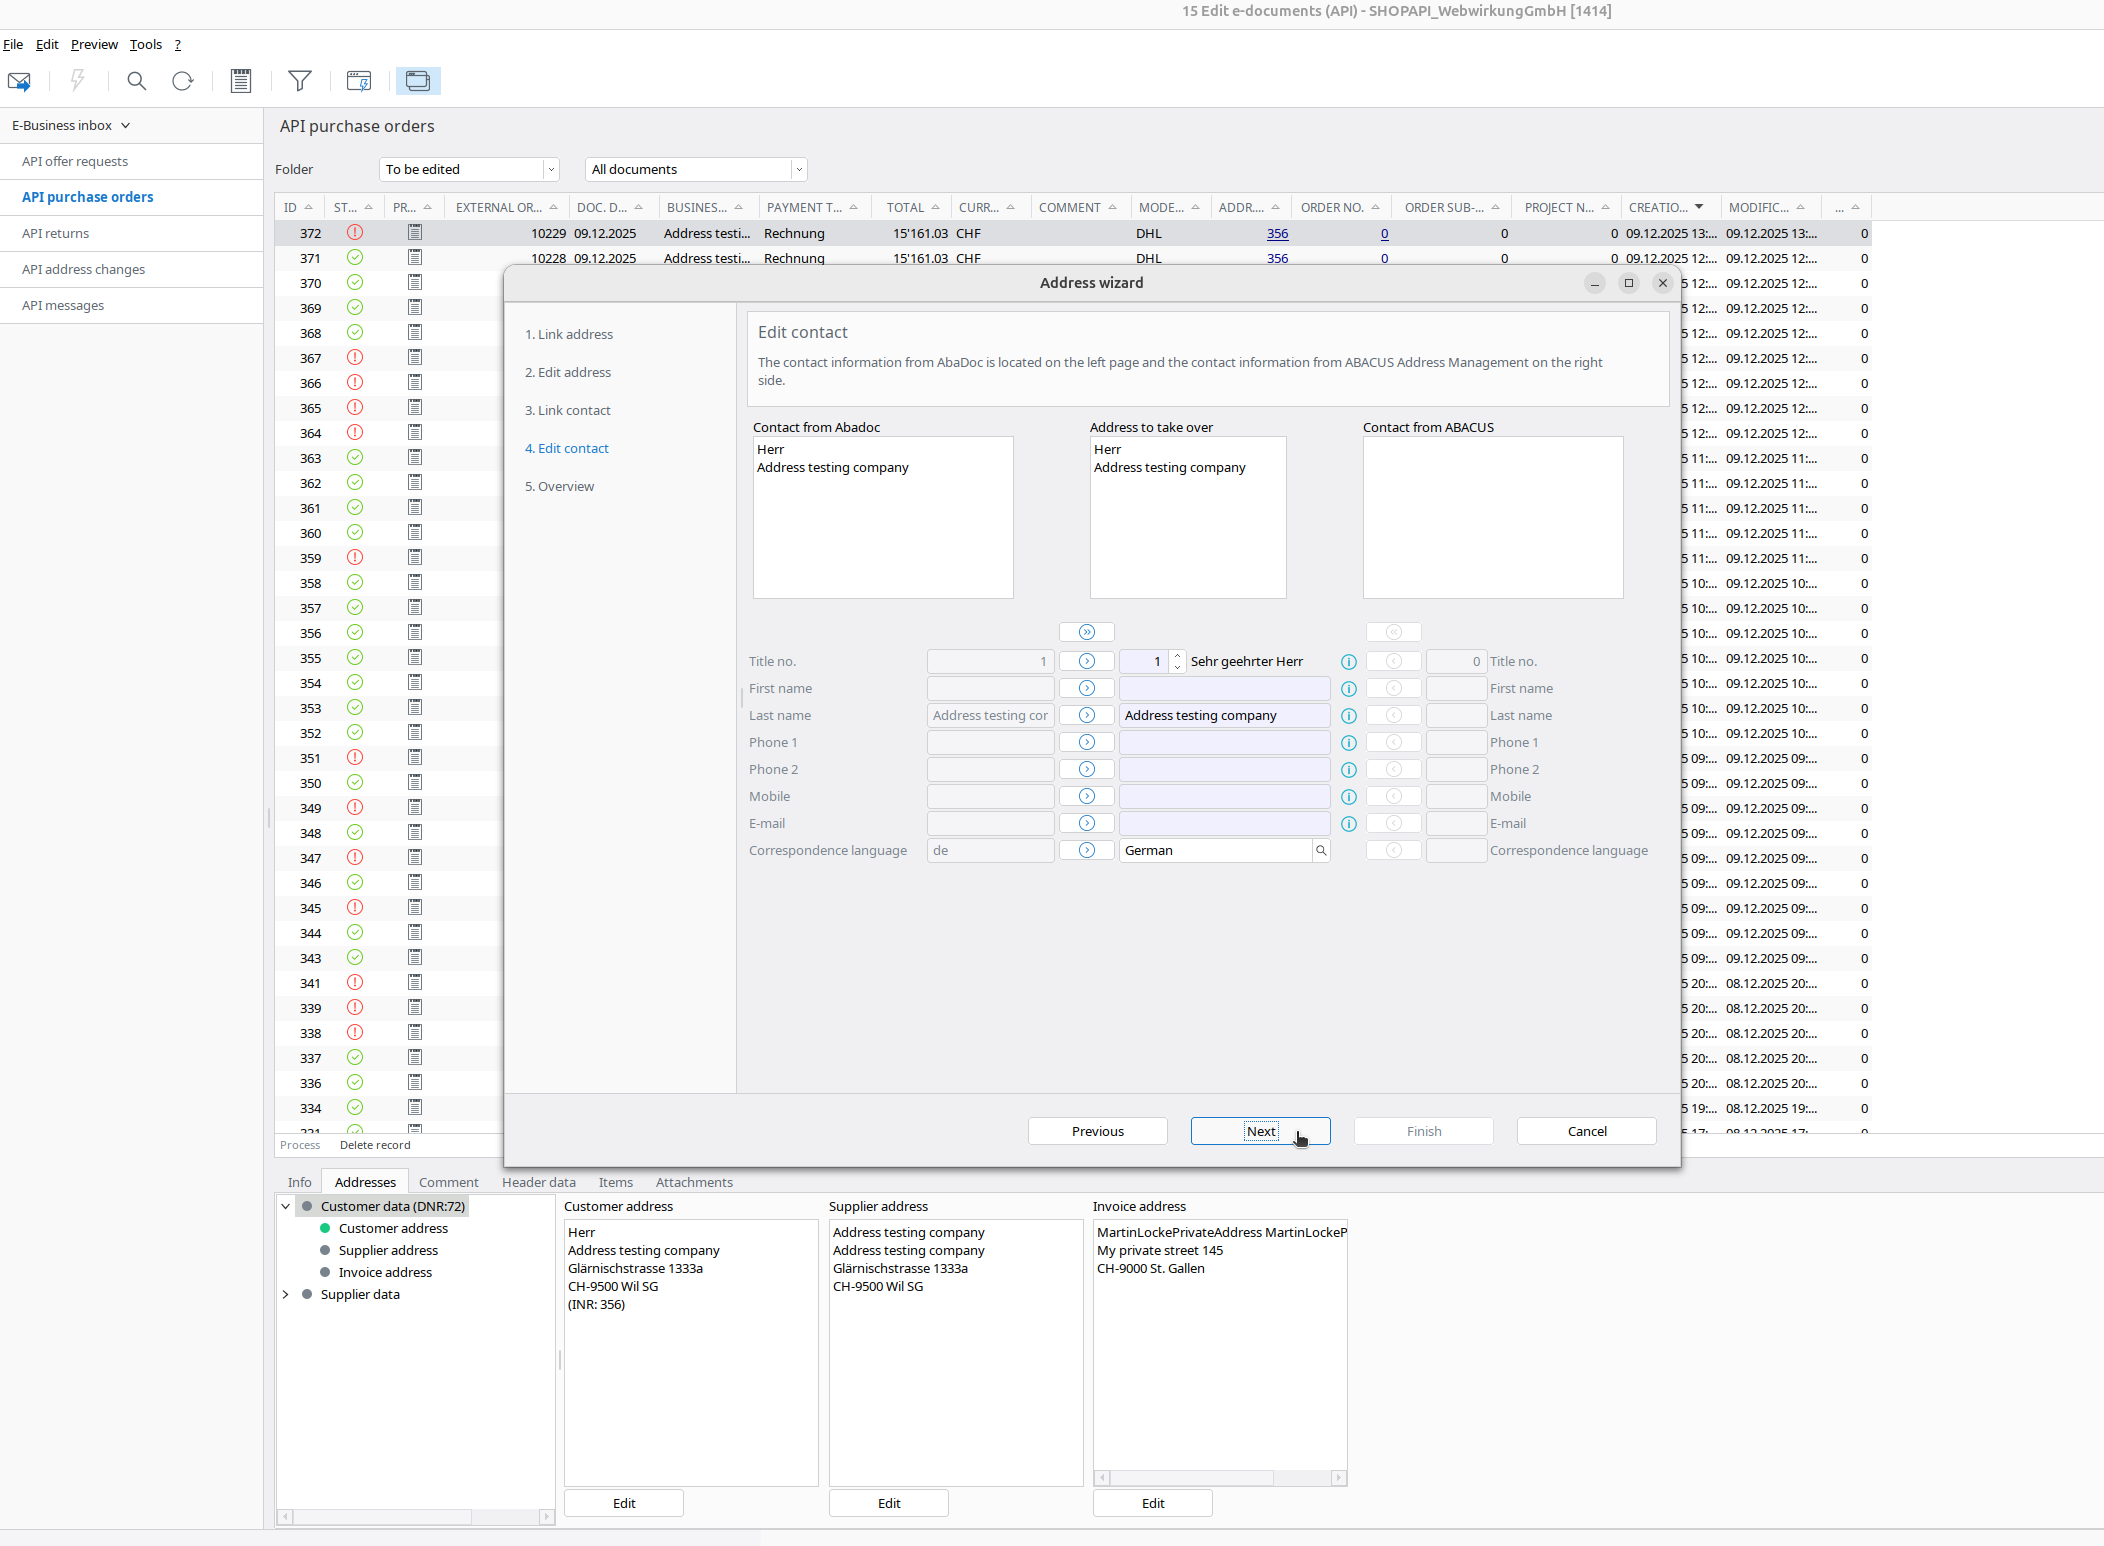 |
- Same with an invoice address - please note that in this example without a company = private
| Link address | Edit address | Link contact |
|---|---|---|
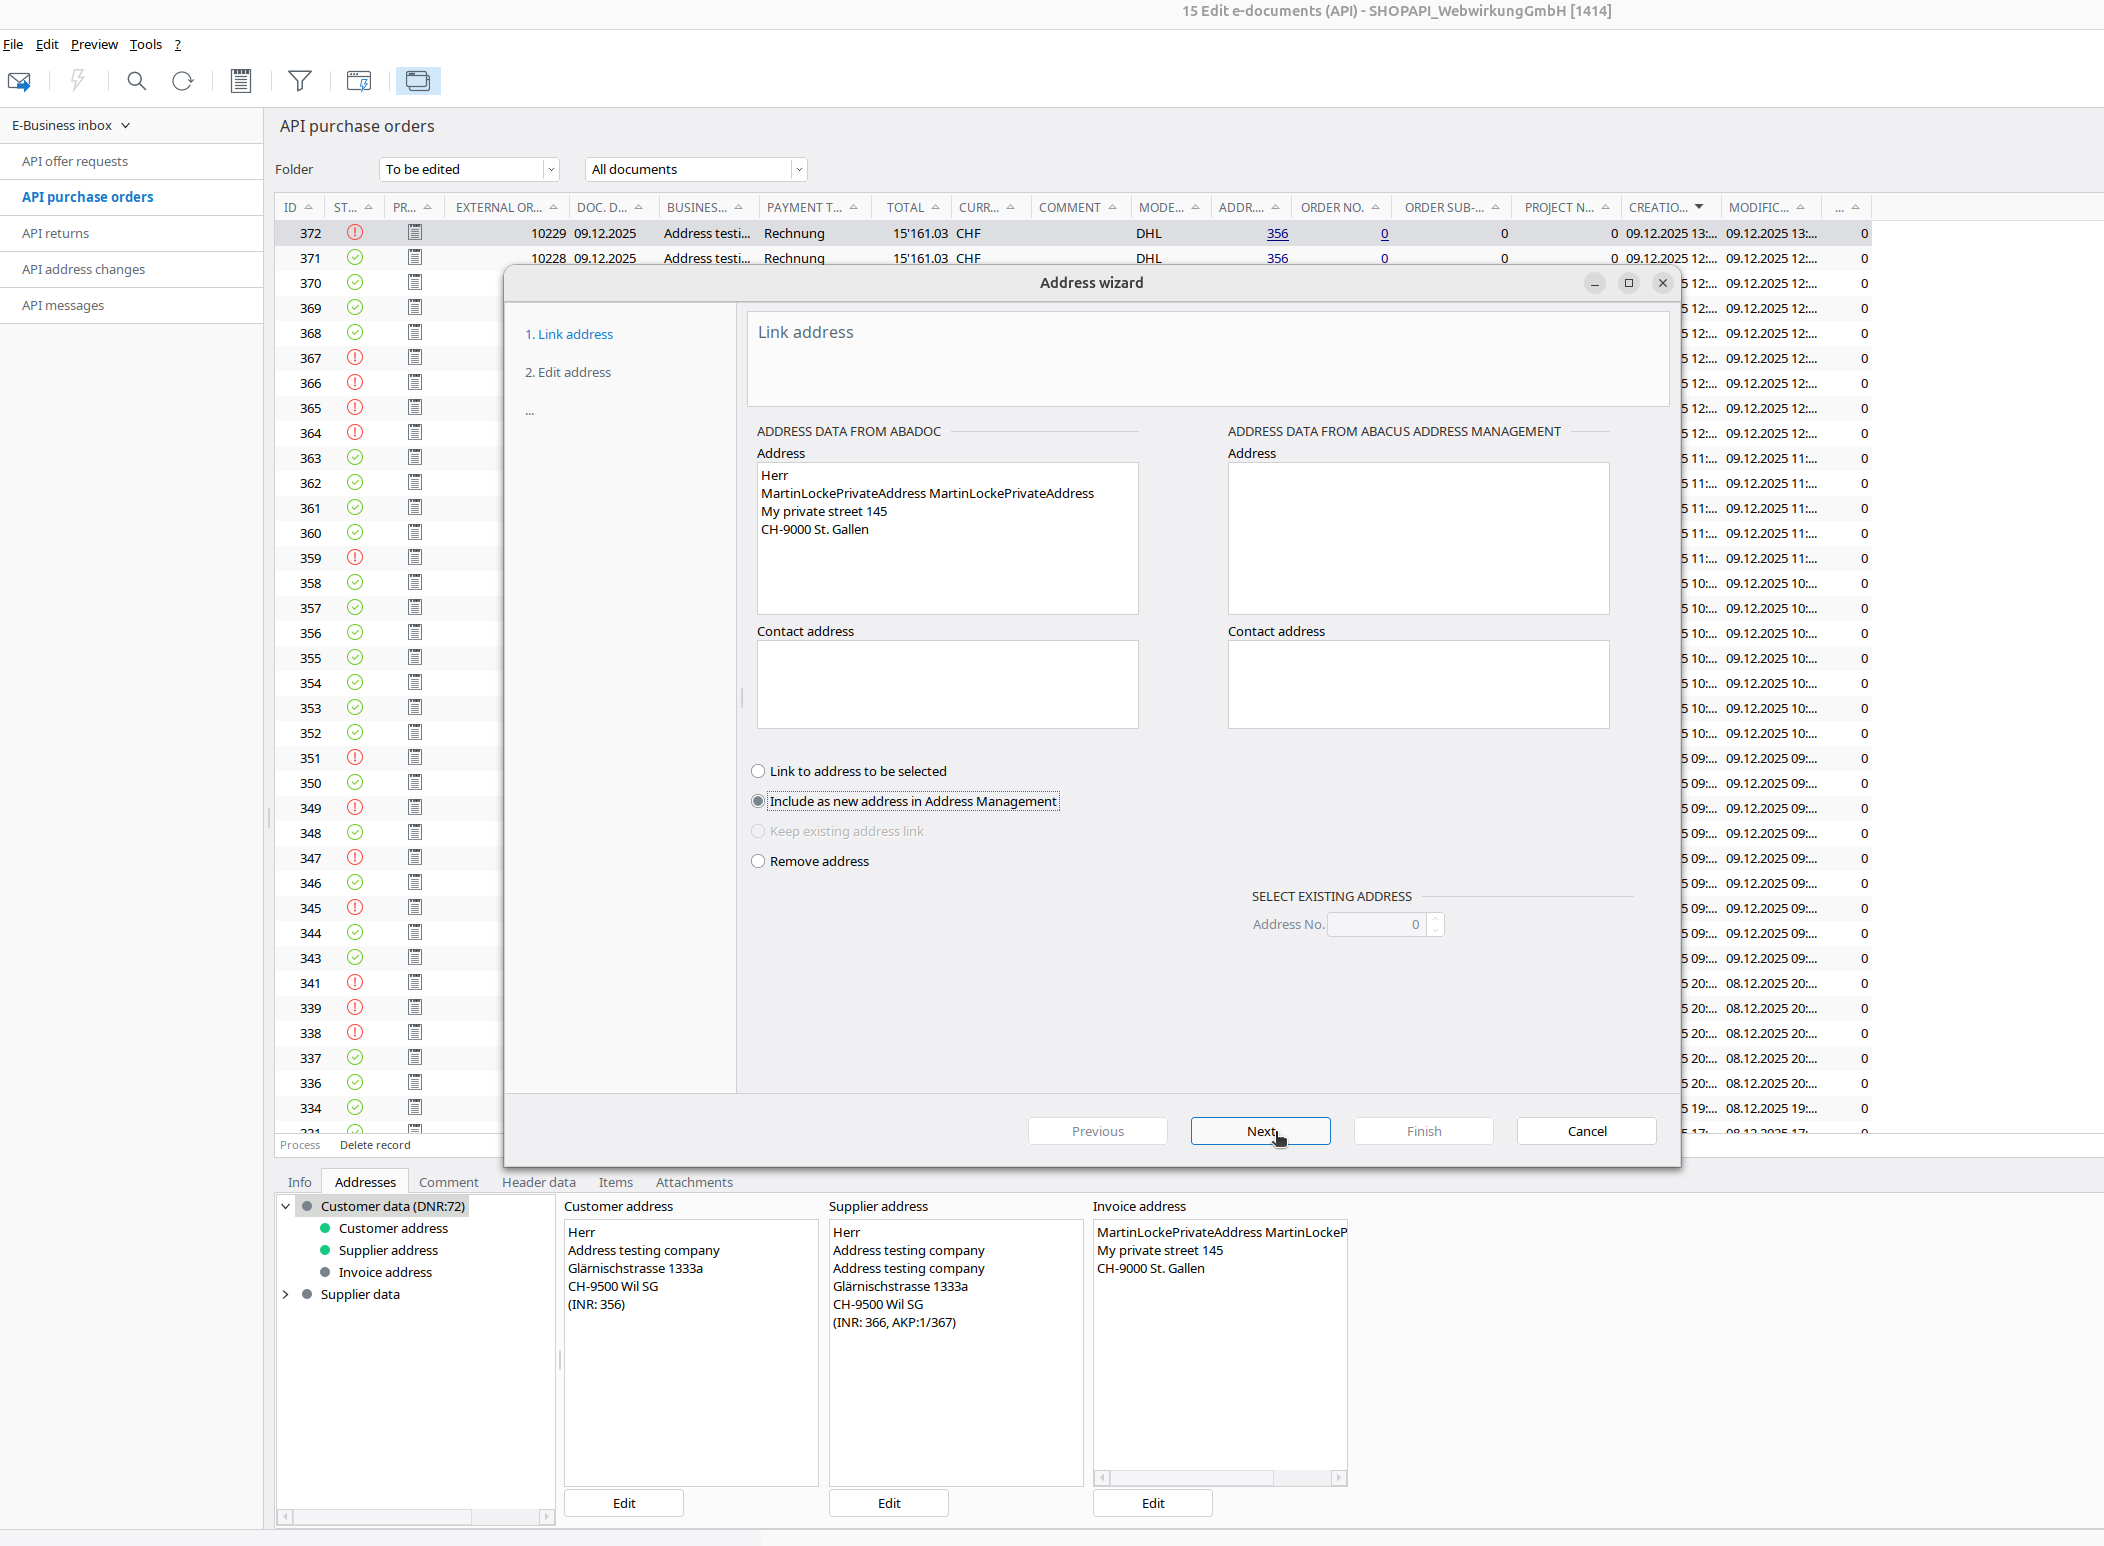 | 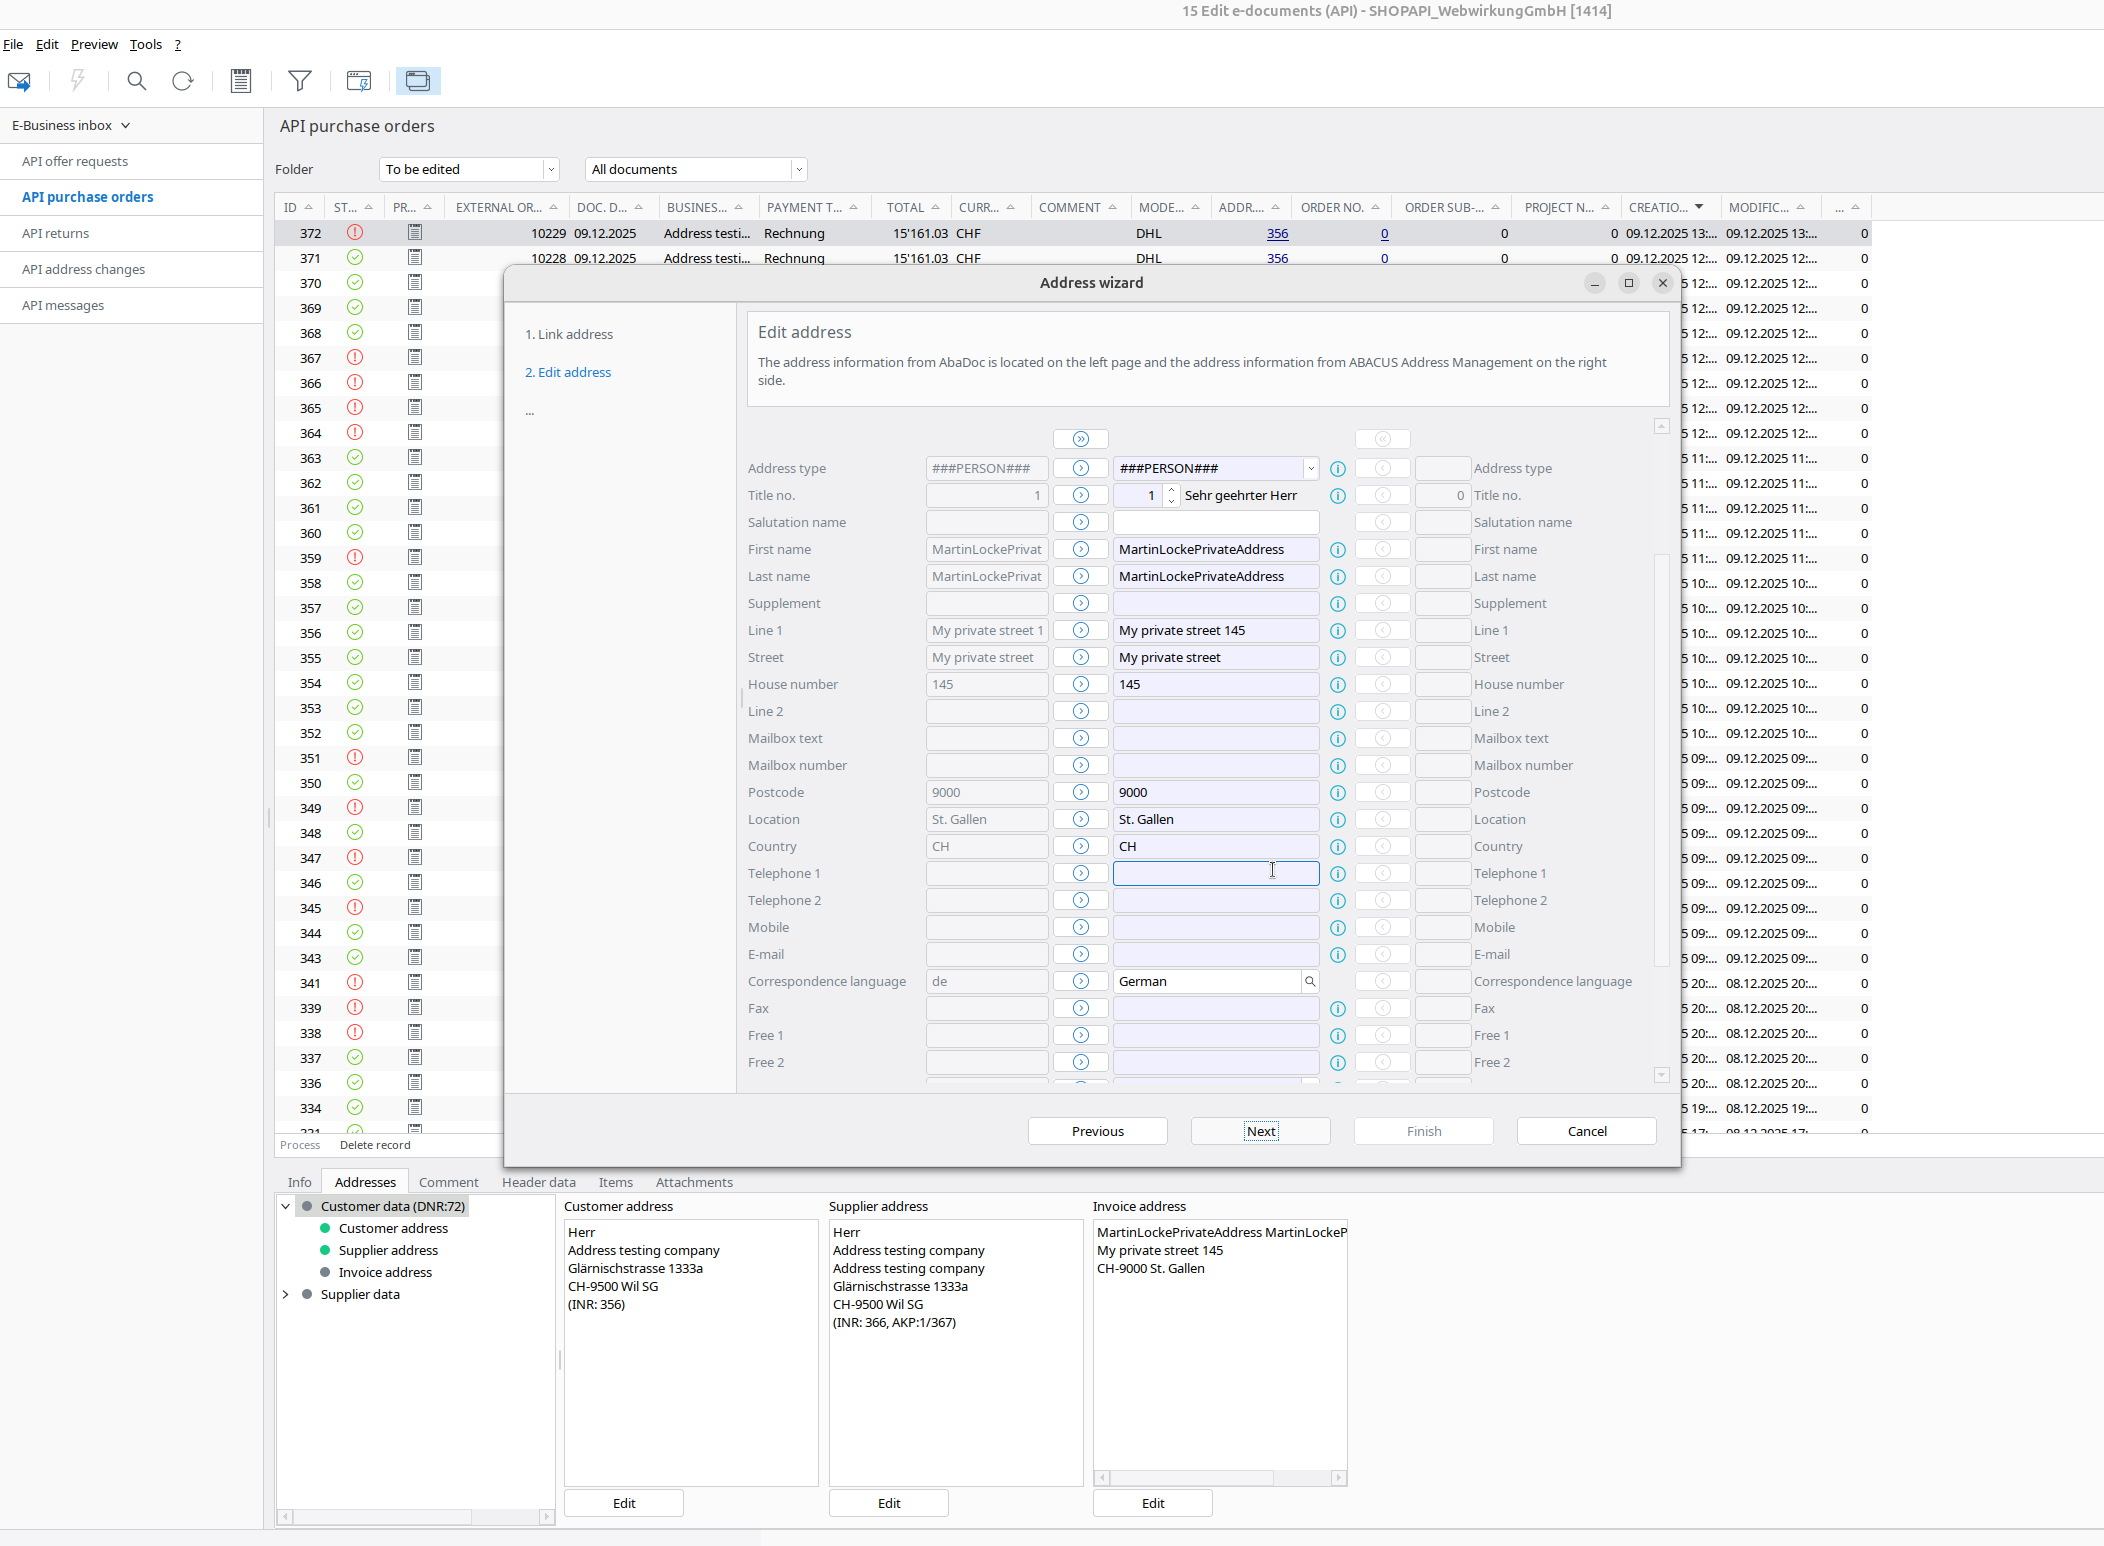 | 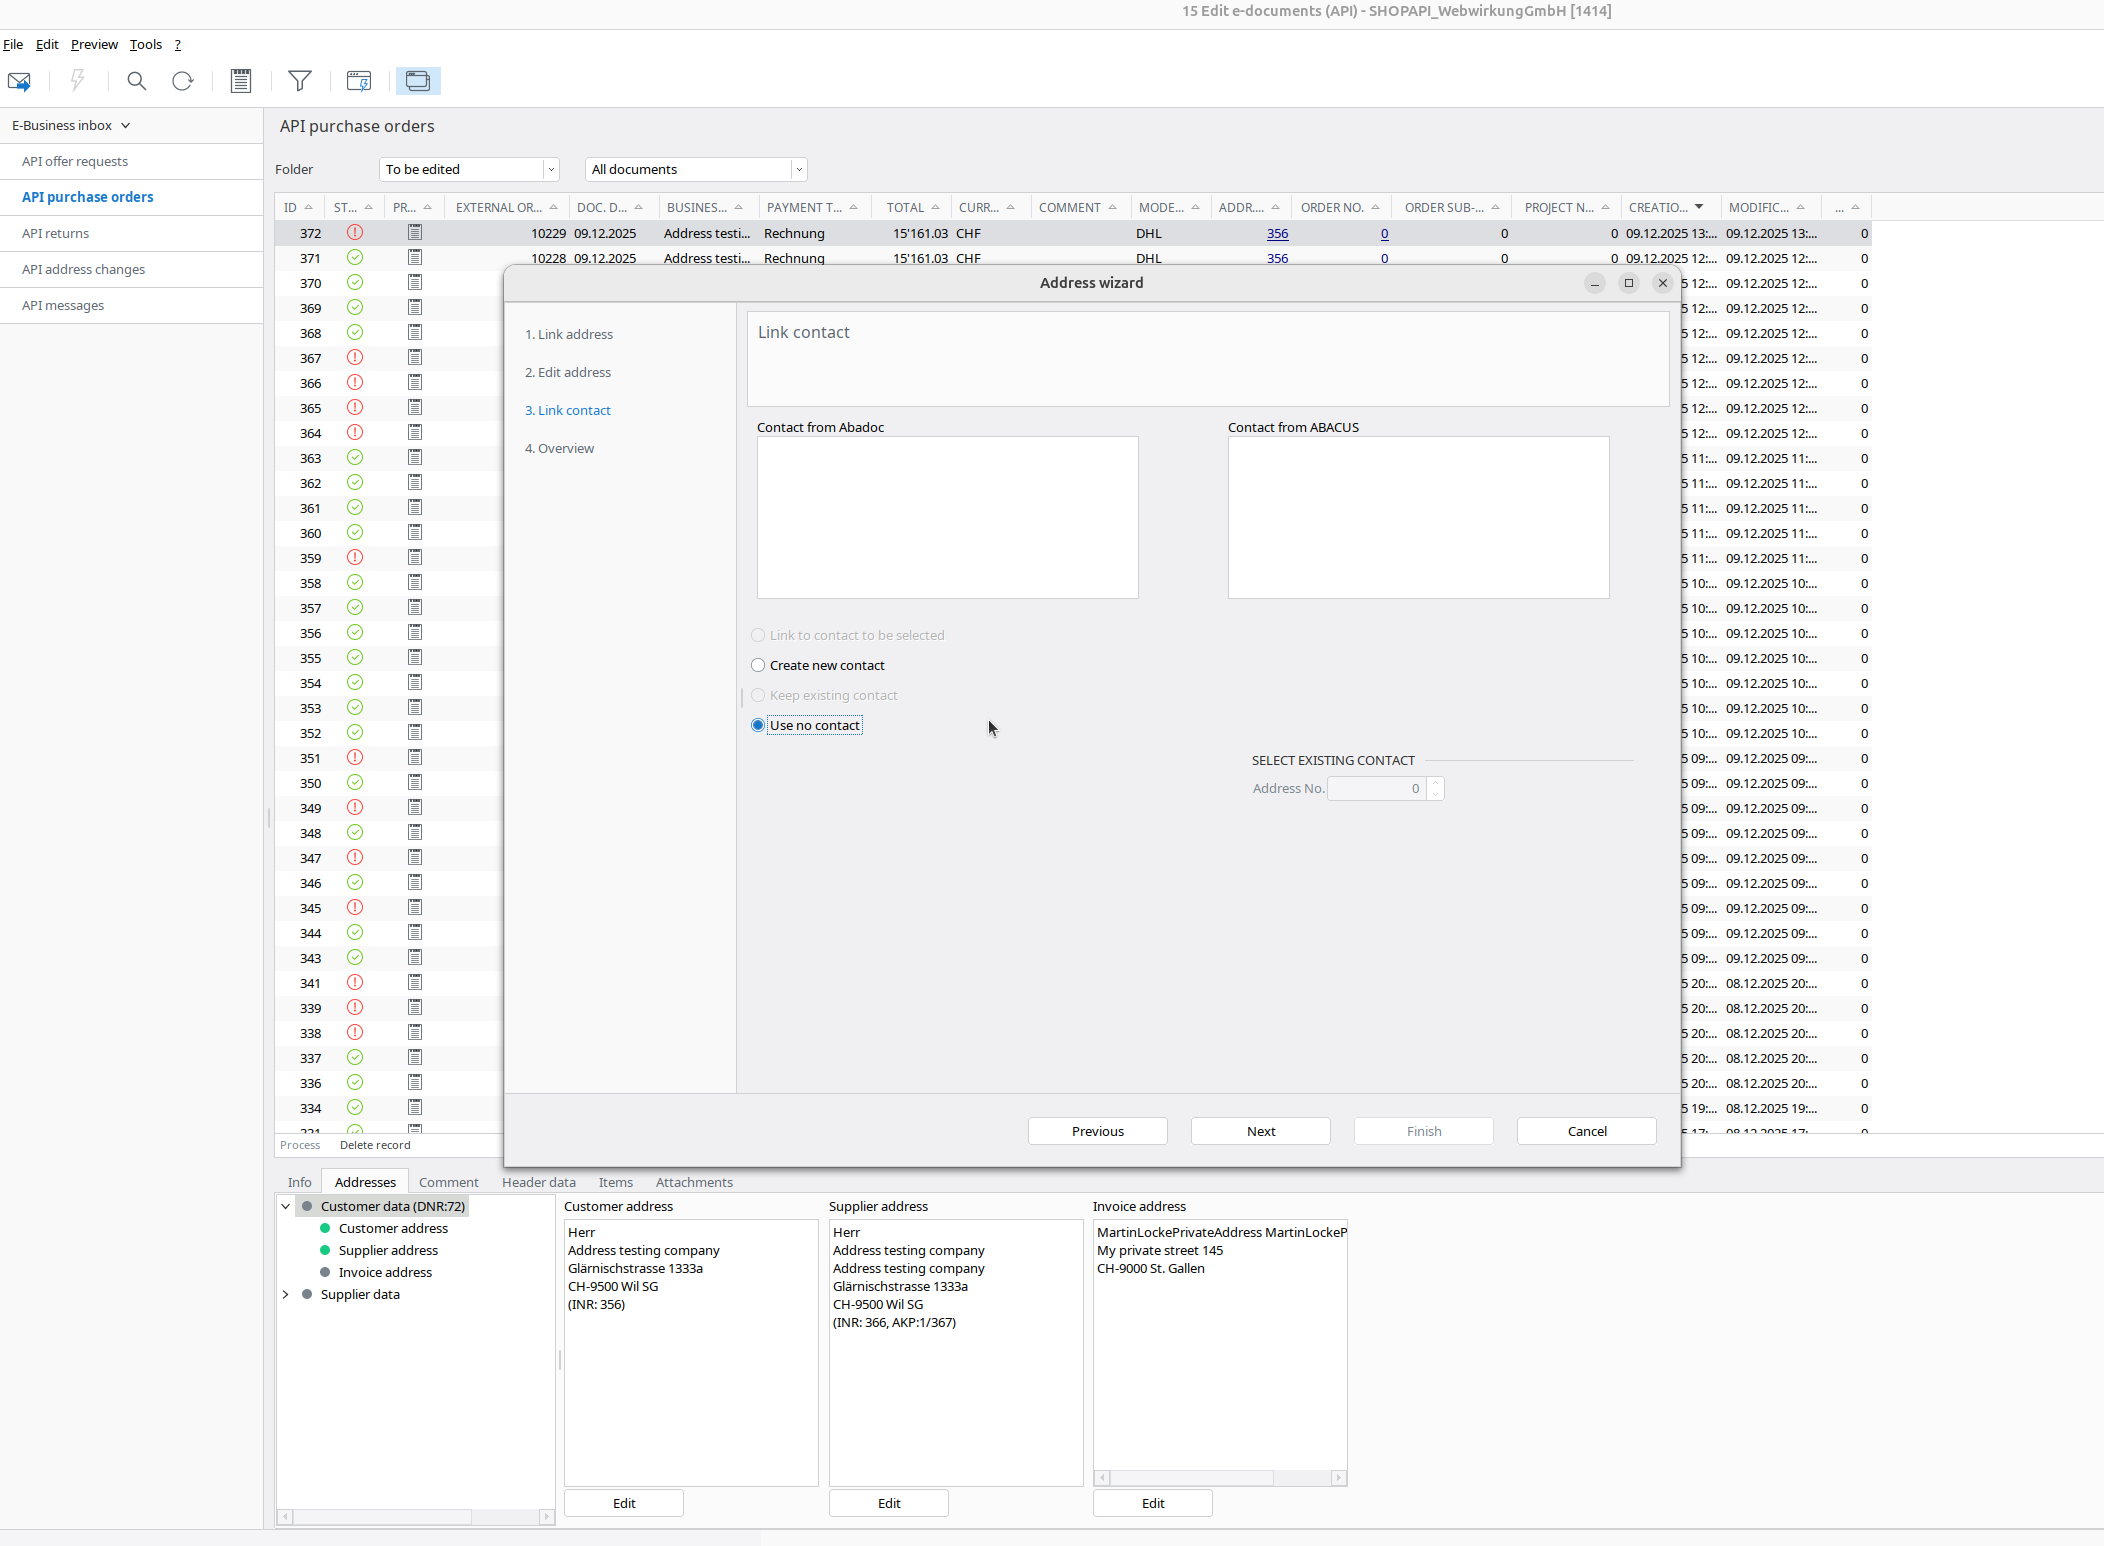 |
Result
The result should look like:
In Shopware:
- Go to your Shopware and run the webwirkung.abacus.subscription.shopper task to map address IDs (See here how)
- Go to the «Customers» and find your shopper
- In the addresses you should see the custom field filled with the abacus address ID. This ID is different for every address:
Final verification
- Login as the shopper in Storefront
- Place a new order
- Go back to Abacus > E-business > Edit e-documents(API)(J15)
- Now all addresses should be "green," which means our mapping works